Rockhopper M6 Balisong Utility or Trainer Knife - Fully Printable with Spring Latch and Bushing Pivots

Description
PDFMeet The Rockhopper
Make both yourself and your workflow at least 300% cooler with the Rockhopper, a durable, totally printable, ultra refined balisong utility knife that takes standard Stanley style blades. Those boxes and packages will never know what hit them.
The Rockhopper is the first and only printable balisong with a working spring loaded squeeze-to-release latch. A Bechmade Morpho ain't got nothin' on you!
For safe practice or use in locations where live blade balisongs are banned, there are also blunt trainer blades provided.
Printing the liners in a durable, creep resistant material is highly recommended – ABS or PETG recommended. The other components can be printed out of anything – PLA works fine. Print all mechanical components at 100% infill for best results. The liners will work if printed in PLA, but if so the latch action will diminish over time as the material creeps.
Join us on lemmy.world for more info and discussion about this knife: https://lemmy.world/post/17328458
A variety of totally swank replacement handle scales are also available: Check out the collection here.
Features
- Fully printable, without the need to purchase any screws, springs, hardware, or glue.
- Low profile, fast and easy to operate spring loaded latch with squeeze-to-release operation. Check it out:
- Reversible deep carry pocket clip.
- Rockin' action with bushing pivots:
- Low profile, snag free Impossible Screws facilitate an easy draw and great feel in the hand.
- Carefully tuned, subtly tapered handles provide a secure grip during use. Built in finger rest notches give you a tactile indicator of the handles' orientation when manipulating the action.
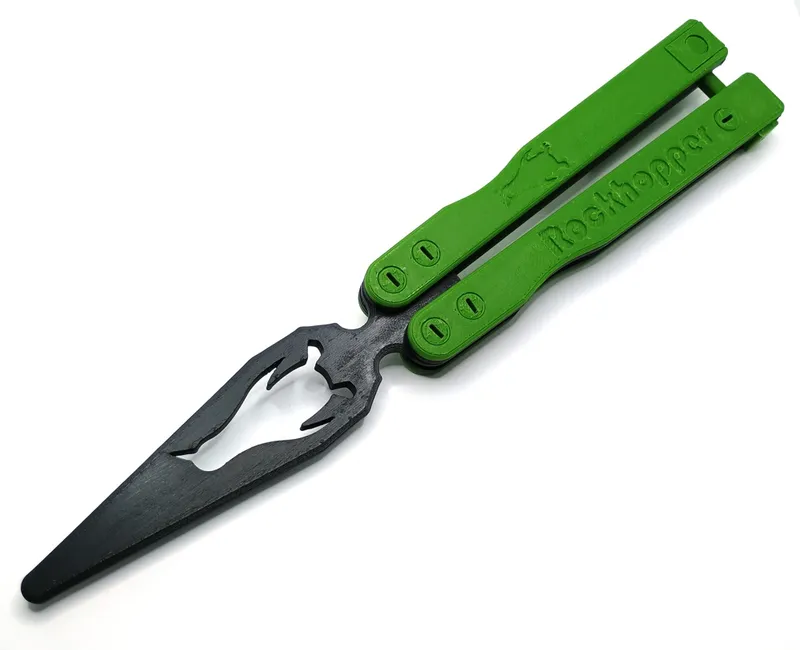
- Holder for live Stanley utility knife blades included as well as a two different blunt trainer blades for practice use. When using the trainer blade, no other parts or hardware are required whatsoever! Print it and play with it right away; no need to wait for the postman to bring you a pack of blades. (Trainer Blade β shown. Trainer blade α also available.)
Become the raddest bird on the entire iceberg. You know you want to.
Updates
M6 Version: New and Improved™ with a redesign to all fasteners and bushings. I realized the hardware was oh-so-close to already being an M6x1.0 thread pitch but not quite. Now it is. This had the following two net effects:
Hardware is M6 compatible. Rather than using the included plastic screws you could, if you were so inclined, replace these with commercial M6 fasteners. Useful if you want your pivots and zen pins to be metal, rather than plastic. Not that I've ever had a problem with the printed screws, but I am given to understand that some people are chicken. You could also add metal hardware if you want to weight the handles more.
Bushings are stronger. A prior weak point of the design was that the thickness of the bushings resulted in them being only 1 wall thick with most nozzle sizes. This could lead to them getting slowly flattened over time, especially when printed in PLA. The switch to true M6 hardware dimensions means that the inner diameter of the bushings is slightly smaller and thus they are now two walls wide. This is clearly superior.

New clip retention design. Let's face it, the old clip mounting method was really a pain in the nuts. In light of that, I designed a new nut. This is finger-tigtenable and can be mounted separately, i.e. last, so you can put the clip on last and you don't have to worry about sandwiching 147 different pieces together when you put the screw through anymore.
All threaded parts will have to be reprinted to use the new screws and bushings. The old blades and blade holder are compatible with the new design.
Bill Of Materials
For a complete Rockhopper, print the following parts:
- 1x Blade Holder or Trainer Blade (your choice)
- 1x each of: Upper Bite Liner, Lower Bite Liner, Upper Safe Liner, Lower Safe Liner
- 1x each of: Upper Bite Scale, Lower Bite Scale, Upper Safe Scale, Lower Safe Scale
- 5x M6 Screws if using the clip or 6x Screws If Not
- 6x 6mm Bushings
- 1x Latch Shank
- 1x Latch Head
- (Optional) 1x Clip
- (Optional) 1x M6 Screw For Clip
- (Optional) 1x M6 Clip Nut
- (Very Optional) 1x Clip Filler
Print all parts flat side down on your print bed, with the exception of the clip which should be printed standing on its edge. A brim is highly recommended on the clip, latch head, and depending on your printer's state of tune, possibly also the screws. Avoid using a brim on the bushings if you can, otherwise the smoothness of the action is likely to be compromised. Printing the liners in ABS or better is highly recommended.
Print in black and white for maximum Penguin Power!
Assembly Instructions
Goes together in a flash. It's as easy as calculus!
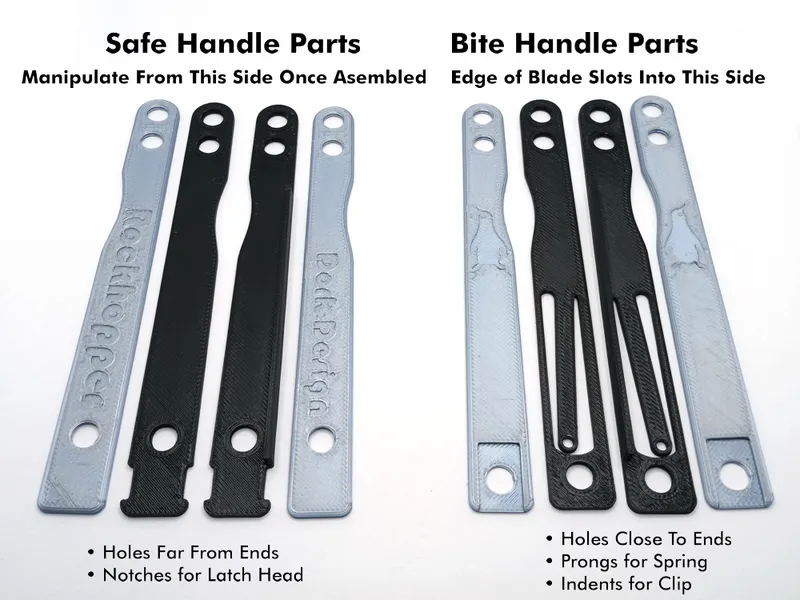
Identify your handle parts as above. The bite side is the handle where the sharp side of the blade will slot into. The safe side is the opposite handle, where the blunt side will go and also carries the latch and clip. This is highly technical balisong knife terminology – You'll be an expert before you know it. Always handle your Rockhopper from the safe handle, unless you happen to enjoy dealing yourself the equivalent of the mother of all papercuts.
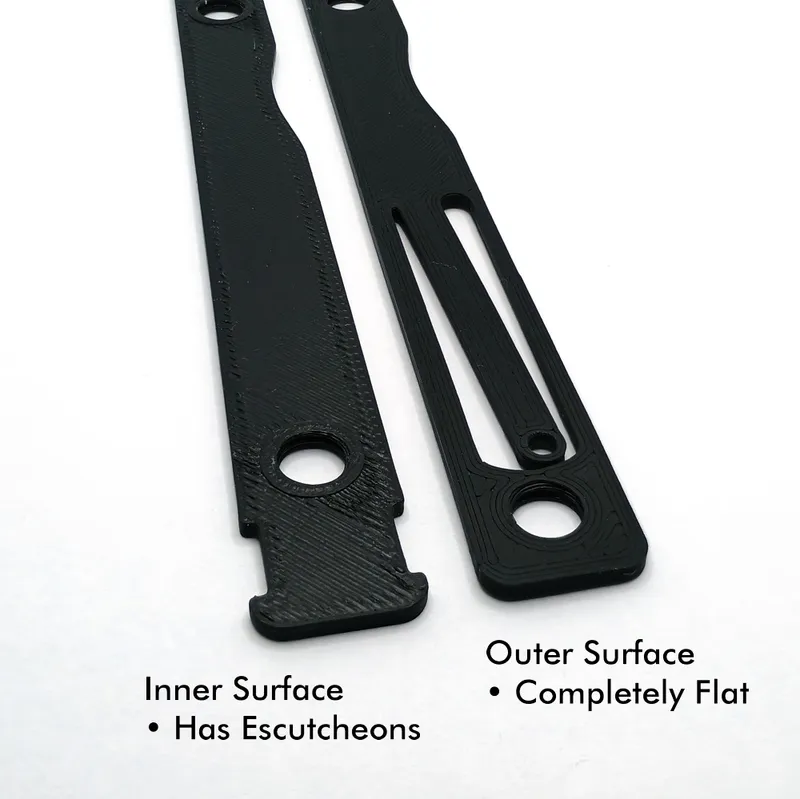
The liner surfaces are identified as above. The inner surfaces of the liners have a short escutcheon modeled into them. (That's your word of the day, by the way.) The outer surfaces are those you printed flat against your print bed and are completely smooth. The bushings and blade holder go against the inner surfaces, and the undersides of the scales go against the outer surfaces.
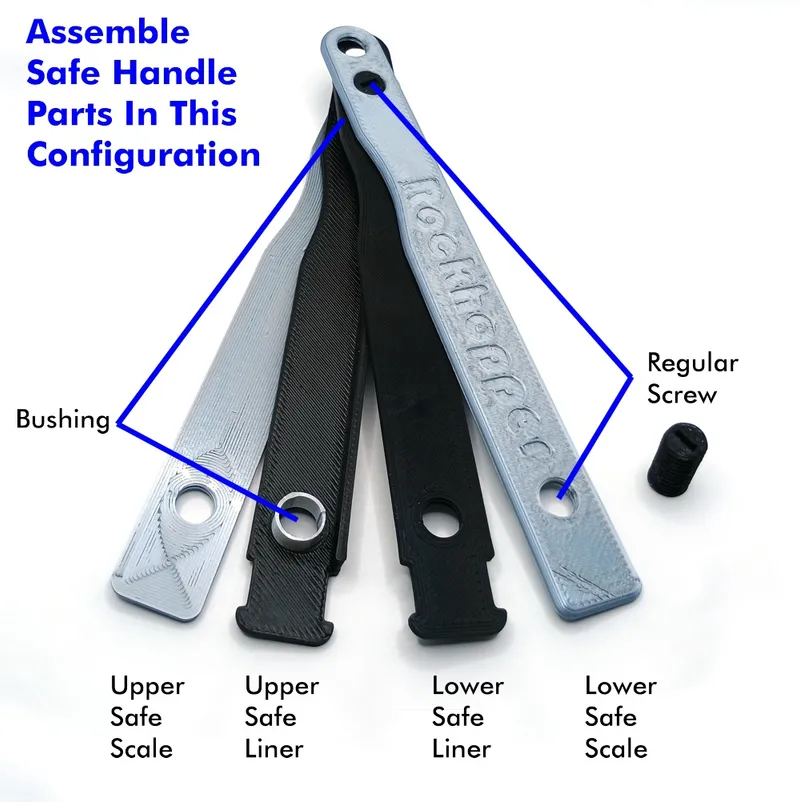
The safe handle is assembled with the liners sandwiched together in this order. The correct orientation of all of these parts will be obvious because the finger notches and screw holes will line up. Assemble the entire safe handle by driving two screws through the middle and rearmost holes. Leave the frontmost hole empty; the blade holder (or trainer blade) will be installed there last.
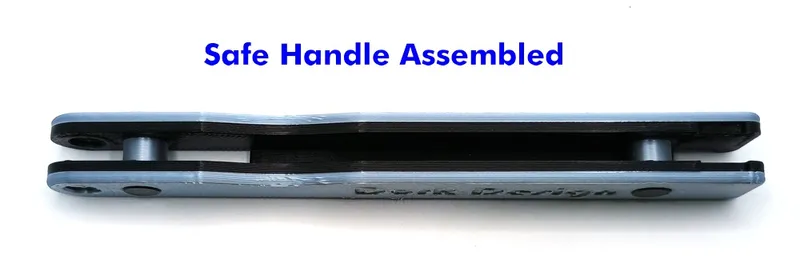
The safe handle looks like the above when correctly assembled. There should be no visible gaps between the liners, scales, and bushings.
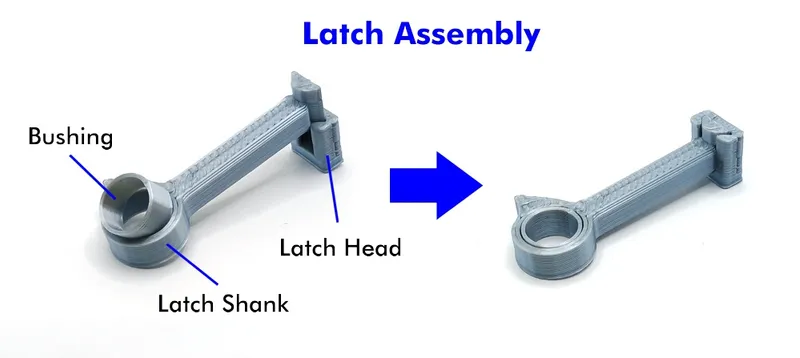
The latch is assembled thusly. The latch head is press-fit onto the shank, with the protrusion on the shank filling the space in the latch head. Don't assemble it backwards. The latch is a two piece assembly because without using supports it is impossible to print in midair [citation needed]. Also insert one bushing.
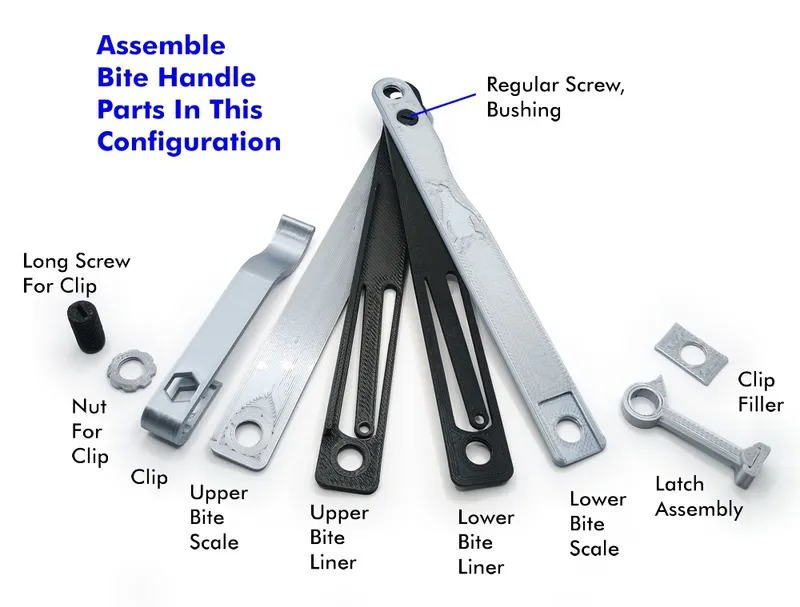
The bite handle is more complicated because it carries the latch, pin for the latch, and pocket clip. The parts largely go together the same way as the safe handle did, but you will install the latch instead of just a bushing in the rearmost hole. The protrusion on the latch must point in the direction pictured if you want the spring action to work, which is towards the finger groove if you need a mnemonic.
The rearmost screw hole is also where the clip is mounted, and its screw is longer than the others. Drive this screw straight down through the entire assembly through both scales, both liners, and out the other side. Insert a clip filler in the slot in whichever side you don't plan to put the clip on for a nice clean look, or both sides if you won't use the clip at all.
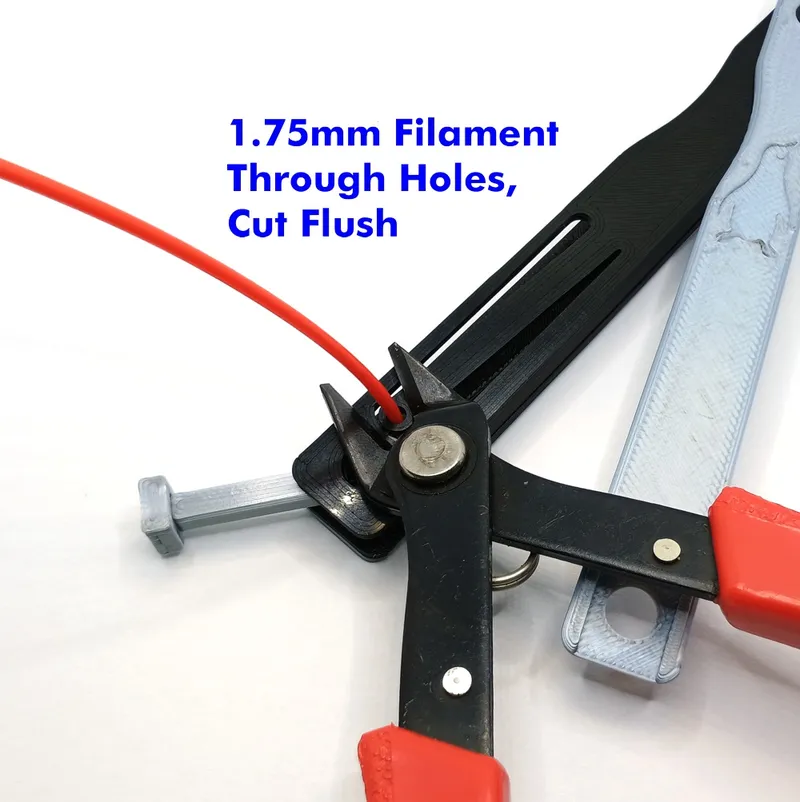
Before putting the rearmost screw all the way through (or you can back it out partially afterwards), push the scale out of the way and slip a piece of 1.75mm filament through both latch pin holes, then clip it flush with your cutters. You can omit this step if you don't care about the spring latch action.
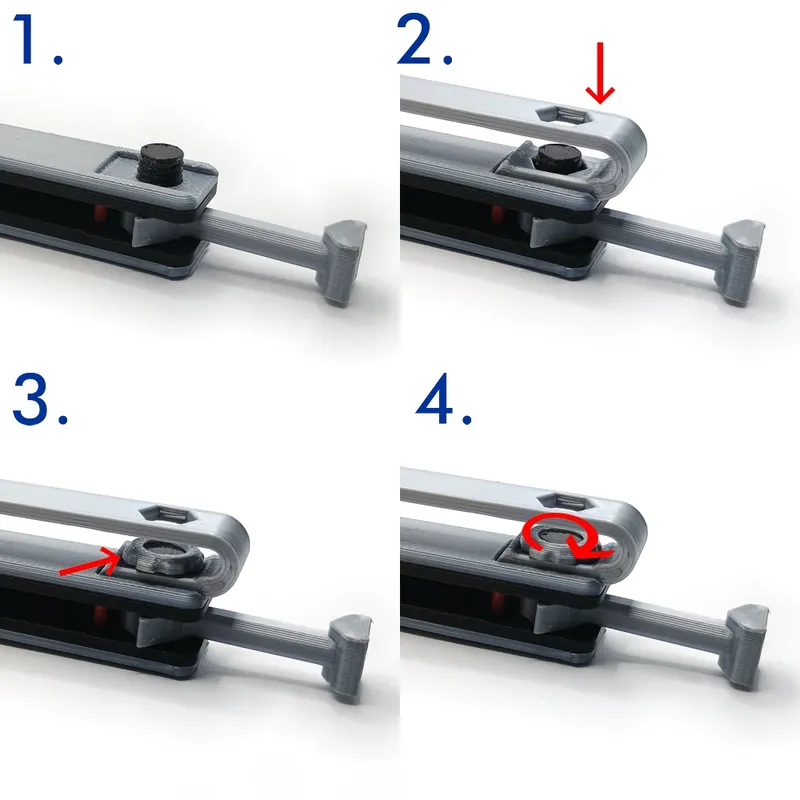
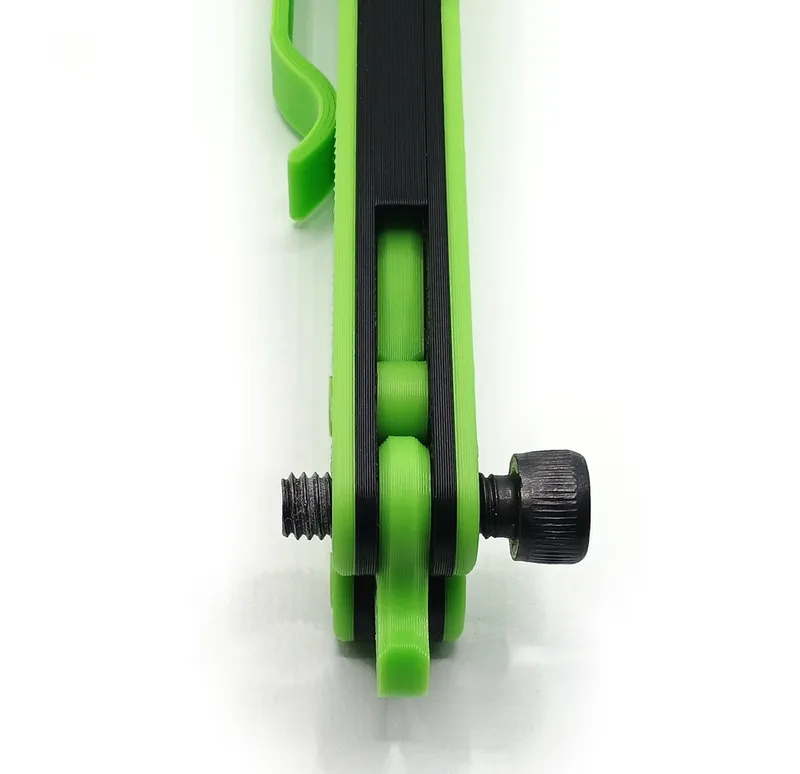
Mounting the clip is now considerably easier. Ensure that the clip screw is flush with the side of the handle you aren't mounting the clip on, and is protruding through the other side (1). Drop the clip on the tip of the screw (2). Balance the retaining nut on top of the screw tip (3), and then tighten it down with your fingers. It should go on easily. You can also engage the notches in its edge with a fingernail or, in really dire circumstances, the tip of your screwdriver.
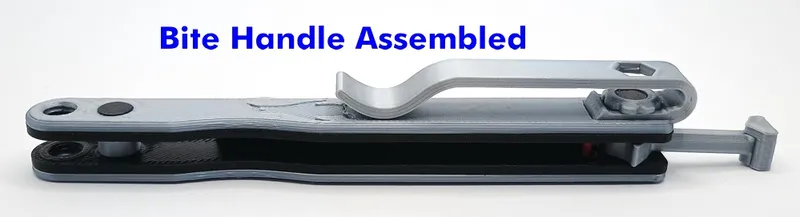
When assembled correctly the bite handle will look like this. You can put the clip on either side, but if you're right handed you will probably want it to be oriented just like it's pictured here.
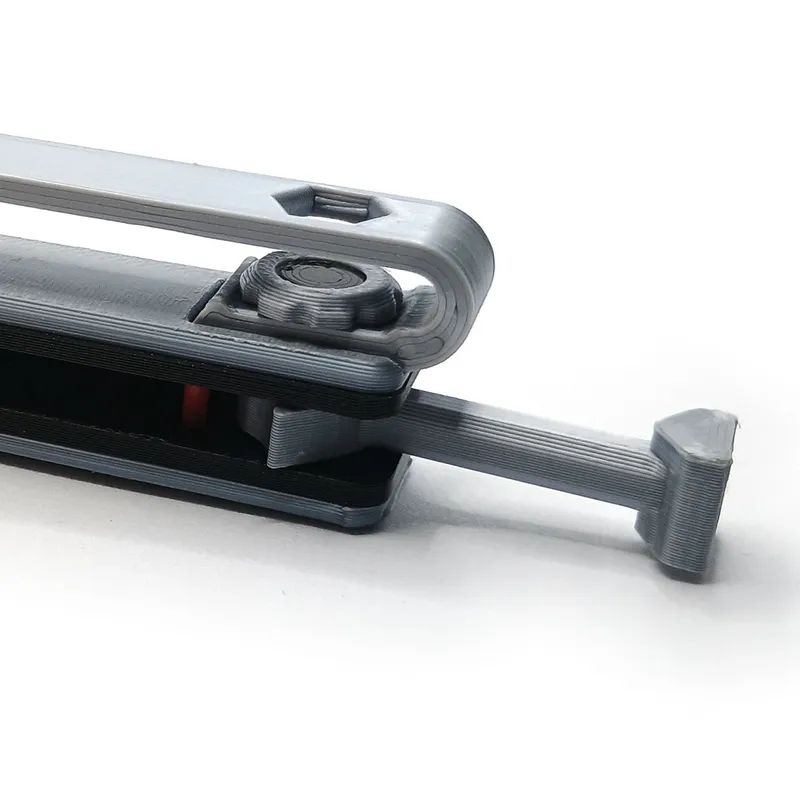
Looking at it from the side like this it should hopefully be apparent how all the parts on the tail end go together, in this order: The clip, the nut for the clip mounted inside it, the scale and liner, latch assembly, other liner and scale, and finally the clip filler.
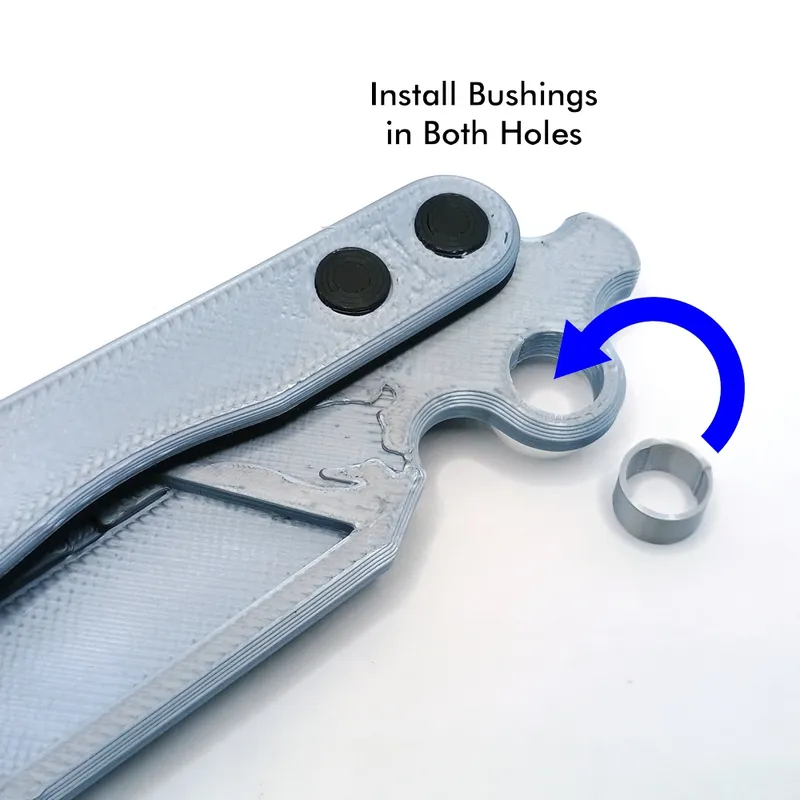
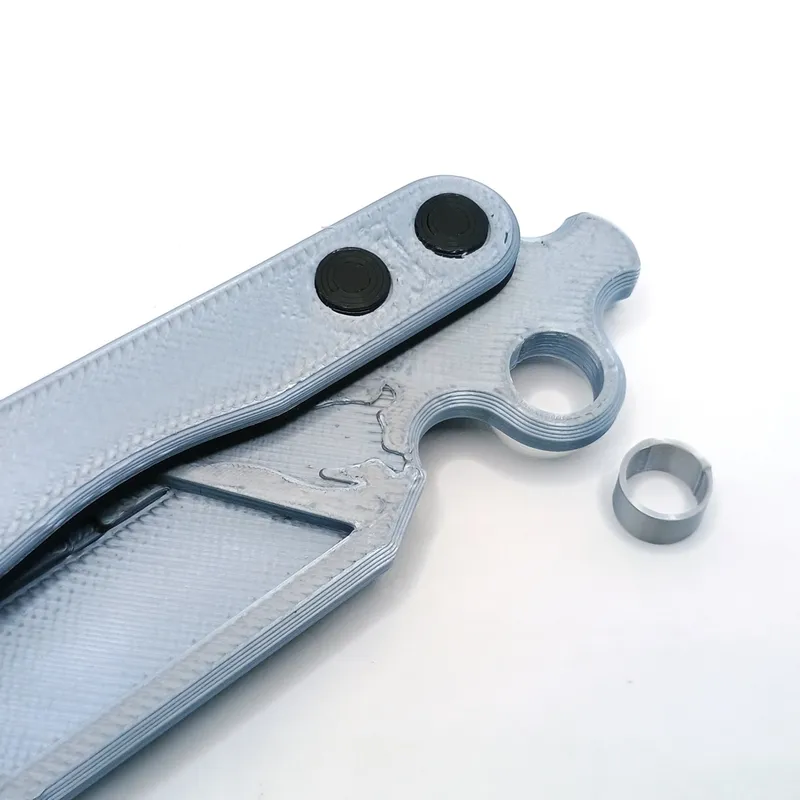
Needless to say, you need to insert a bushing into both holes on the blade holder before installing it.
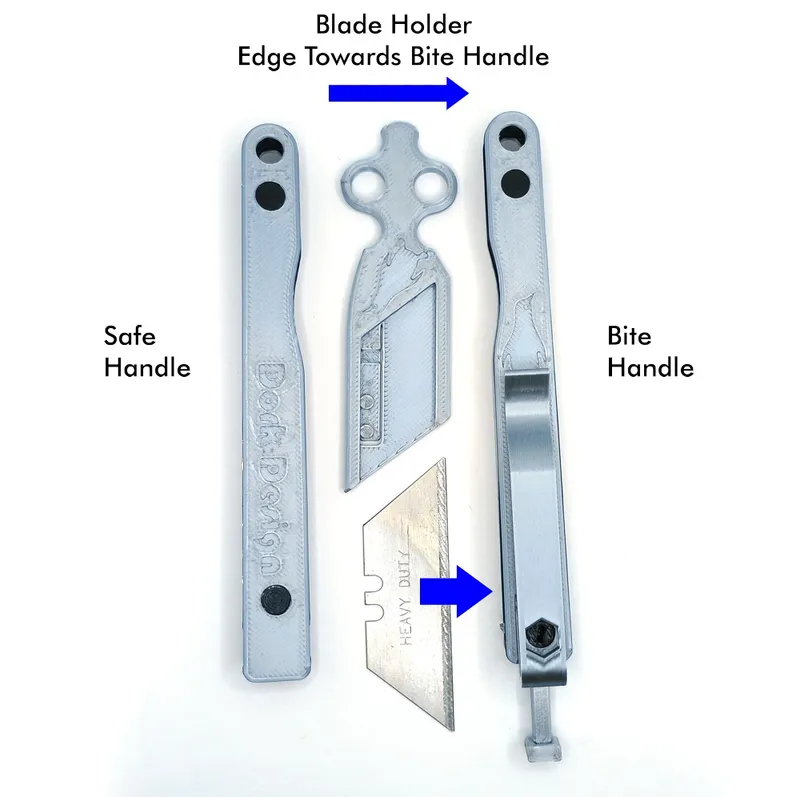
This is the part you can get backwards. Remember what I said earlier about the sharp edge slotting into the bite handle? Don't get it backwards, or you'll just annoy yourself. Mount the blade holder in the handles in the orientation pictured above, and put your last two screws through both remaining holes.
If you are using either of the trainer blades instead the orientation doesn't matter as much (for blade α) or at all (for blade β, since it's totally symmetrical).
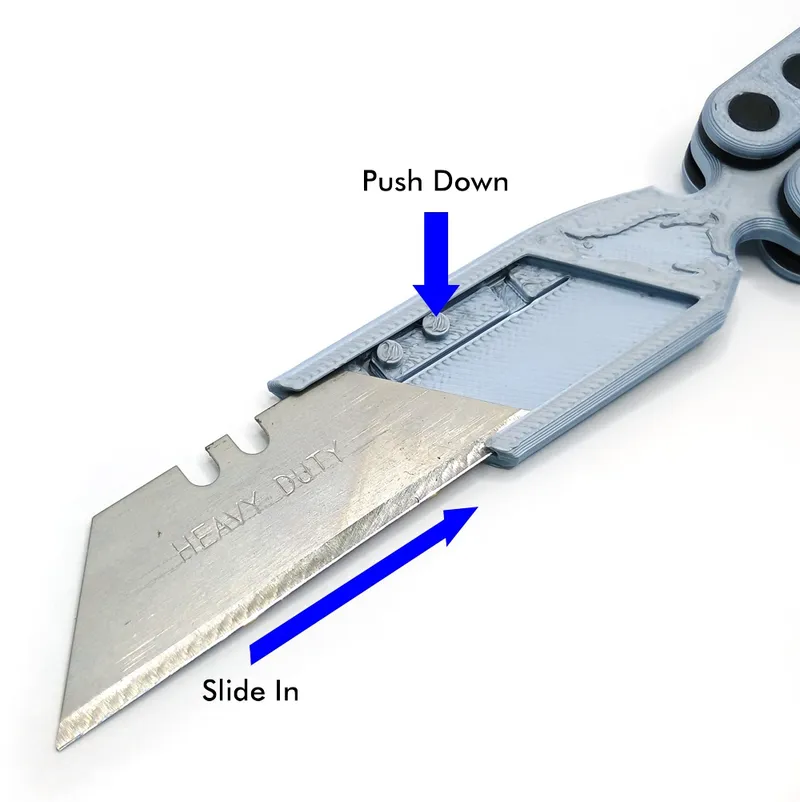
It's easy to install a blade into the older by pushing down the prong with the two pins on it. There is a fingernail notch in the tip of it on the reverse of the blade carrier to assist in holding it down. Slide the blade in…
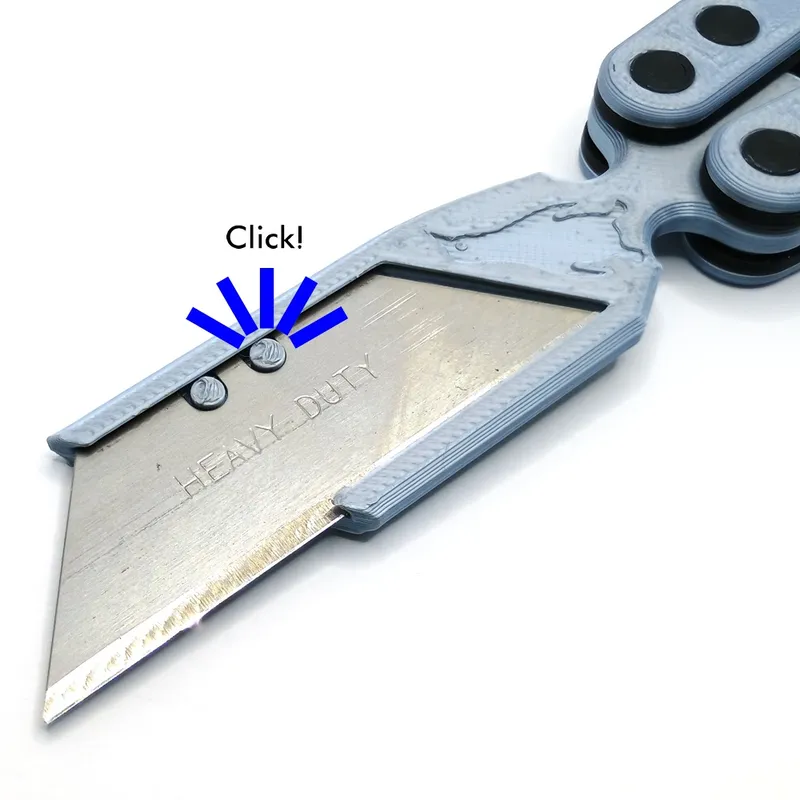
…Until it clicks into position.
Now you're ready to rock and roll.
Notices and Fine Print
This is a non-commercial design. You can print as many of these for yourself or give away as many as you like, but selling this design for any price is strictly prohibited – And that also means even if you are not selling it for profit.
The user assumes all risk and responsibility for the production and use of the Rockhopper. Research the laws where you live prior to carrying this in public.
Additional Technical Notes
Several [Alt] model files are provided which are bushings and screws with slightly adjusted dimensions. These are in case you need to compensate for your printer's state of tune, if you're having trouble getting the screws to thread or want to tune the tightness of the rebound action.
[Alt] Screw 3.95 and [Alt] Screw For Clip 3.95 are screws with an infinitesimally smaller external diameter which will be easier to thread in.
[Alt] Bushing 7.7 and 7.8 are bushings with slightly increased diameters which may be helpful if your printer produces parts that are undersized. Installing larger diameter bushings will also increase the tension on the handles when fully latched in both the open and closed positions, and will cause a rebound to happen off of the zen pins slightly sooner.
We all know how balisong people like to fiddle and tune incessantly, so if that describes you feel free to knock yourself out with the above.
Dork Design.
When in doubt…
…Wing it!
Tags
Model origin
The author marked this model as their own original creation.


