AD01 Minimalist Mouse

Description
PDFBackground
This was initially designed for the MakerWorld Wireless Mouse Design Contest, and has been designed to use the components from the BambuLab's Wireless Mouse Kit 002.
Why
The AD01 is a minimalist design developed for additive manufacturing. It departs from the complexities of typical ergonomic/gaming mouse designs and aims for comfort in a minimum of surfaces.
I wanted to include a color break in the design, or at least allow for one. So it has been designed with a separate Button shell. It provides visual interest in the side view and demonstrates the nice curve of the back of the mouse a little better, but it will look just fine in a single-color print too.
Features
- 118mm × 38mm × 68mm (4.65" × 1.5" × 2.5")
- High-arch back for support
- Auxiliary button for controlling DPI
- USB Dongle “garage"
- Single screw assembly (use the other 5 for something else!)
- Snap fit battery cover
Build
- The build does require minimal supports, I feel it is important to build the Button and Top Shell parts perpendicular to the build plate. It results in nicer curves without the topographic artifacts that can be so unsightly. *NOTE: I recommend printing with a PETG Interface for PLA builds. I have not yet tried this print without the PETG interface.
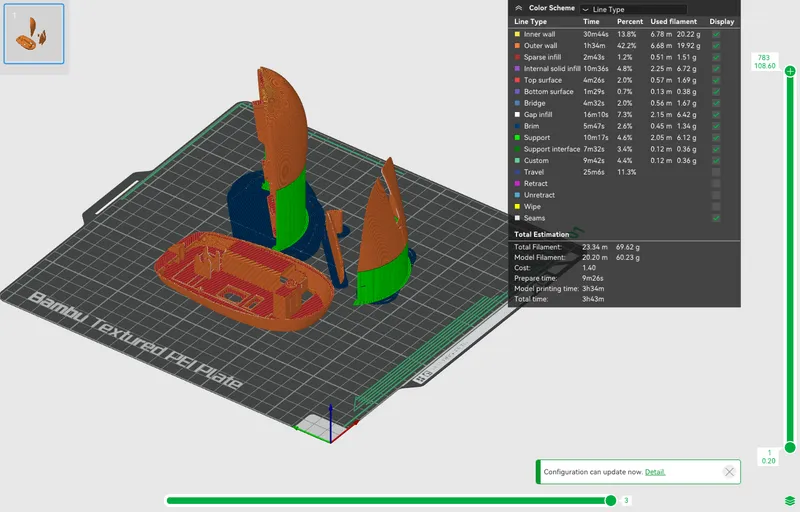
2. When setting up your print plate, make sure of a few things:
3. Bridging in the battery pocket, I noticed that BambuStudio would slice it with "impossible" bridging lines on the underside surface of the top of the battery compartment, depending on wall loops, it worked nicely at 4 loops.
4. For the buttons, there is a small ledge on the back of the DPI switch button, add a little support to this surface to help stabilize the button in printing.

4. Make sure to print the Battery cover with long flat skinny edge on the build plate, you want the build lines perpendicular to the snap fit closure.
Assembly
- The most critical step is assembling the Buttons and Top Shell. The buttons need to be thin and flexible, however, they can break along a build line if over-stressed during installation. Some PLAs have poorer layer adhesion. But once assembled, you're good. A few tips:
- Be careful removing support to begin with, if they crack then it will fall apart during the stress of assembly. I like the PETG interface because it comes apart so easily.
- Make sure the parts are lined up evenly before pressing into place, you want to push both sides simultaneously.
- NOTE: I have uploaded a PDF with diagrams of the assembly process for you to follow along with.
Enjoy and Please leave comments and feed back below. I would love to see your builds!
Tags
Model origin
The author marked this model as their own original creation.