Button Box for Roland E-Drum Racks
Description
PDFButton Box for Roland E-Drum Racks
A button box which can be mounted directly onto Roland Drum Racks for easy remote control of your DAW.
Background:
It was inconvenient for me to operate my laptop running a DAW (in my case Cubase) while recording a drum track.
So I wanted to have a distraction free method to trigger a few essential commands such as start/stop/record etc without dropping my sticks.
The available commerical solutions where too expensive or not practical because e.g. impossible to be mounted to my rack.
So I came up with this DIY button-box based on the famous Arduino micro.
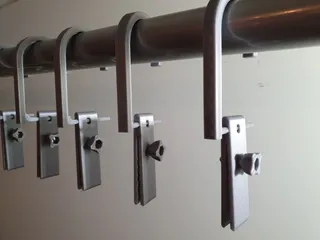
I can be mounted on standard 38mm tubes used by Roland racks to hold the box.
A remix from :
Codeisland's Roland MDH-12 Rack Clamp (https://www.thingiverse.com/thing:3743052)
and DaveM's Stream Cheap Box (https://www.thingiverse.com/thing:2822140)
thanks for the good work ! I basically modified Codeisland's clamp so it can hold DaveM's box.
Parts:
- Rack Clamp (2 parts), 3d printed
- Button Box Main Body, 3d printed
- Front-panel, 3d printed (2 variants) or use a CNC (2D file provided)
- Arduino Micro Pro + USB cable
- Push buttons of your choice
(I used : 2x rectangular Signallux L42M8, 1x round Psm 15mm Red, 4x Mini 7mm momentary buttons) M6 wingscrew, M4x40 and M3 screws ### Instructions:
Print out the 2 rack clamp parts and the box body. PLA will work fine, but if you want more stability use PETG.
Combine the clamp by a M4x40 screw as axis between the 2 parts, tighten the screw, but make sure it can still rotate easily.
Use a M6 wingscrew and nut as tightener to hold firmly on your rack.
Use 2x M3x4 screws (or similar) and nuts for combining the upper clamp part to the box.- For the front-panel you have several choices. You might want to design your own variant depending on your buttons of choice.
Use one the available front-panal templates in either stl (for 3d printer) or svg (for CNC) to create your own front-panel.
I decided to make the panel on my DIY CNC machine because I liked the engraved design...but a 3d printed panel will work just fine. If you use the printed version, use a filament with contrasting color for 1-2 layers to get better label visbibility. - After your front-panel is ready, insert the buttons and solder to the correct Arduno ports (see assignment below).
I decided to use a seperated PCB to have more space, but that is not mandatory. If you do this, use the 4 holes in the corner to hold the PCB.
Finally close and secure the front-panel with 2 M3 screws. Programming the Arduino:
Any Micro Pro will do, just make sure it's the Adruino Micro PRO (not the standard Arduino micro!) because of the built-in USB.
An Arduino Micro Pro conntected to any PC or laptop can natively emulate a USB keyboard and so can trigger any keystroke,
even function keys and num block keys etc. Micro pros are available from different sources, so you might need to modify your code
depending on the included libraries.
In my case, I decided to use the digial ports 2-8 which will be initalized as internal pull-ups first.
The connected push buttons (normally open) will pull the pins to GND which is detected by the code and triggers the programmed action (emulated key press).
For my DAW (Cubase), I decided to use the following setup: Port Button Key Cubase Function 2 M c Metronome On/Off 3 L [Num] 1 Goto Left Locator 4 >> [Num] + Forward 5 << [Num] - Backward 6 P SPACE Play/Stop 7 B b Begin 8 R [Num]* Record It can be easily changed in the code to match your configuration. Use my enclosed code as example.Enjoy.
Print Settings
Printer Brand:
Prusa
Printer:
I3 MK3S
Rafts:
No
Supports:
Yes
Resolution:
200
Infill:
20
Filament: Prusament PLA black
Category: MusicTags
Model origin
The author marked this model as their own original creation. Imported from Thingiverse.


