Fidget Fabric Fried Egg Set (requires mesh fabric)


Description
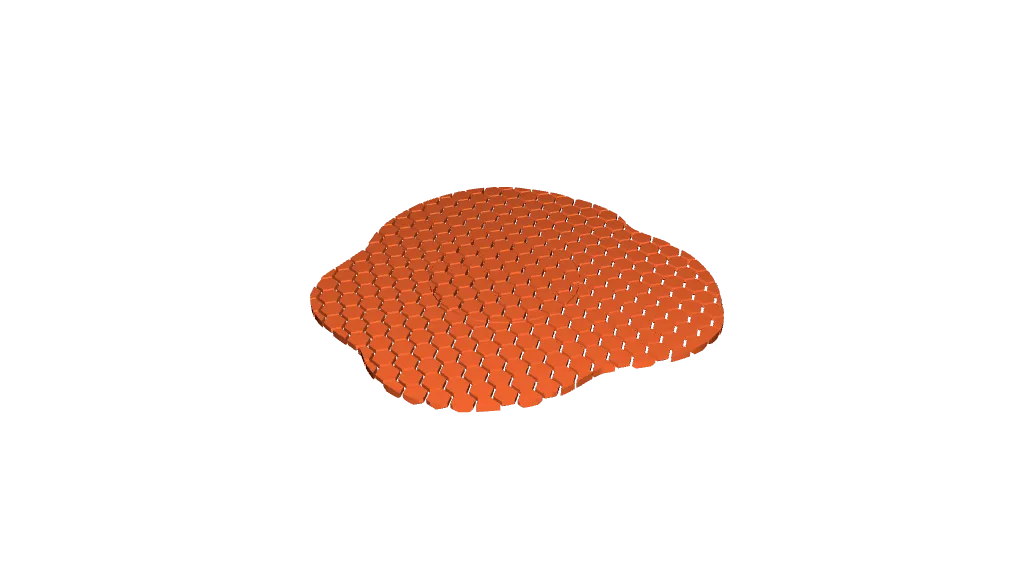
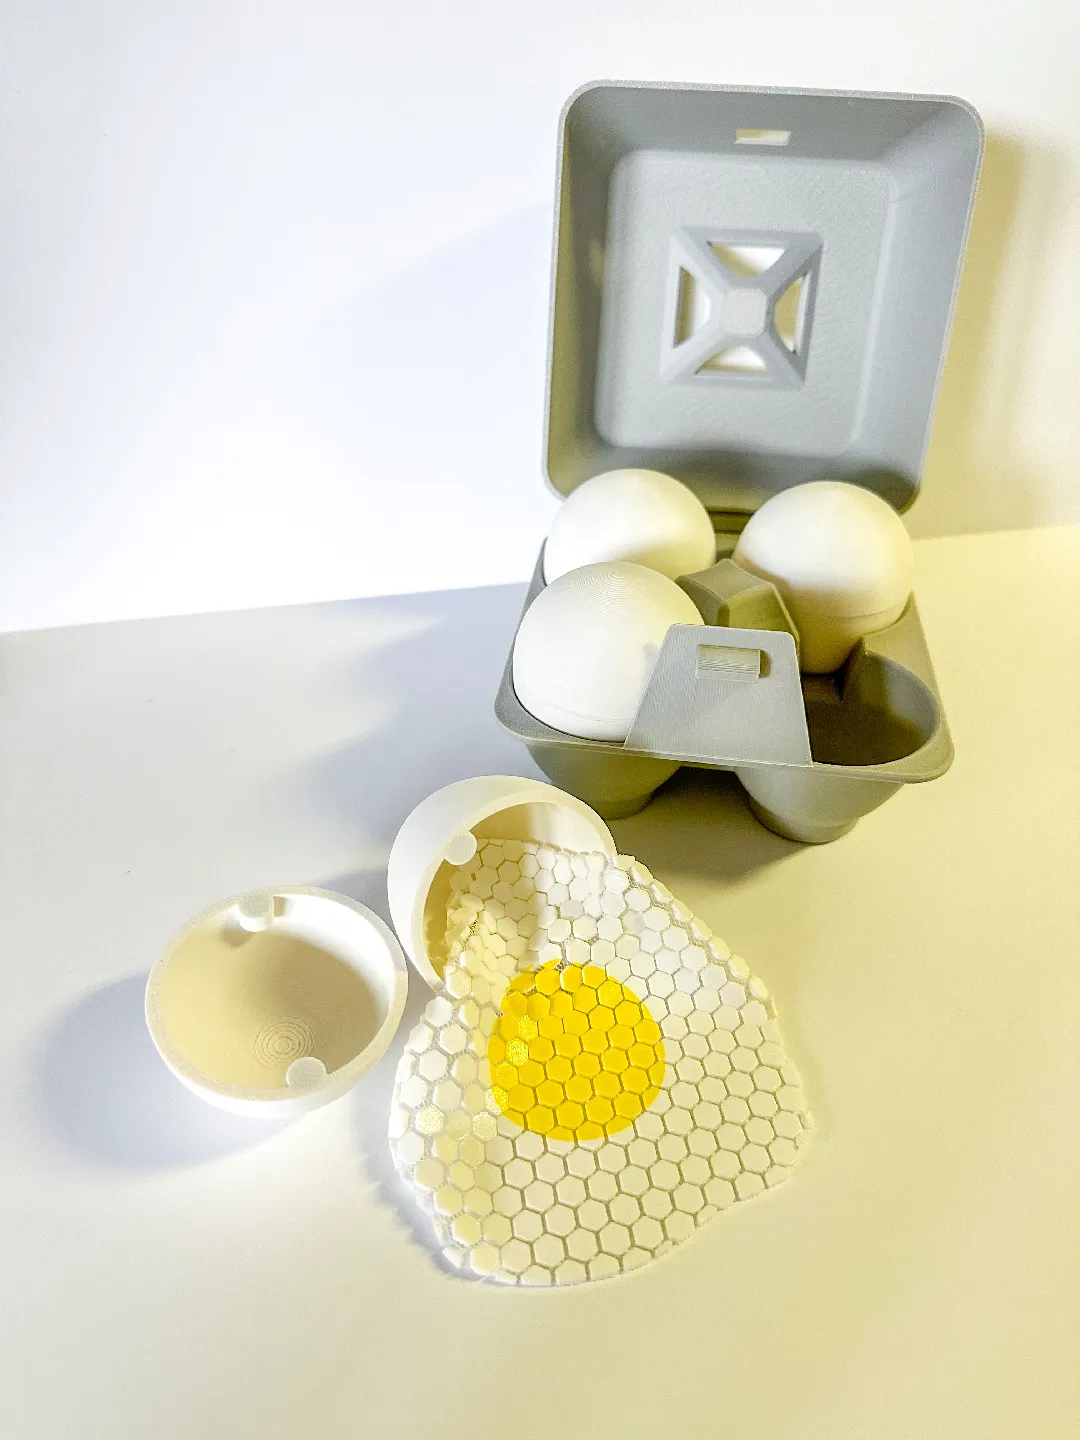
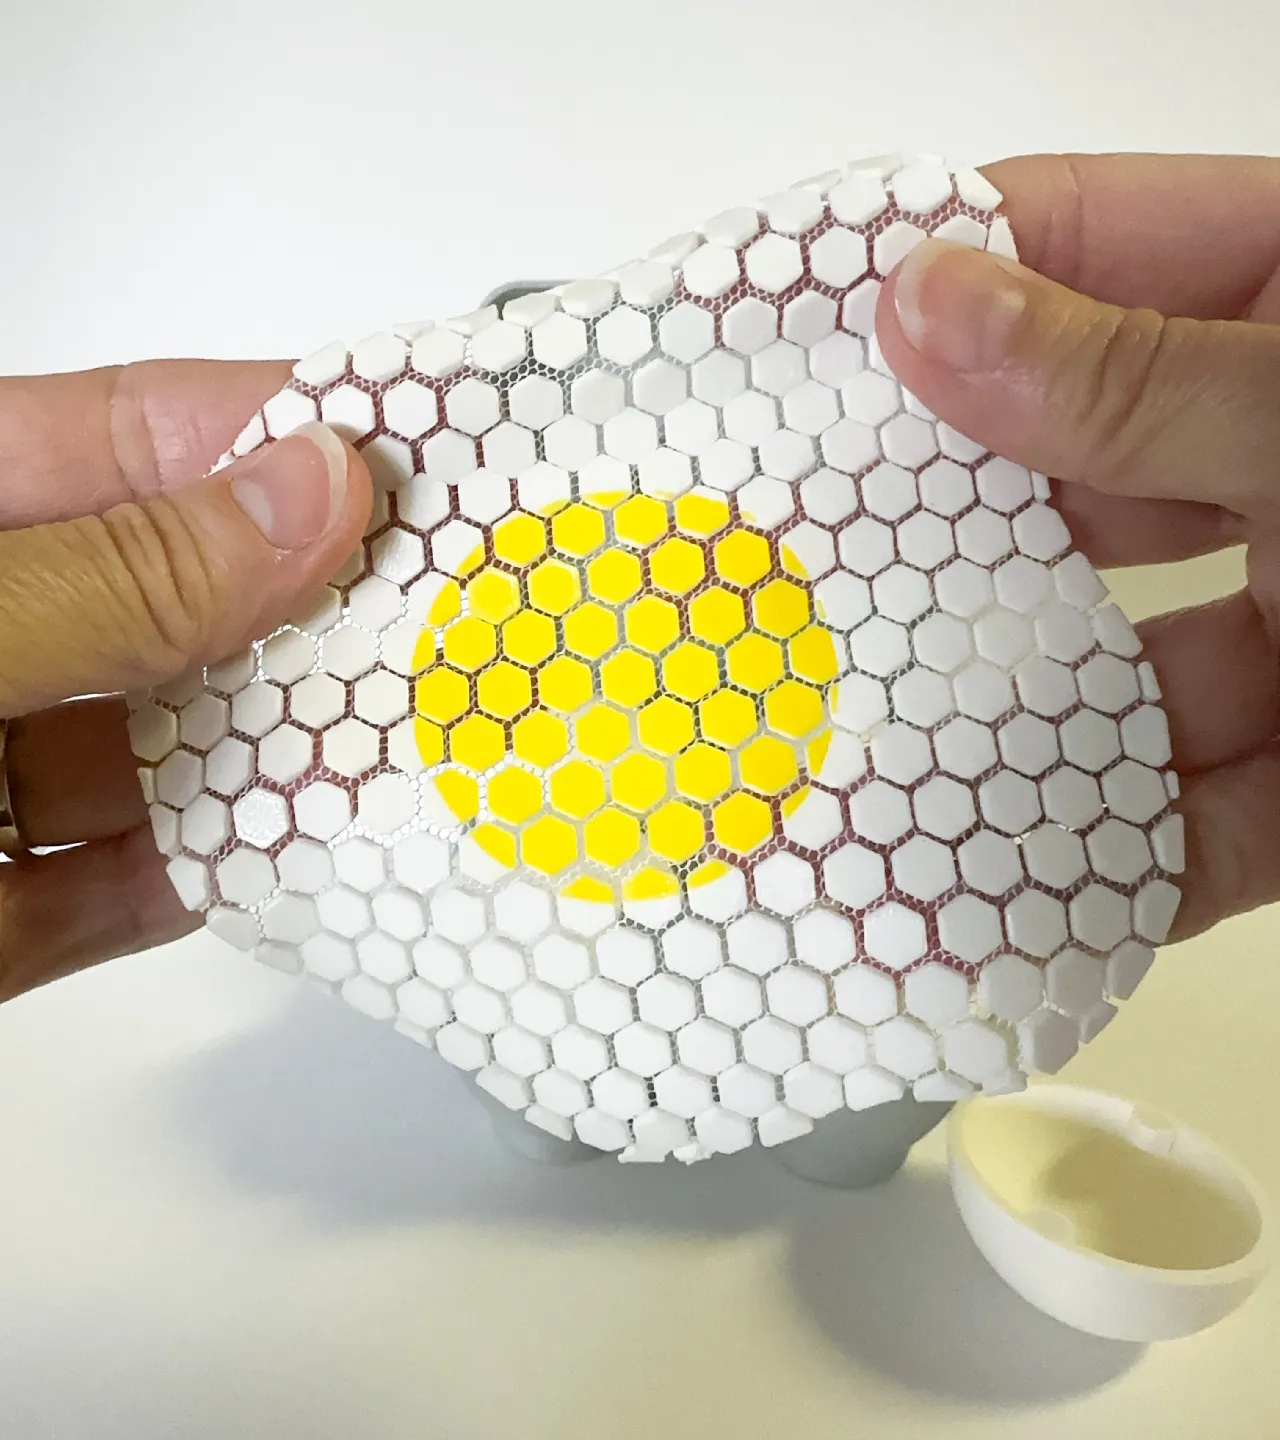
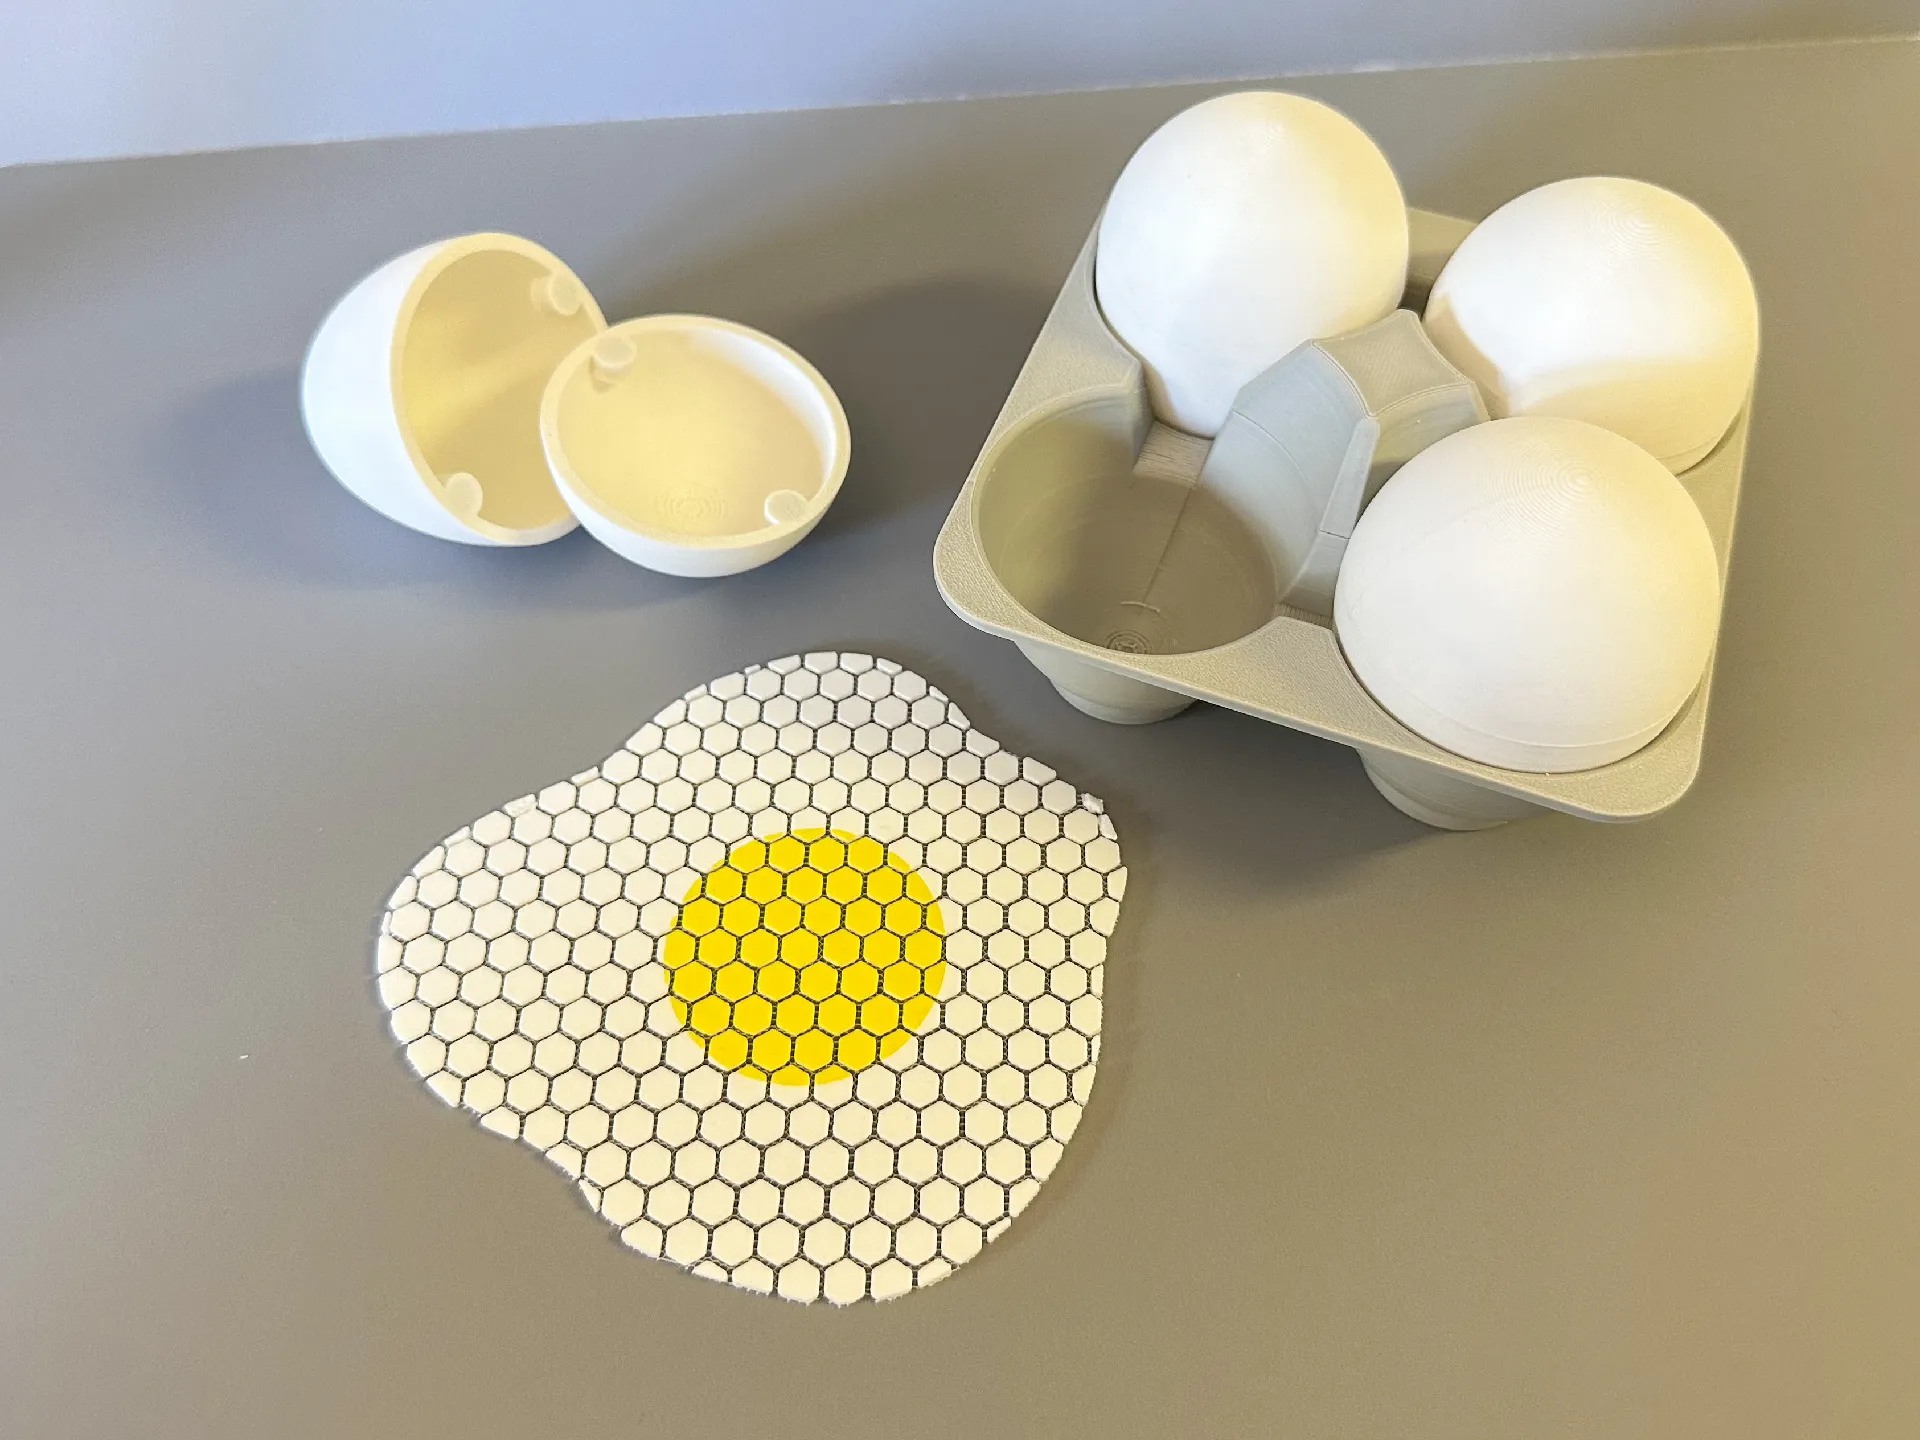
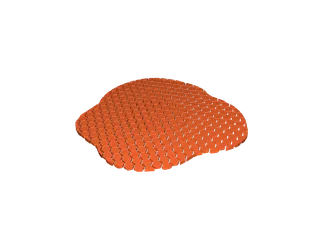
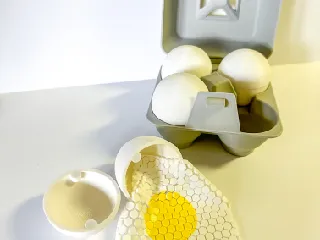
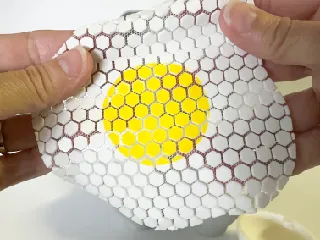
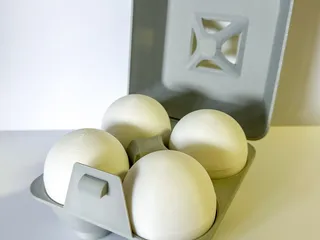
PDFI have had this idea for a ‘fried egg’ fidget fabric/drink coaster for a little while. I loved the idea of using mesh fabric in the fried egg to give it flexibility and make it feel more ‘egg-like’. The egg shell with the magnets is a fun fidget in itself. The egg tray and egg carton give you an option for how you would like to store your eggs 🥚🥚 (**You will need fabric and magnets for these prints - see details below 👇)
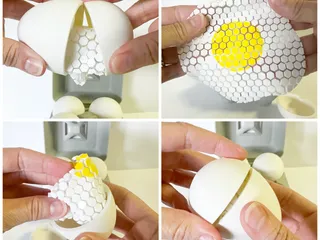
Dimensions of Fried Egg: 5 in. diameter
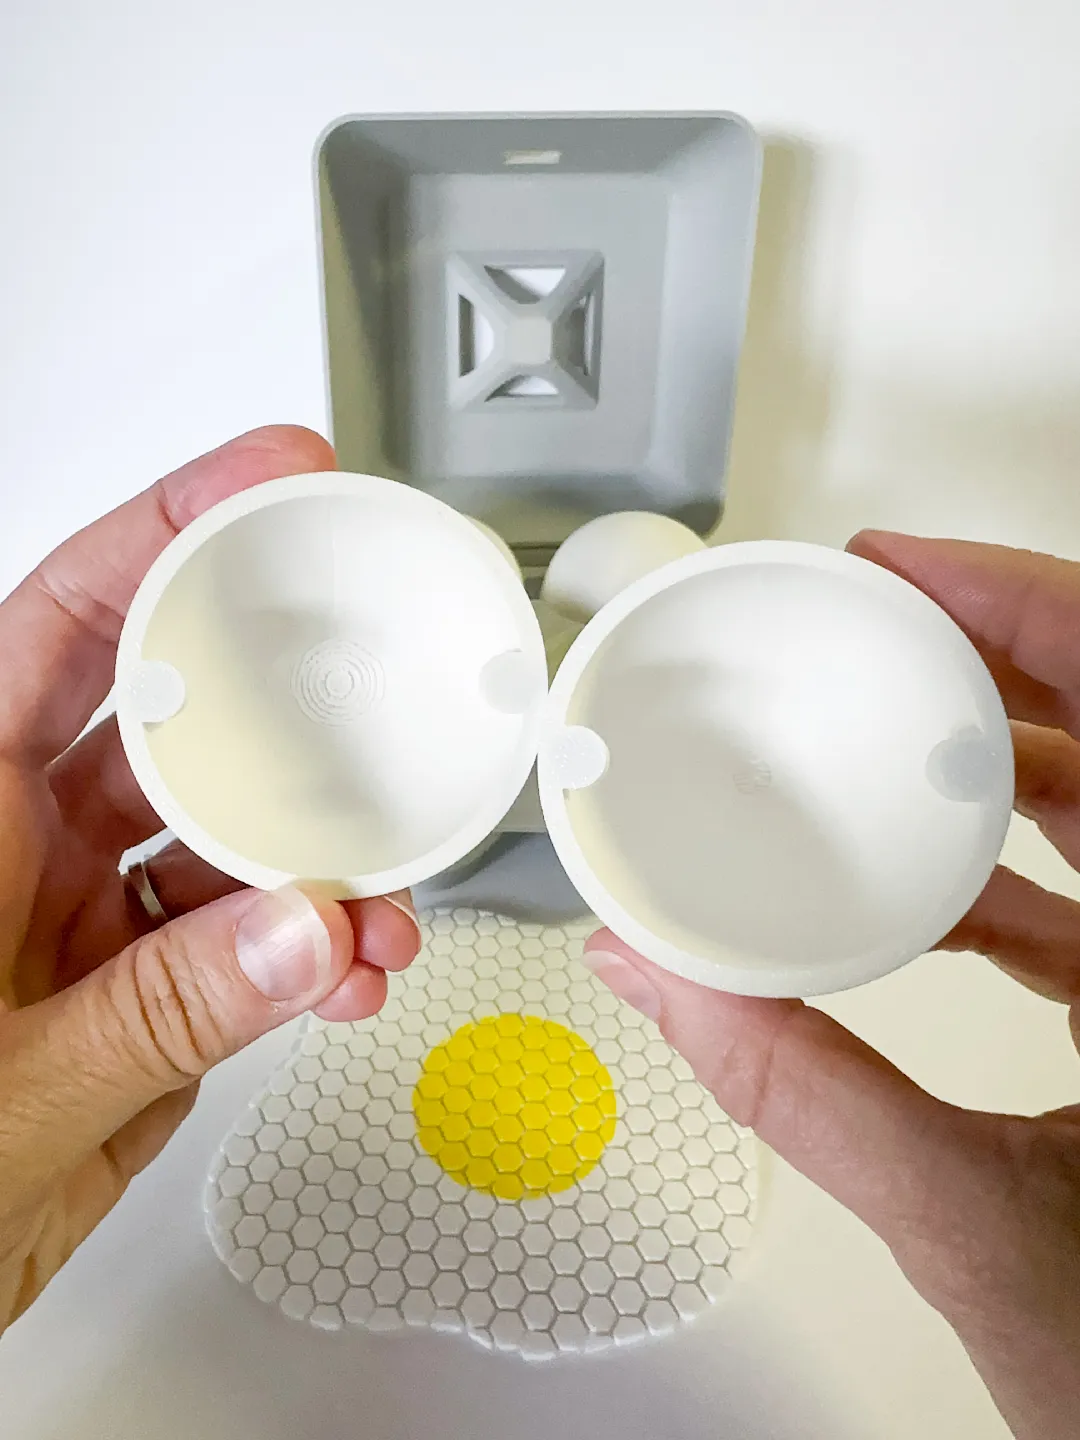
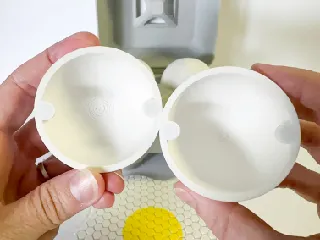
Dimensions of Egg Shell: 3 in. x 2 ¼ in.
Egg Tray: 5 in. x 5 in. x 2 ¼ in.
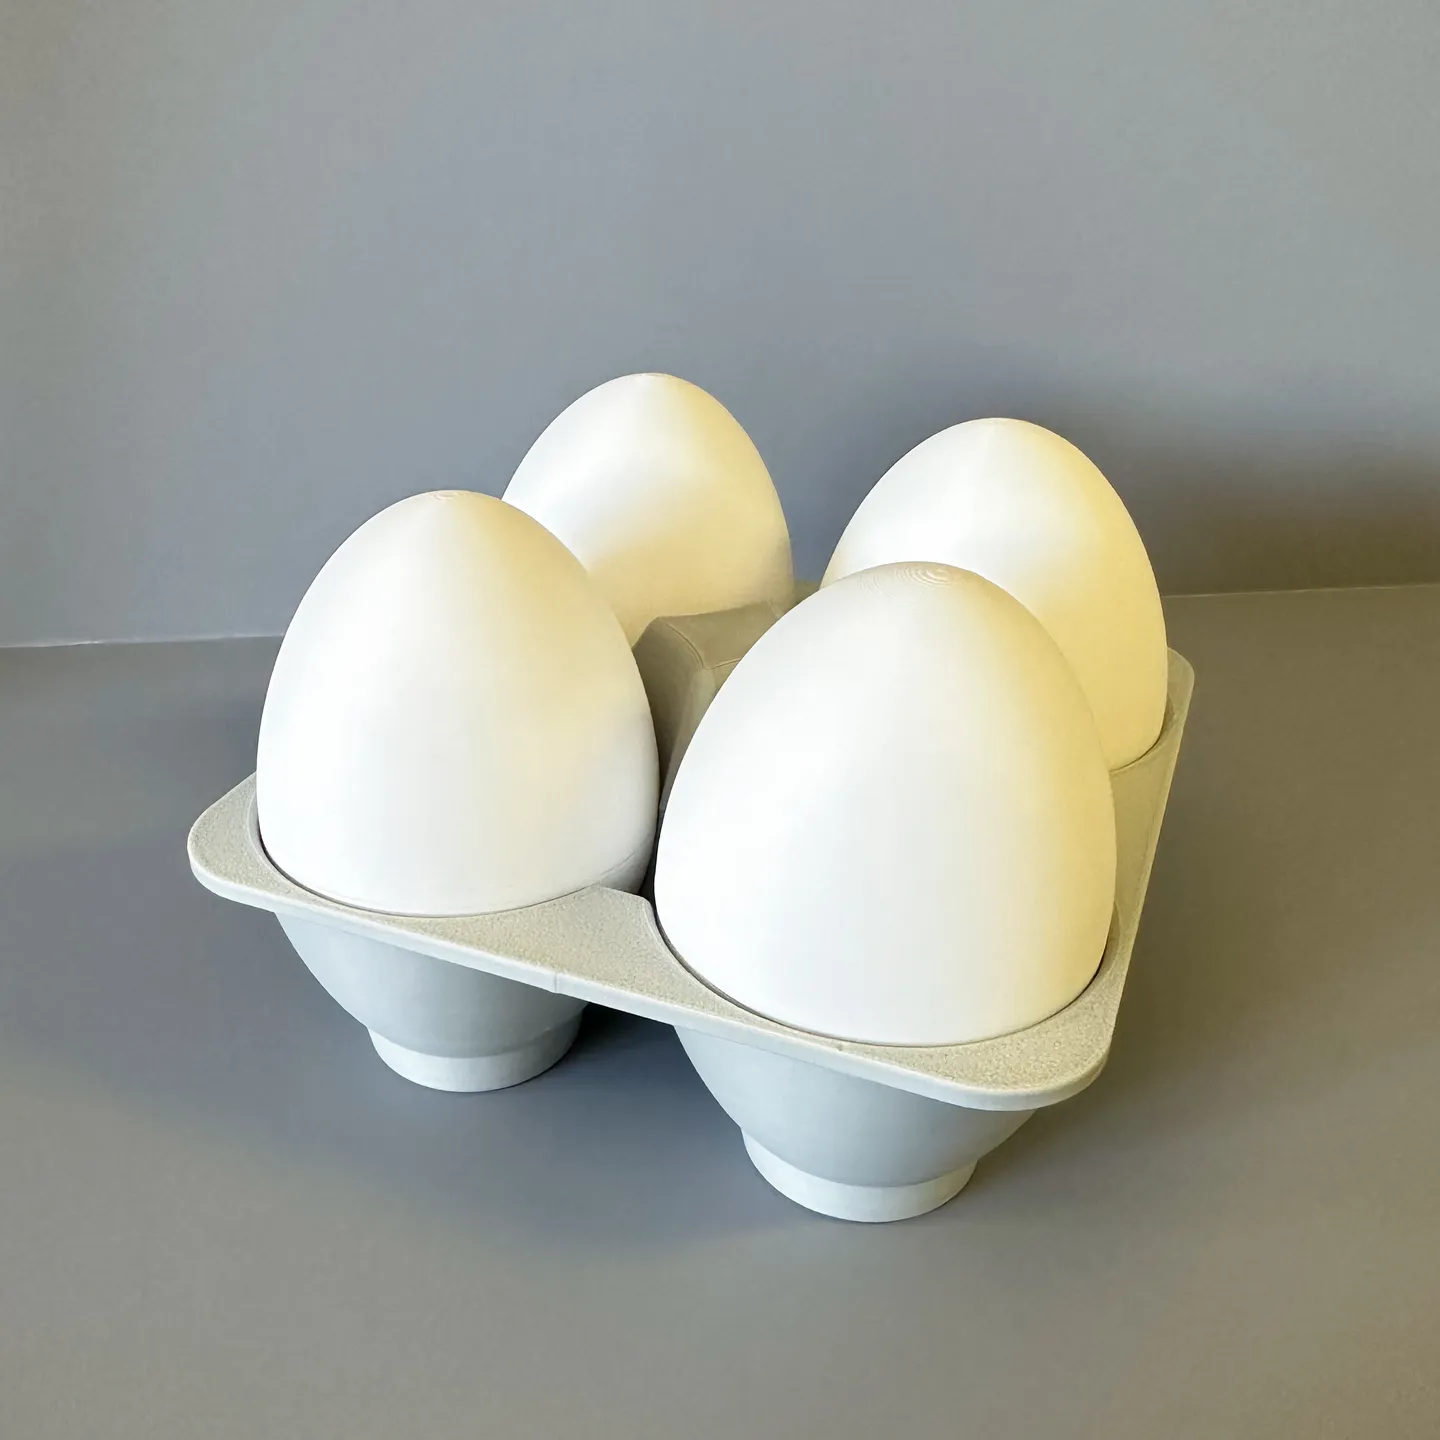
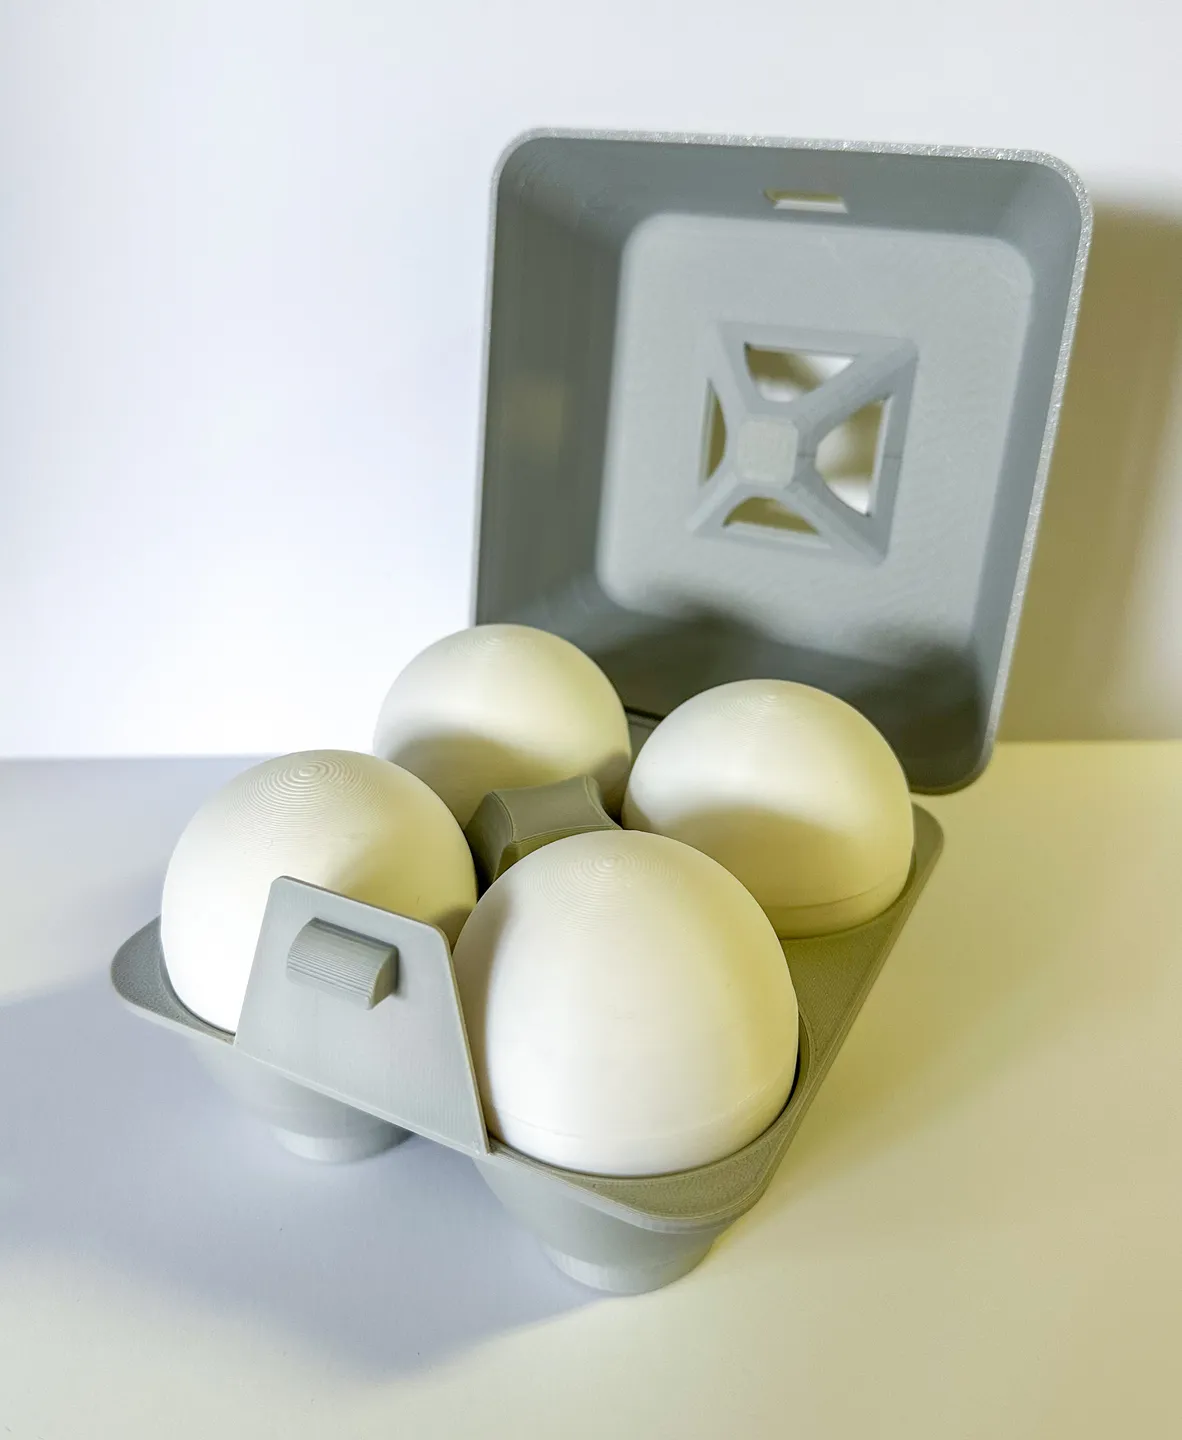
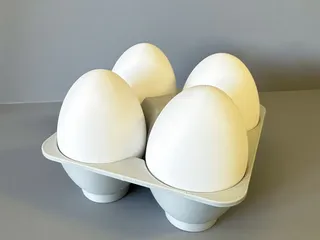
Egg Carton: 5 in. x 5 ½ in. x 3 ¼ in.
PLA works great
Layer Height 0.2mm
Infill 10-15%
Smooth print plate recommended for Fabric Fried Egg
Supports needed for: small half of Egg shell, Egg Tray and Egg Carton
Other items you will need:
- Polyester Mesh Fabric (Mosquito Netting)
- 6x3 Neodymium Magnets (4 magnets per egg shell)
Here is an Amazon link for these items: https://amzn.to/4ca7hq2
A note about fabric: I have tried several different types of fabric. Polyester Mesh fabric (also called Mosquito Netting) is my favorite. I have found that mesh made from PE (Polyethylene) tears very easily. Tulle also is not very durable and tears very easily. Nylon mesh will also work but it is thicker for the print head to print over and I think if you have never printed with fabric before you will feel more comfortable using Polyester Mesh instead.
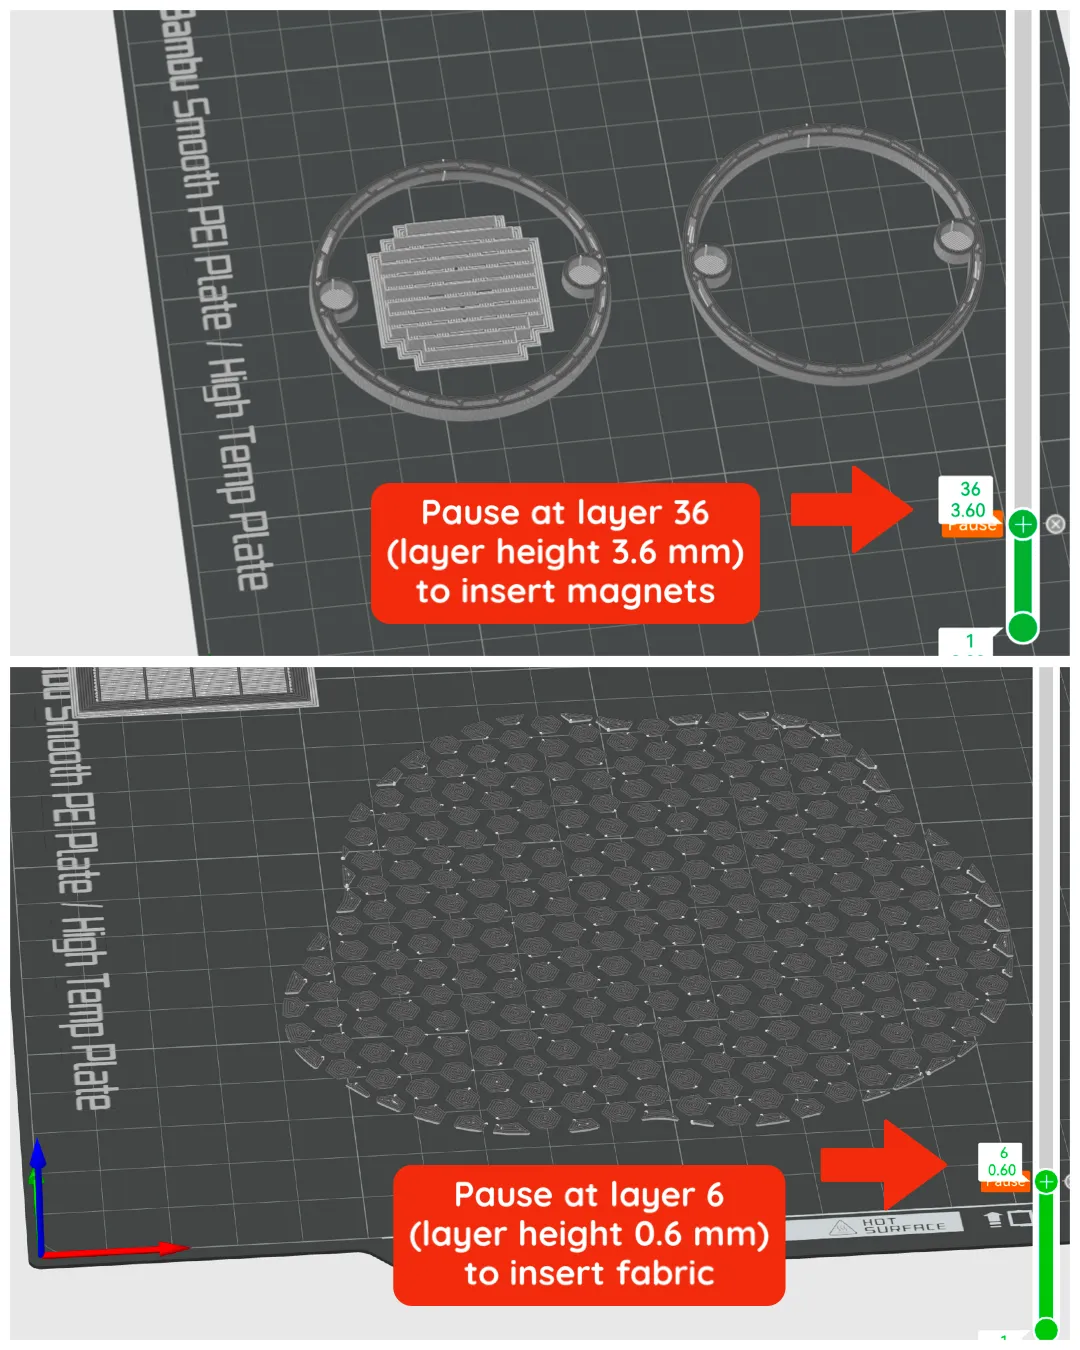
How to print the Fried Egg: I recommend slowing the print speed to 50% initially to get a really clean first layer. Pause the print at layer height 0.6mm to lay a piece of mesh (that has been cut about an inch wider in diameter than the print) over the print. I like to secure the fabric down with blue painters tape. You can also use magnets. Resume the print at that slower 50% speed for a layer or two and then you can increase the speed back up to 100%.
To make it multi-color, pause the print at layer 13 (layer height 2.6mm) to change out the filament to a new color (see photo).
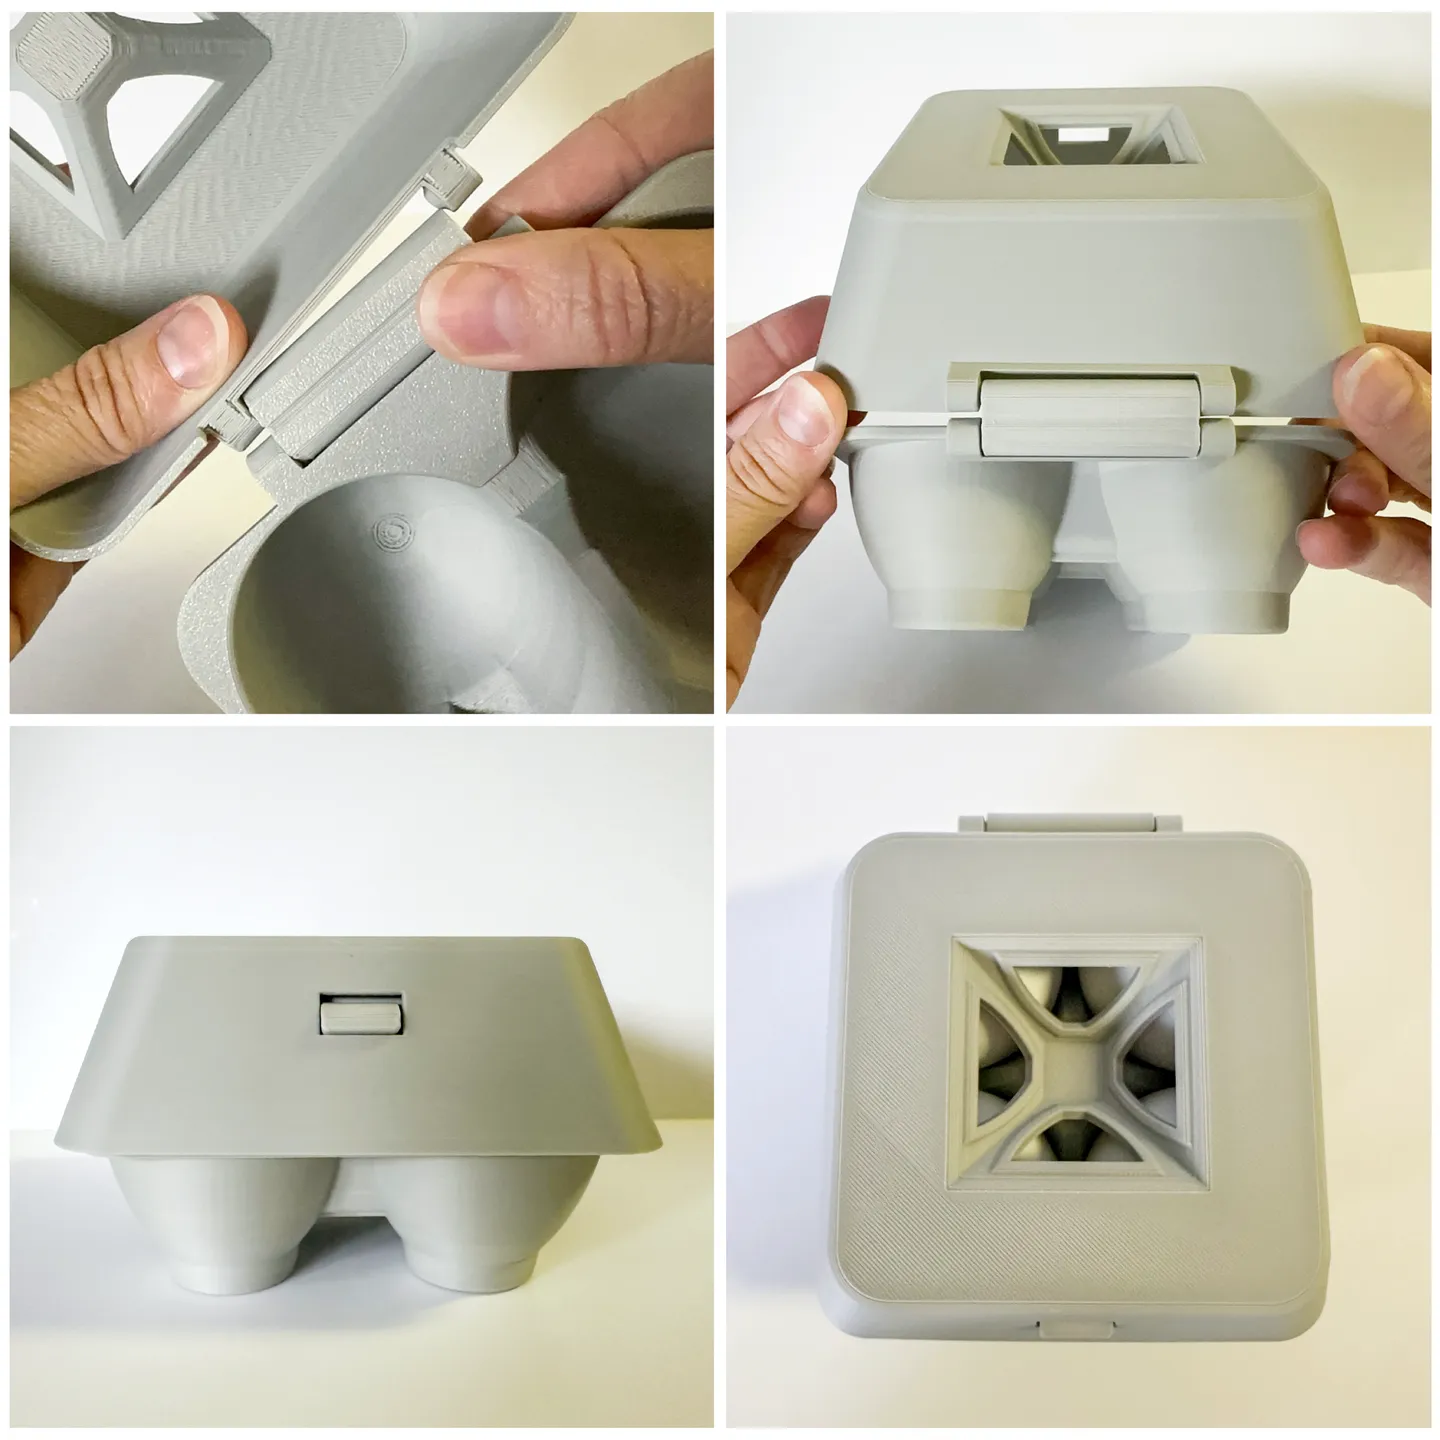
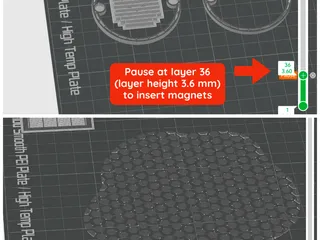
How to print the Egg Shell: You will need (4) 6x3 neodymium magnets for each complete egg. To insert the magnets, pause the print at layer height 3.6mm - when it pauses you can add the magnets. Make sure the orientation is correct so that the two halves of the print will attract to each other when done:)
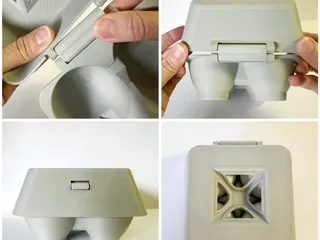
How to print/assemble Egg Tray and Egg Carton: The Egg Tray and Egg Carton Bottom both need supports. The Egg Carton Lid needs supports and a brim. (I like brim on the lid as an extra precaution to prevent warping.) Use the small peg to attach the pyramid piece to both the egg tray and egg carton bottom. The hinge is attached (prints in place) to the egg carton bottom. To attach the carton bottom to the lid, pop the loose part of the hinge into the matching part of the lid. Lastly, fold/bend the tab of the carton bottom up so it can slot into the corresponding hole of the lid when closed.
My designs are free for personal and non-commercial use. If you would like to sell them for commercial use, send me a message and we can discuss the details:)
If you like my work and want to help support it, you can buy me a Diet Coke at https://www.buymeacoffee.com/3dpmom Thanks so much!
Tags
Model origin
The author marked this model as their own original creation.


