XRP Robot - Top Mounting System

Description
PDFThis design is for the newer version of the frame (V1.5.3)
This is the XRP Top Mount System: a solution for expanding your robot's capabilities. This versatile frame allows you to securely attach sensors, microcontrollers, Raspberry Pis and more. Customize your setup with ease by designing your own adapters to fit any additional components you desire. Enhance your robotics projects effortlessly with the XRP Top Mount System.
If you encounter any issues when printing the TMS or need support, please feel free to let me know.
Happy printing :)
Required parts per frame
How to assemble
- Press in the heat inserts (for the threaded heat insert version)
- Place the frame on the XRP robot and align it with the holes in the frame
- Place a screw adapter over the M4 screw and mount it from underneath
- Repeat step 3 on the other side
How to design your own adapters
If you want to design your own mounting adapter, here are the measurements you need
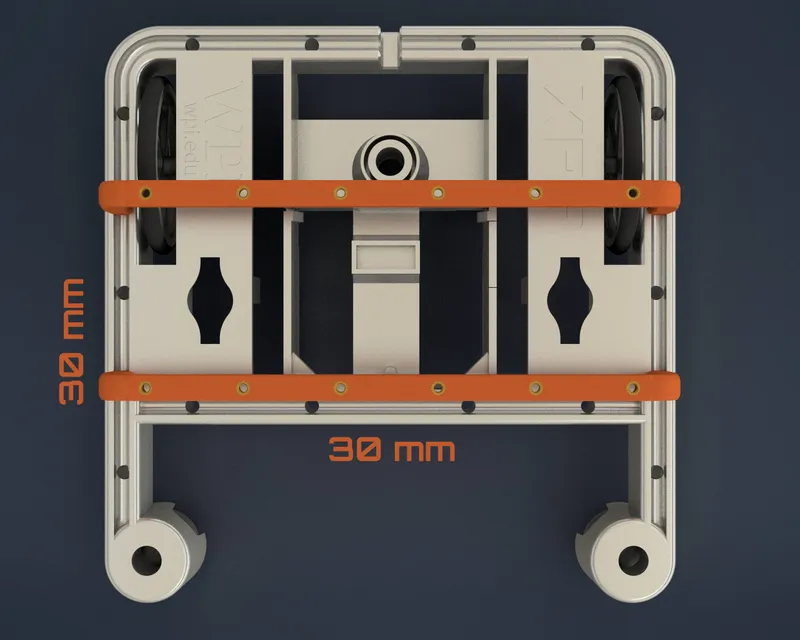
So, when you mount the frames like in the picture above, your design needs a mounting hole spacing of 30 x 60 mm, 60 x 60 mm and so on.
Changelog
| Date | Version | Type | Comment |
|---|---|---|---|
| 2024-06-20 | V1.0 | Release |
Tags
Model origin
The author marked this model as their own original creation.


