Hexagonal Ornament

Description
PDFHexagons are cool
If it is not obvious yet, I like hexagons. I also like to design around slicer settings and modifiers. I have designed in the past earrings with similar geometry and exposed infill by using modifiers. This design is larger and intended as a decorative ornament for the holidays or all year round. Small bonus is the very simple print in place mechanism that allows the inner hexagon to spin/rotate.
Modifier settings
The .3mf file should contain the correct configuration of the 3 bodies in PrusaSlicer. There should be two regular bodies "InnerHex" and “OuterHex” and the third body should be a modifier. If not, you can right click the gear next to the body name in PrusaSlicer and change the type from the menu to modifier.

The modifier is used to expose the infill for that perticular segment of the geometry only. To expose the infill under the modifier settings you select layers and perimeters and set everything to 0

Slicer settings
The “rays” that bridge from the circle to the inner hexagon walls are designed to print as two extrusion lines with an extrusion width of 0.48mm. Therefore I recommend to edit the print settings in advanced and set the default extrusion width to 0.48mm and the rest to 0 so that every extruded line will be 0.48mm.

While you are editing settings, you can also play around with different solid infill patterns. With the new 2 colour filaments and silky-shiny-satin filaments the different solid infill patterns can create very nice effects.

Filament recommendations
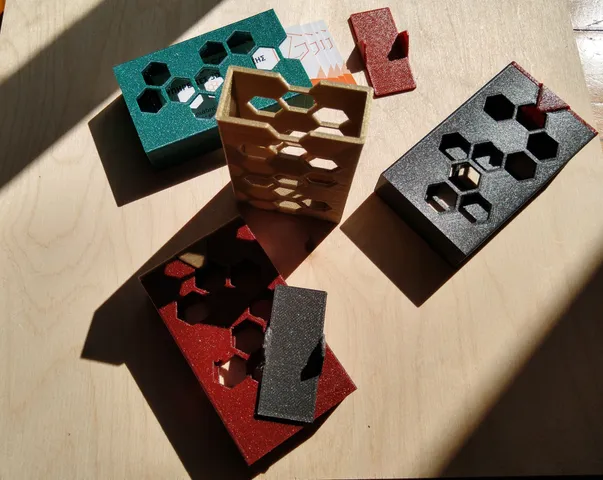
This is a decorative object, so any filament with nice colours, pearls, glitters and effects will look nice. However as previously mentioned for the solid infill patterns, shiny filament and the dual colour co-extrusion filaments will have the best looking results. The print in my photos is a satin raspberry colour filament, while I wait for my two colour filament to arrive.
Tags
Model origin
The author hasn't provided the model origin yet.