Illuminated Frisbee


Description
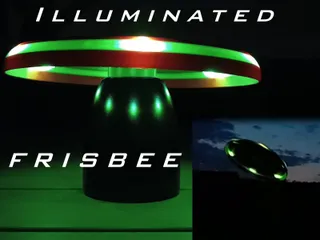
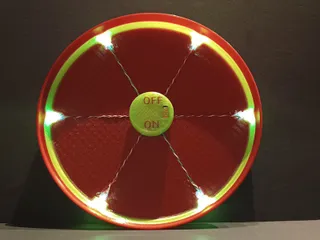
PDFWith this frisbee you can play till the absolute end of the day. Even in pitchblack it's easy to throw and catch. Others may think it's a kind of UFO…
CONSTRUCTION
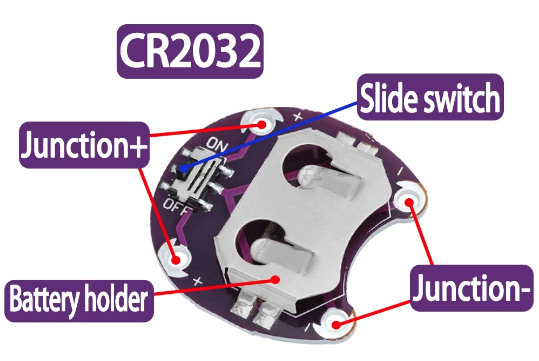
For the battery (CR2032) I used a holder with PCB and build in switch. They sell them on Aliexpress or similair sites. Just search for Lillypad CR2032. The printed Battery Holder has a PIP slider (make sure it slides well before assembly). The PCB is locked with the little Clip.
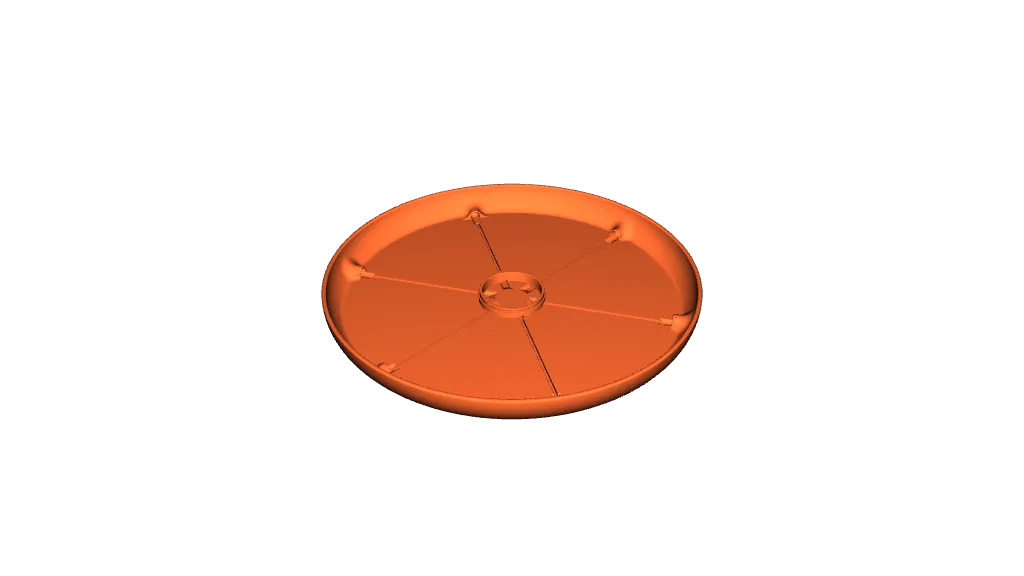
The Battery Holder is placed on the Frisbee and locked using a bayonet mount. This ensures it won't come of with throwing.
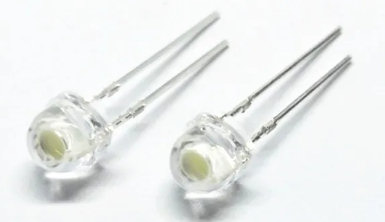
The LED's I used were low profile 5mm LED's (5mm Straw Hat LED). I used the white ones and let the color be made by the color of used filament. The LED's are connected to the battery holder using a twisted pair of wires from an old UTP cable. Of course you can use other wires, make sure they fit in the foreseen chanels. The LED's are secured in place using some hot glue. I also fixated the wires extra with some tiny drops of glue.
Keep the wires a little longer and roll them up a little to have enough room to mount the Battery Holder properly.
PRINTING
Printed in PETG, 0.4 nozzle and 0.2 layer heigth. For the frisbee I changed color on 3mm height and again on 9.2mm. This is the part where the light from the LED's shines through. I used a semi tranparent filament (green) for that purpose.
The Battery Housing is made out of several parts which make coloring easy. Only the slider for the switch needs to be manual colored on the bottom layer if you want it to stand out.
* If you plan on printing in PLA keep in mind that a hot car or exposure to direct sunlight can heat up the frisbee so hot that it can deform! (PLA can deform at about 50-60°C)
Tags
Model origin
The author marked this model as their own original creation.