Minecraft Geared Lever Switch (Flat switch)

Modified Minecraft Geared Switch lever to work with flat light switches.
224
447
0
5116
updated January 1, 2025
Description
PDFThe installation of this is fairly straight forward but you'll need to use slightly longer screws than the ones that are currently attaching your light switch cover. 6-32 x 1 inch machine screws with a round head should work fine.
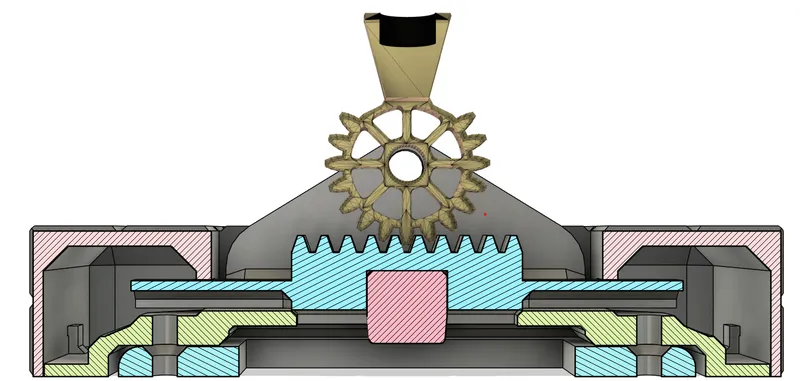
- Slide the “RAIL-GEAR” into the “BASE-PLATE”.
- Insert the “KEY” in the “RAIL-GEAR”, it should fit snuggly into it.
- Remove the screws from the existing light switch cover. (You can either keep the cover in place or remove it.)
- Screw the “BASE-PLATE” over the light switch. You'll need to slide the “RAIL-GEAR” up or down to gain access to the screws. Validate that the “RAIL-GEAR” still slides easily, if not try loosening up the screws a little bit.
- Install the “COVER-PLATE” over the “BASE-PLATE”.
- Glue the 3 parts for the lever together (Gear/Handle/Wood)
- To install the lever, place “RAIL-GEAR” and Lever as shown below then use the Pin and Clip to secure it in place.
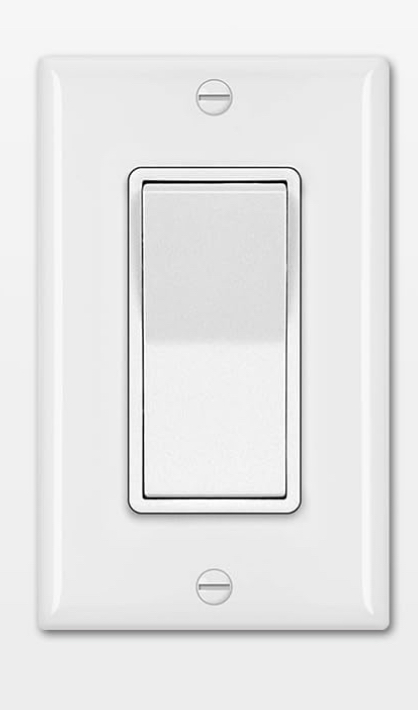
It works for this type of switch:
Here’s the list of filaments I used to make this:
- Bambu PLA Sparkle Slate Grey
- Bambu PLA Sparkle Onyx Black
- Polylite PLA Steel Grey
- Bambu PLA Matte Dark Brown
Tags
Model origin
The author remixed this model.

Differences of the remix compared to the original
Modified the design to work with flat light switches. Kept the same lever components but I had to modify the cover plate & holder design to accommodate the wider gap between the attaching screws.