Proton Pack Wall Mount

Description
PDFDisclaimer
I am not responsible for damages caused by your pack falling off the wall. Test your parts and use your best judgement. Don't just trust that what worked for me, my printer, and my pack will work for you, your printer, and your pack. You need a secure connection to your wall or whatever surface you are mounting it to that can support the weight of your pack. You also need to ensure the printed hooks are strong enough that they won't snap under the weight of the pack. I recommend a high-stiffness material like PLA pro / tough / plus / etc. Please read everything, and make your own adjustments as you see fit.
Description
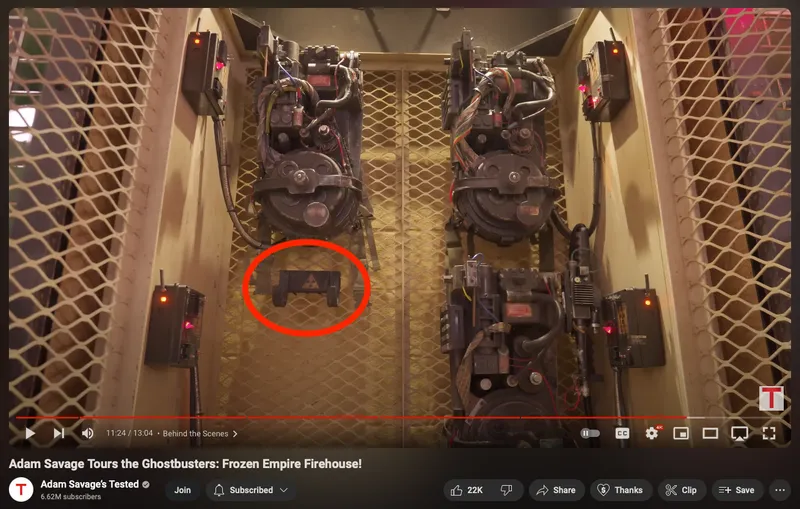
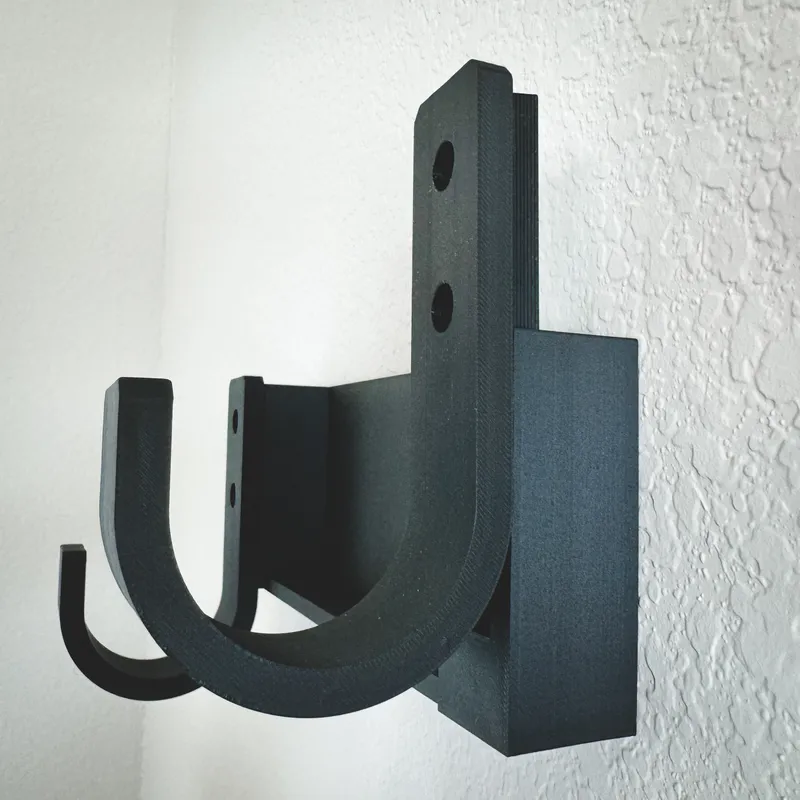
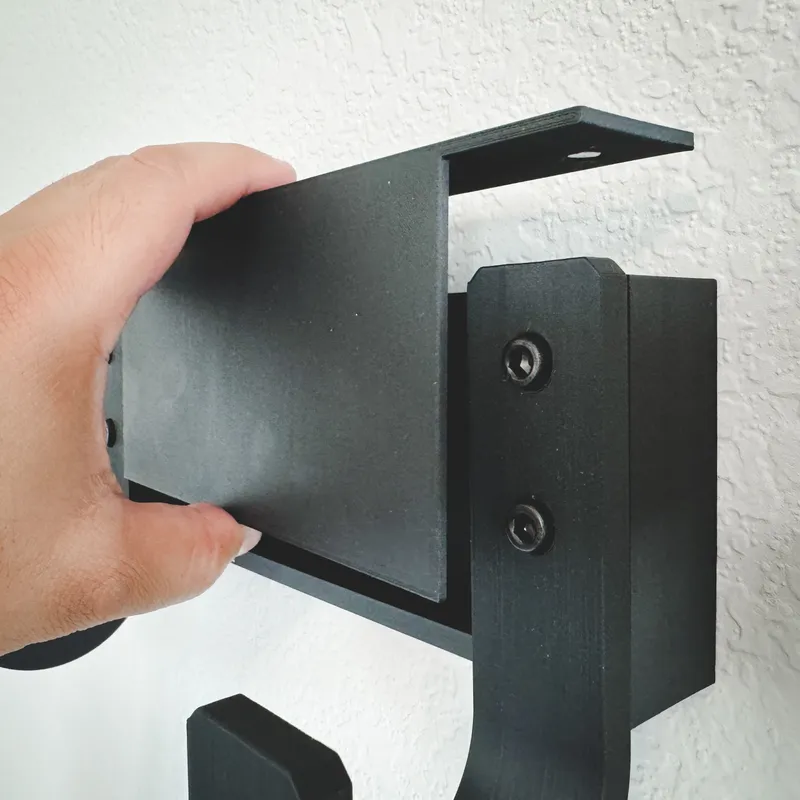
This wall mount is designed to hold a Haslab Proton Pack mounted to an ALICE frame. The design is loosely based off the one seen in the Frozen Empire behind the scenes video from Adam Savage / Tested. This mount will have the pack mostly vertical, rather than having the top leaning in as shown in the video. In addition to holding your pack, there is also a small hidden storage space inside!
You need to have mounted your ALICE frame to your pack with spacers, so the frame has proper clearance. Without them, the frame is too close to the pack, and the hooks won't be able to get under it. See this video if you're not sure what I'm talking about. Also, if your pack is not the Haslab one, or if you have modified your Haslab pack in a way that adds significant weight to it, this mount may not work for you.
Hardware
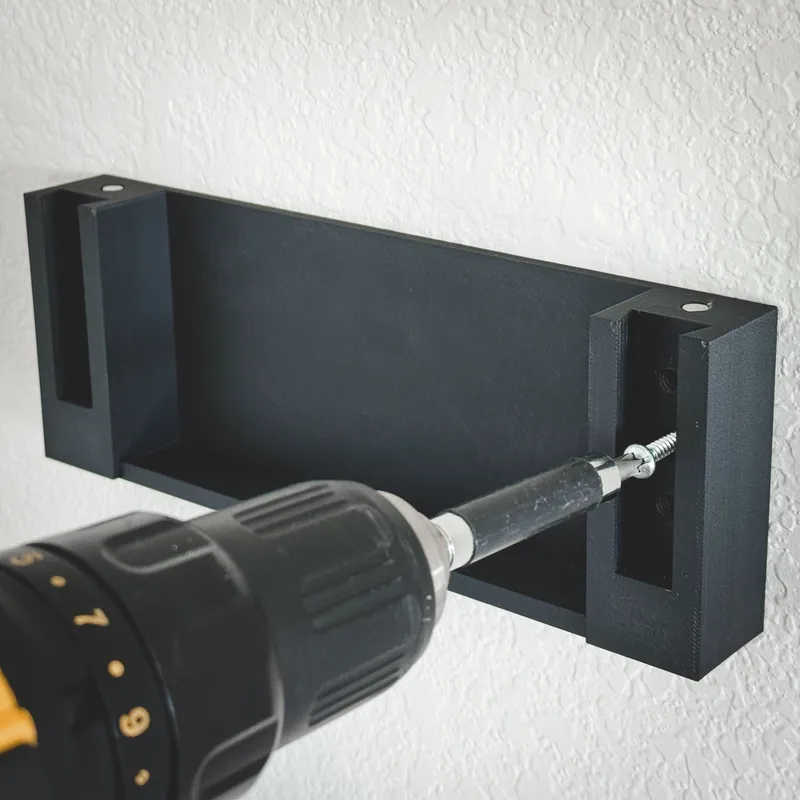
- (Qty 2) #8 screws with a 8mm diameter or smaller screw head. I used these 1 1/2" Toggler brand screws and anchors. https://a.co/d/fJNzxhD
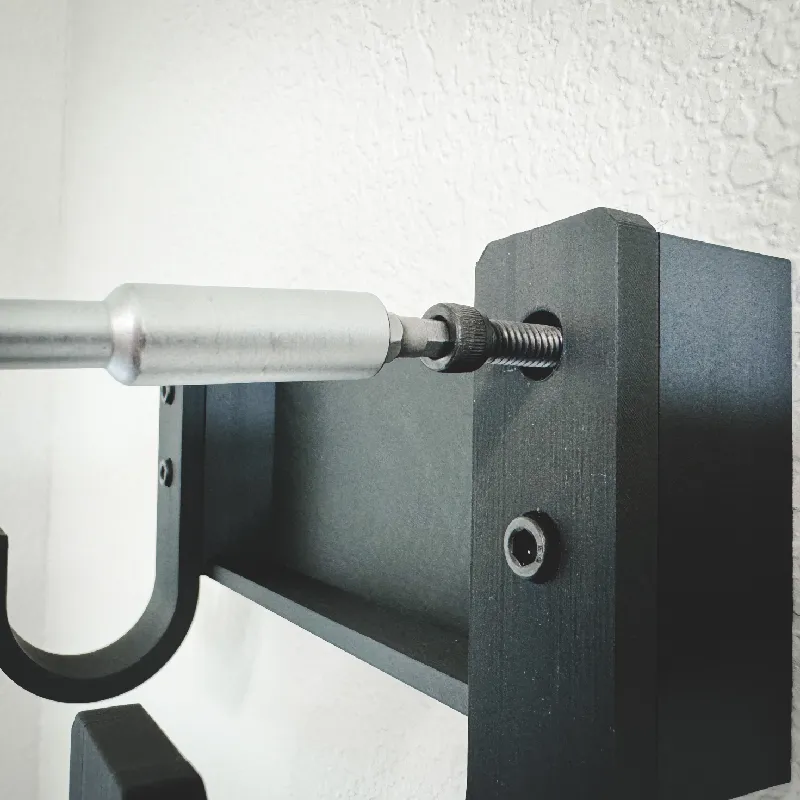
- (Qty 4) 1/4-20 x 1" socket head cap screws. I chose these as they align with the Ghostbusters gear aesthetic. https://a.co/d/6rjNhEJ
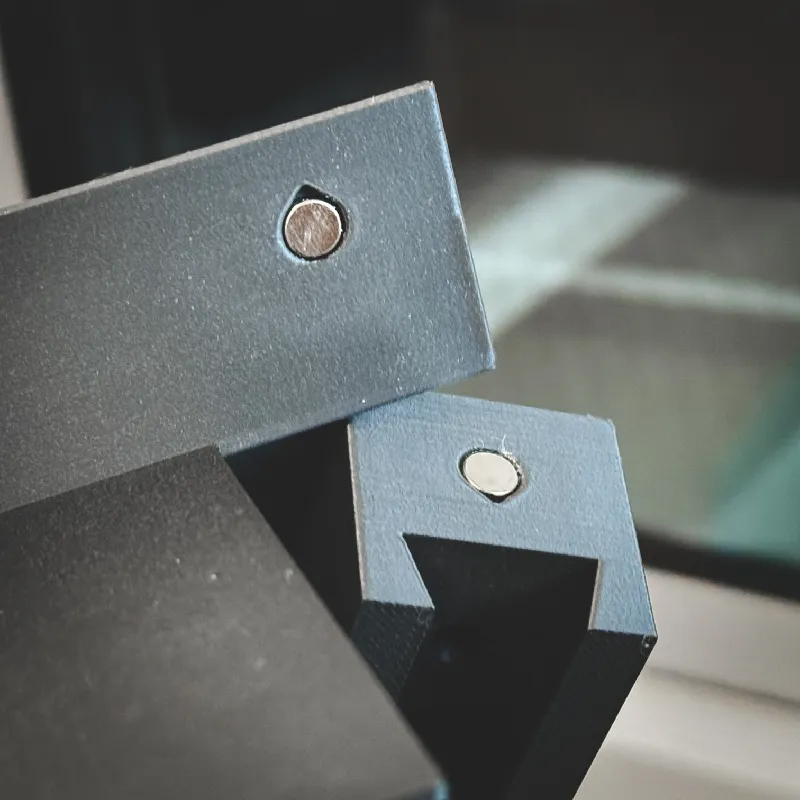
- (Qty 4) 6mm x 2mm disc magnets. Optional, but highly recommended. These help hold the cover onto the plate. https://a.co/d/7QSneIe
The Amazon links are just for reference. There are many suitable alternatives available for purchase from various retailers that will work fine.
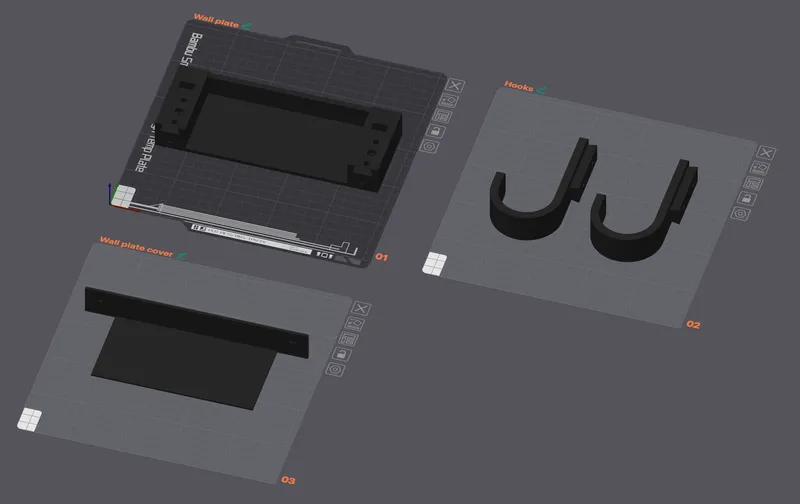
There are 3 models you need to print:
- (Qty 1) Wall plate
- (Qty 1) Wall plate cover
- (Qty 2) Hook
You can also print an optional hole guide to make it easier to mark where your holes will go.
This is what worked for me. Adjust as you see fit. I started by loading the base settings from the 0.20mm Strength profile built into OrcaSlicer. If you don't use OrcaSlicer or Bambu Studio, the key settings of this profile are:
- Layer height: 0.2mm
- Wall loops: 6
- Top shell layers: 5
- Bottom shell layers: 3
- Sparse infill density: 25%
I then made the following overrides:
- Global
- Sparse infill pattern: Gyroid
- Brim type: Mouse ear
- Wall plate
- No additional overrides
- Hook
- Sparse infill density: 75%
- Enable support (I used default tree support settings)
- Wall plate cover
- Sparse infill density: 15%
- Wall loops: 2
The .stl files should import in the proper orientation, but just in case, this is how they should sit on the build plate.
In these orientations, the only parts that need supports are the hooks. They need support for the underside of the dovetail and the screw holes.
Tips
- Print with a a very rigid material. Basic PETG has too much flex and will not work well here. I recommend a high-stiffness material like PLA pro / tough / plus / etc.
- The cover can be oriented on either of the front or top, but I like putting the front side down on a smooth build plate so it looks nice.
Post-process
Remove the supports from the hooks and, if necessary, sand or file down the dovetails so they slide easily into the wall plate.
Leave it as a raw print, or finish it however you would normally finish off a prop. A resin coating would probably increase the rigidity of the hooks. I didn't do this, though, so I can't say how effective it is.
Test part strength (don't skip this)
- Slide the hooks into the wall plate
- Bring your pack over to a bed or some other cushioned area where a small fall won't damage it
- Position the hooks under the top of the ALICE frame
- Holding only the plate, lift up until your pack is being held only by the mount. Let the pack hang for however long you need to feel confident in the hooks. Be careful and, again, use your best judgement here.
Alternatively, if you don't want to risk your pack at all, you could find a way to hang weights or other heavy objects equivalent to the weight of your pack from the hooks.
Assemble
- Make sure you've tested your part strength
- Glue the magnets into the top of the plate and the inside of the plate cover. Make sure your polarities are correct.
- Mount the wall plate to the wall using the #8 screws (and any other required hardware, such as drywall anchors)
- Attach the hooks by sliding them into the dovetail slots of the wall plate. Secure each hook with 1/4-20 screws. I like the look of the screw caps slightly protruding, but there should be enough room to screw them in so they are flush with the hooks if you prefer that.
- Attach the cover to conceal the hidden stash area
- Mount your pack!

If you want to create your own radioactive hazard label, Wikipedia actually has a great SVG of one here. I've attached that SVG to this project for convenience.
You can also find these hazard labels on Amazon or Etsy.
And, of course, you could just print one. There's a nice collection here. You want W003.
Tags
Model origin
The author marked this model as their own original creation.


