(New Version!) Adjustable gantry mounted nozzle seal, parking and silicone nozzle brush / cleaner for Voron (2.4/Trident)
Description
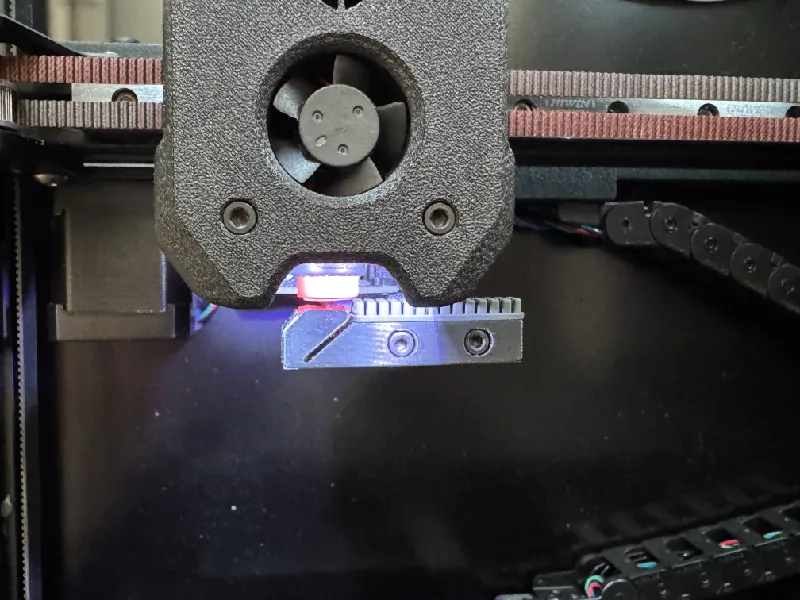
PDFThis is an adjustable gantry mounted nozzle parking spot and brush for Vorons (2.4 & Trident) using bambu lab's silicone wiper.
New Version! Now made more modular and using high temperature silicone RTV to further improve nozzle heat handling (can withstand sustained 287C)

Why?
When putting together my ERCF I was annoyed by the slight oozing that happens when changing filaments. No matter how much you retract the filament during a swap, there will be some oozing simply because of the time it takes to perform the change. This ooze then transfers over to the purge tower causing a small bump which when printing can cause slight layer shifts and bend your nozzle if its too severe.
In addition if you have a runout or using the endless spool functionality, that stray filament will transfer over to your print, causing a bump either on the infill or the external surfaces.
This mod aims to address this by introducing a location to park the nozzle while filament is being swapped and a mechanism to wipe your nozzle before resuming your print.
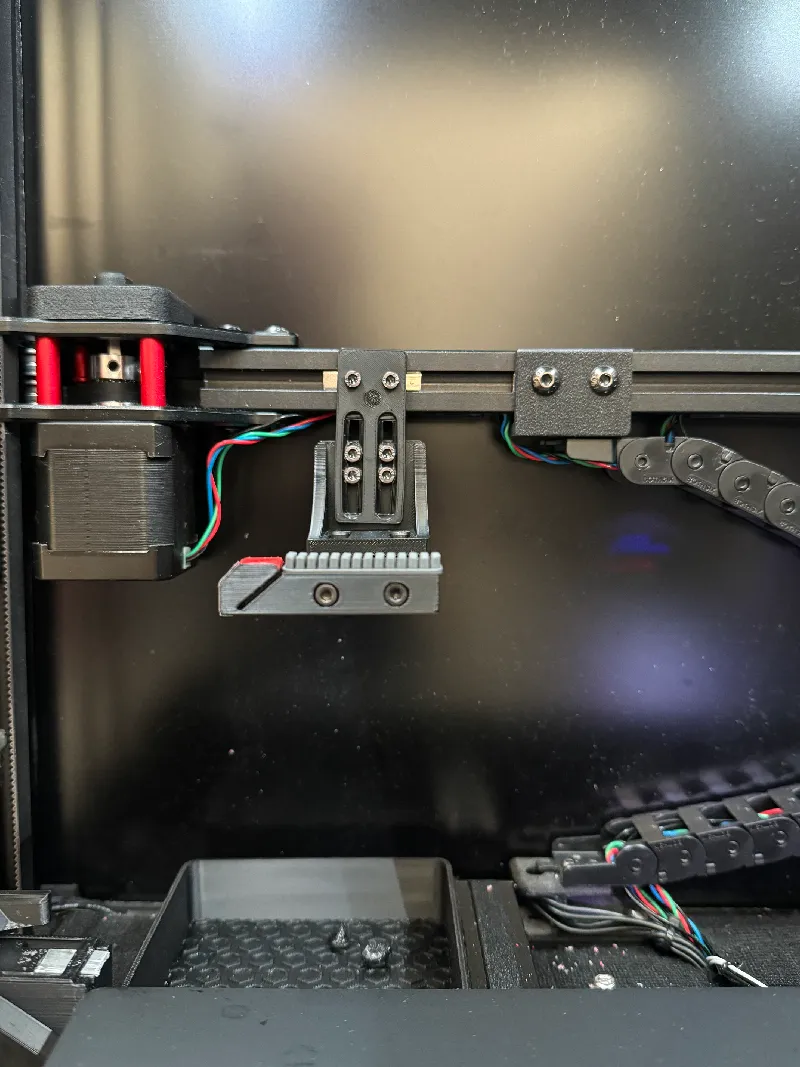
Benefits
It is gantry mounted, which means you don't need to lower the Z height (on a Voron 2.4) to wipe against a brush fixed on the bed. If you lower your toolhead to the rear of bed to wipe, your head may end up colliding with printed parts surrounding that area. A gantry mounted brush solves this issue as you dont need to change Z height to wipe.
In addition, I have selected to use the bambu lab silicone wiper (https://uk.store.bambulab.com/products/heatbed-nozzle-wiper-a1 / https://us.store.bambulab.com/products/heatbed-nozzle-wiper-a1) instead of a brush bristle brush. I find it is gentler on the nozzle, it is non conductive which helps if you have a beacon or cartographer probe on the toolhead and leaves no metallic residue on the nozzle. It is also cheap and reasonably readily available.
Also you can use the much cheaper silicone brush version from Aliexpress - https://www.aliexpress.com/item/1005007402118137.html
It also has an integrated, spring loaded nozzle parking spot, to reduce any ooze happening during a tool change. This reduces the amount of stray material in the chamber by preventing the nozzle from oozing when it is parked.
Finally the mount is flexible so it should not bend your nozzle or place too much strain on the stepper motors causing them to skip steps.

After close to a year of using the brush mount I have refined the design and produced a single option. The new design has the following benefits:
- Uses high temperature silicone RTV to fill the nozzle stop area. This has several benefits, namely higher temperature resistance (up to 287C sustained depending on the silicone you use), improved nozzle sealing and higher wear resistance compared to the foil options.
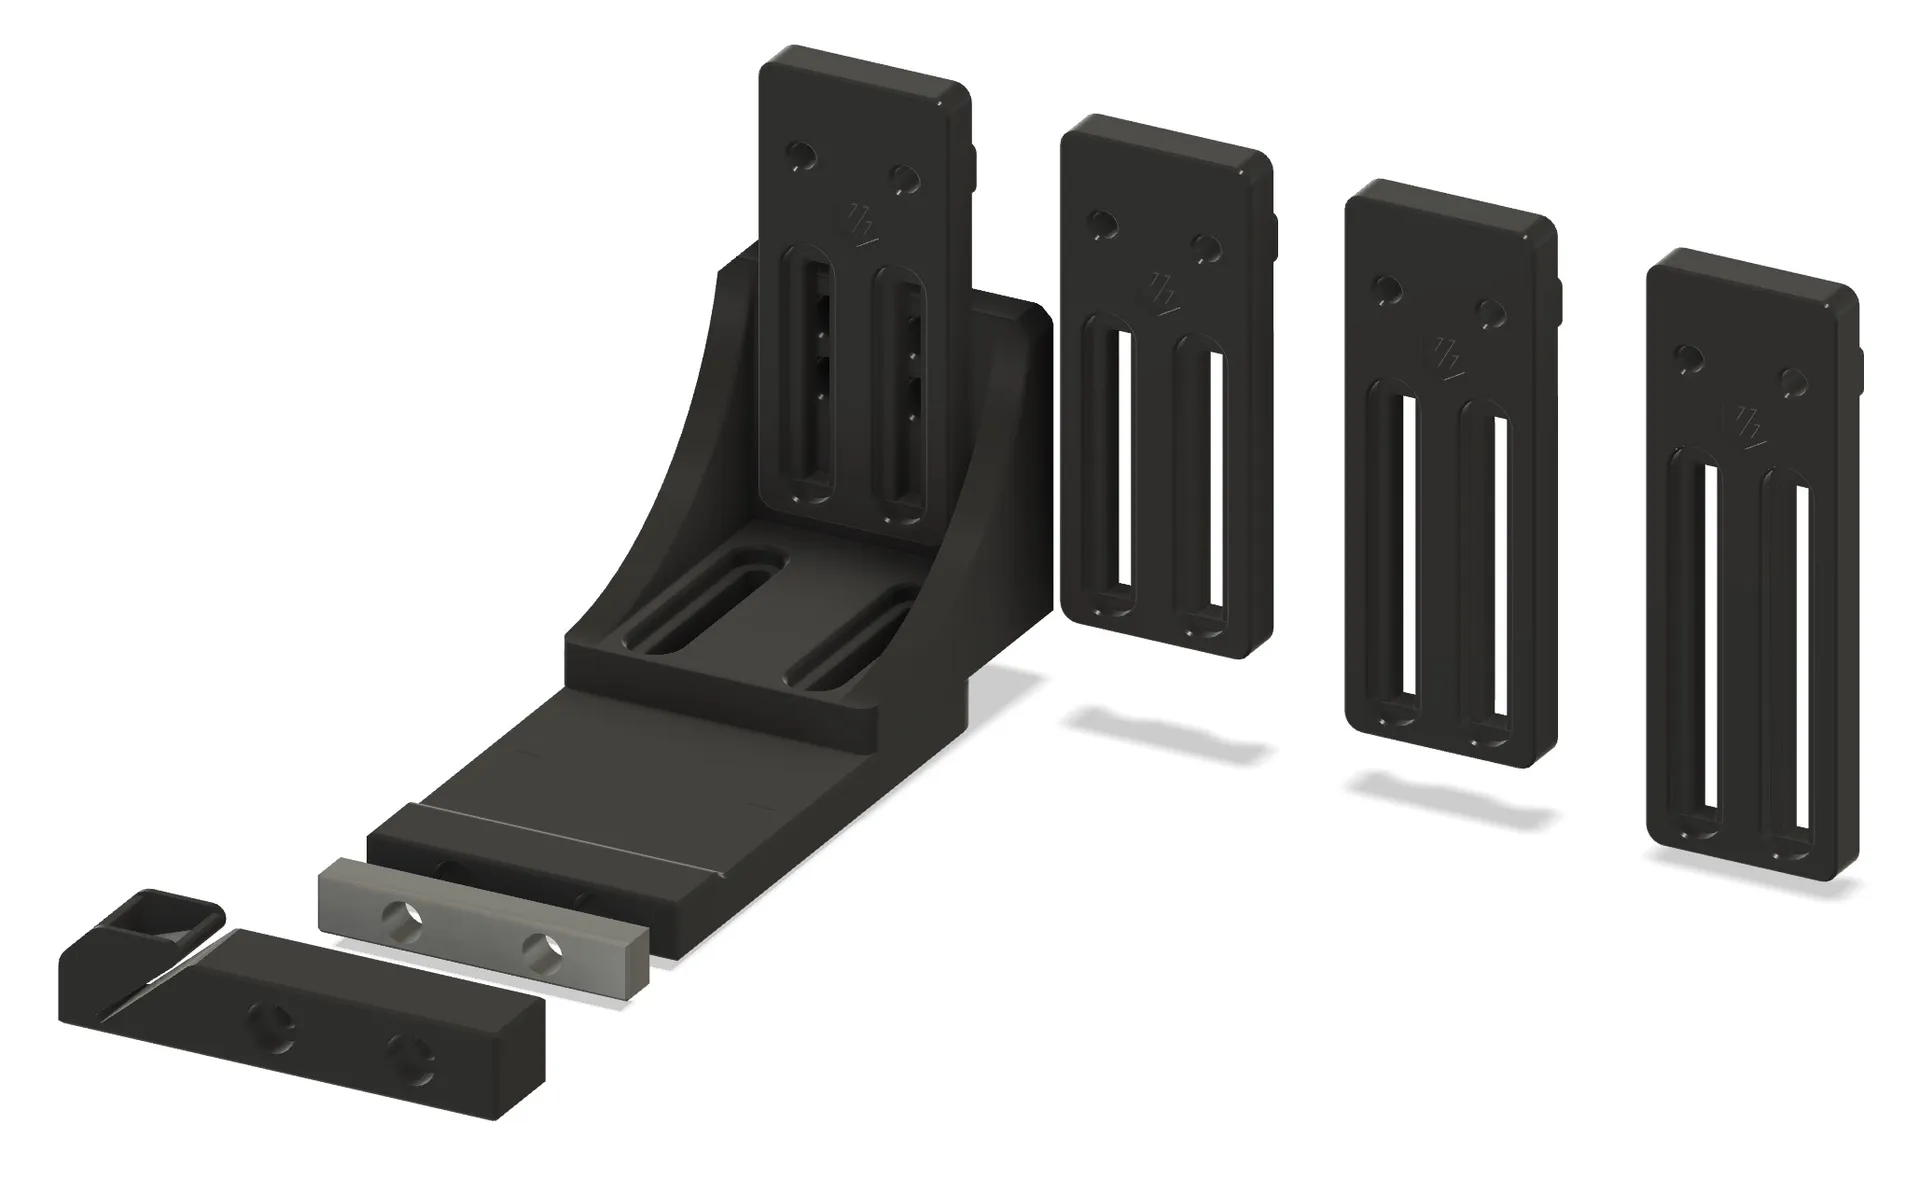
- Modular design:
- The brush mount is now its own component facilitating easier replacement.
- The design now has three options for the extrusion mount to cater for longer toolhead.
- A brush holder extender has been provided to allow for use with tool heads that have the nozzle further forward from the gantry. The provided extender is 5mm deep. If moving the brush further to the front is necessary, resize it accordingly in the slicer.
The previous revisions have now been moved to the archive folder in case you still want to use them
- Nozzle brush only.
- Nozzle brush and integrated nozzle parking spot using aluminium foil tape only.
- Nozzle brush and integrated nozzle parking spot using a 6x3 magnet and aluminium foil tape.
Video in use:
BOM:
Materials:
- Silicone brush: https://www.aliexpress.com/item/1005007402118137.html
- Silicone High Temp RTV: https://www.amazon.co.uk/Weld-31314-Temperature-Silicone-Sealant/dp/B00ID8IUJY
- HVAC aluminium self adhesive tape (optional): https://www.amazon.co.uk/dp/B07KQDQHC9
Hardware:
To mount the assembly to the extrusion:
- 2x M3x10 BHCS screws
- 2x M3 Ball Spring T-Nuts
To put the assembly together:
- 6x M3x8 SHCS screws (M3x10 will also work) to mount the joint to the extrusion mount and brush mount.
- 2x M3x10 SHCS screws to mount the brush base to the brush mount. If using the extender longer screws will be needed (M3x16)
- 8x M3 3x5x4 heat set inserts
Print using ABS/ASA for flexibility and heat resistance using the standard Voron parts print settings.

To assemble:
- Install the heat set inserts in the parts.
- Using 2x M3x8 screws put together the brush mount to the joint
- Using 4x M3x8 screws put together the vertical mount to the joint
- Assemble the screws loosely so you can move the parts up/down/front/back
- Fill the nozzle stop area all the way to the top and some more, with high temperature silicone. Using a piece of cardboard that has been soaked with water, smooth it over the top surface and following the curve of the model. Let it cure overnight. The water on the cardboard helps avoid the silicone sticking to it and allows for easier levelling. Use a piece of paper towel to clean up any excess as much as possible.
- Once cured, clean up the excess silicone that may be stuck to the brush mount and cut optionally cut and install a small piece of self adhesive alunimum tape to the leading edge of the nozzle stop.
- Install the silicone nozzle brush using the double sided sticky tape on the brush itself.
- Fit the brush assembly to the brush mount using 2x m3x10 screws (or longer if using the spacer)
- Install the M3 Ball spring t-nuts to the rear extrusion
- Install the assembly using 2x M3x10 screws
- Move your toolhead over the brush area and adjust the screws so the nozzle is just over the middle of the brush and touching it about 1mm deep. You want it to touch the brush but not hit the bottom of the wiper.
- Lower your gantry to Z 5.0mm. Check that there is adequate clearance between the brush and the bed. Be careful as you lower your z height if you've moved the nozzle brush too much forward it may collide with the bed. If that is the case, move the wiper arm slightly back till it clears the bed.


Nozzle cleaning macro:
In my ERCF I use the following macro to clean the nozzle. X34 is the nozzle stop location, X80 is the end of the brush move.
[gcode_macro _CLEAN_NOZZLE_GANTRY]
gcode:
   SAVE_GCODE_STATE NAME=clean_nozzle_gantry
   G90
   G1 X34 F18000
   G1 X80 F18000
   G1 Y357 F18000
   G1 X34 F18000
   G1 X80 F18000
   RESTORE_GCODE_STATE NAME=clean_nozzle_gantry
Adjust the X34 above to be the X position left most of the brush, without touching it and without touching the nozzle parking spot/seal either.
Adjust the Y359 position to be the middle of the brush
Adjust the X80 position above to be the X position right most of the brush, without touching it.
You can find your values by homing X & Y then using mainsail to place the toolhead at the left most side of the brush and right most side of the brush. Adjust Y to be in the middle or as close to the middle as possible.
Then update the below variables in the mmu_macro_vars.cfg as below.
ATTENTION: While the nozzle stop can withstand sustained heat of 287C (subject to the RTV used) it is recommended to set the variable_enable_park_runout to false as you don't want to park the nozzle on the seal and wait for extended periods of time to prevent it from melting.
In the macro below X38 Y357 is the location of the middle of the silicone part of the nozzle stop.
[gcode_macro _MMU_SEQUENCE_VARS]

variable_enable_park_printing   : 'toolchange,load,unload,runout,pause,cancel'
variable_enable_park_standalone : 'toolchange,load,unload,pause,cancel'
variable_enable_park_disabled   : 'pause,cancel'


variable_park_toolchange        : 38, 357, 1, 5, 2
variable_park_runout            : 38, 357, 5, 10, 2
variable_park_pause             : 38, 357, 5, 10, 2
variable_park_cancel            : 38, 357, 10, 5, 5

variable_post_form_tip_position : 38, 357, 0

variable_user_post_load_extension     : ' _CLEAN_NOZZLE_GANTRY'
and if using the filament cutter:
[gcode_macro _MMU_CUT_TIP_VARS]
variable_restore_position       : False
ATTENTION: In addition, make sure your heater timeout is set to as low as possible (currently 60 seconds).
[mmu]
disable_heater: 60  # Delay in seconds after which the hotend heater is disabled in the MMU_PAUSE state
For tip forming and to better understand the above please visit: https://github.com/moggieuk/Happy-Hare/blob/main/doc/toolchange_movement.md
Tags
Model origin
The author remixed this model.
Differences of the remix compared to the original
Remixed the variable mounting bracket for the Klicky probe to be able to accommodate a nozzle wipe silicone brush fixed to the gantry.

