Silhouette Cameo 5 Pinch Roller Replacement Parts

Description
PDFIf you used this part consider leaving me a small tip using the below links!
https://www.buymeacoffee.com/wafflecart
https://ko-fi.com/wafflecart
Silhouette cameo 5 roller replacement parts. This can be used to replace the parts on the left or right carriage and can be done without any major disassembly, see assembly instructions below.
Recommended print settings
- PETG for strength, PLA might be ok but I have not tested.
- 100% infill
- Minimum of 4 perimeters/walls
- 0.2mm layer height
- Requires a very small amount of support for the little bits where the springs sit on, your slicer should do this automatically if you enable supports.
- Approx 20min print
Recommended tools for assembly
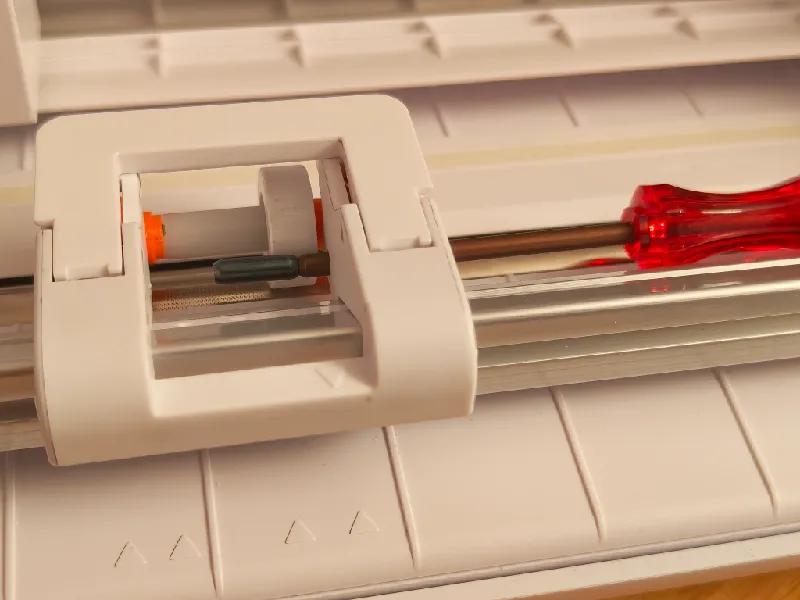
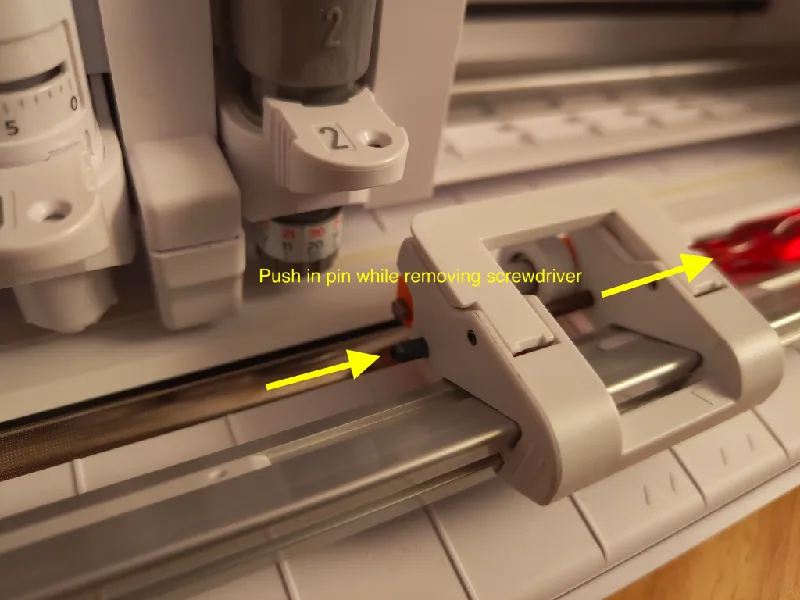
- Thin screwdriver, hex or allen key of approximately 3mm thick to push out the pins in the carriage and also to help align the holes when putting the pins back in.
Assembly instructions
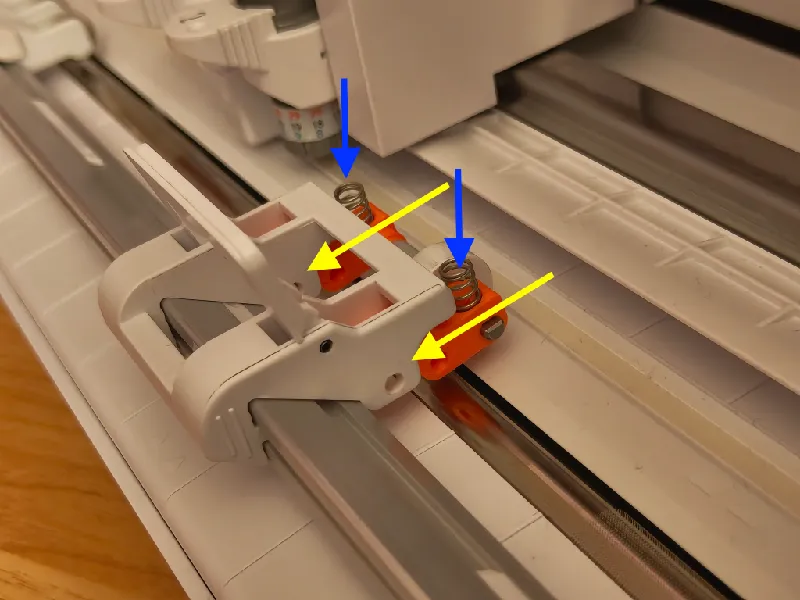
Note: Keep the white carriage on the metal rail, it does not need to be removed.
1. Hold the carriage to prevent movement and push out the dark metal pins on each side with a thin screwdriver, hex or allen key. Pull out the broken plastic pieces, bar, spacer, springs and roller bearing from the carriage. Careful not to lose the springs!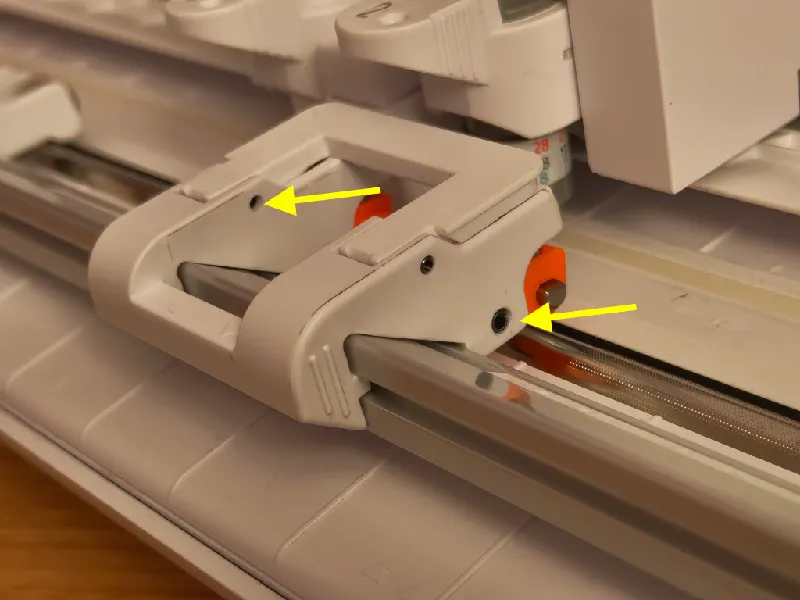
2. Reassemble with the new printed parts as shown, the roller bearing should be on the right side if you are doing the right side carriage. If you are doing the left side carriage the roller bearing should be on the left.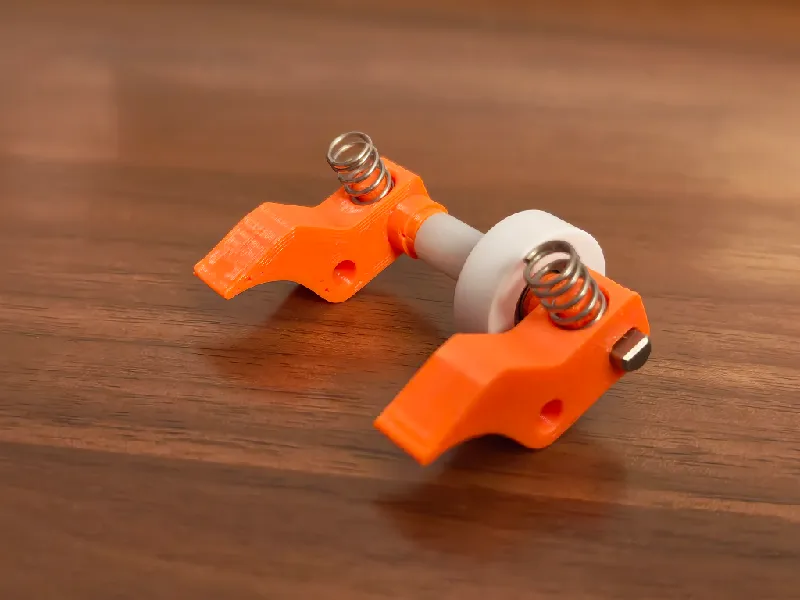
3. Place the 3D printed assembly onto the white carriage again. Remember the roller bearing should be on the right for the right side carriage, left if you are doing the left sided carriage. Push down/apply tension to the springs and manoeuvre it in place into the carriage. Similar to the 3d printed parts there are small protrusions underneath on the white carriage that the springs sit on.
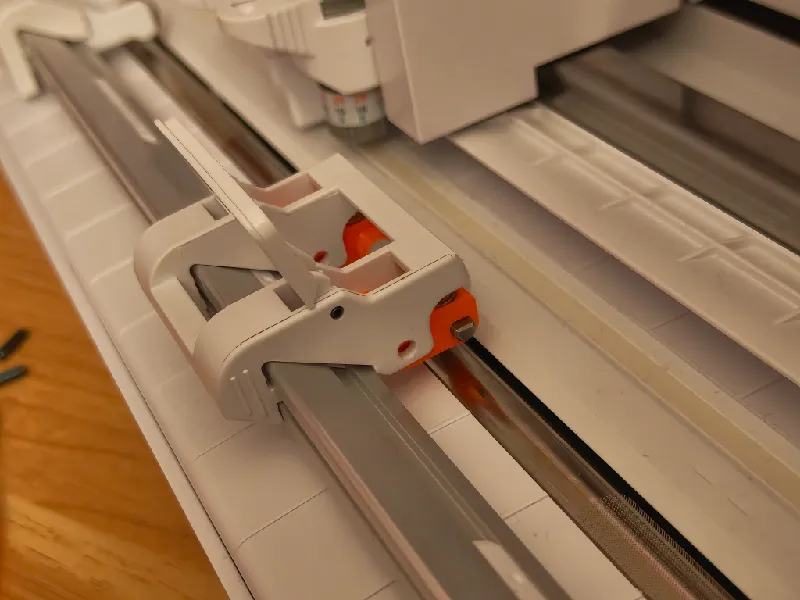
4. Now put in the pins again. If you are finding it hard to put in the pins the holes may not be aligned. Pull up, pinch or apply tension on the bar and 3d printed assembly to get the holes aligned before inserting in the pins. This can be tricky to do but to help with alignment and keep everything in place you can temporarily place in your tool then push in the pin while simultaneously removing screwdriver.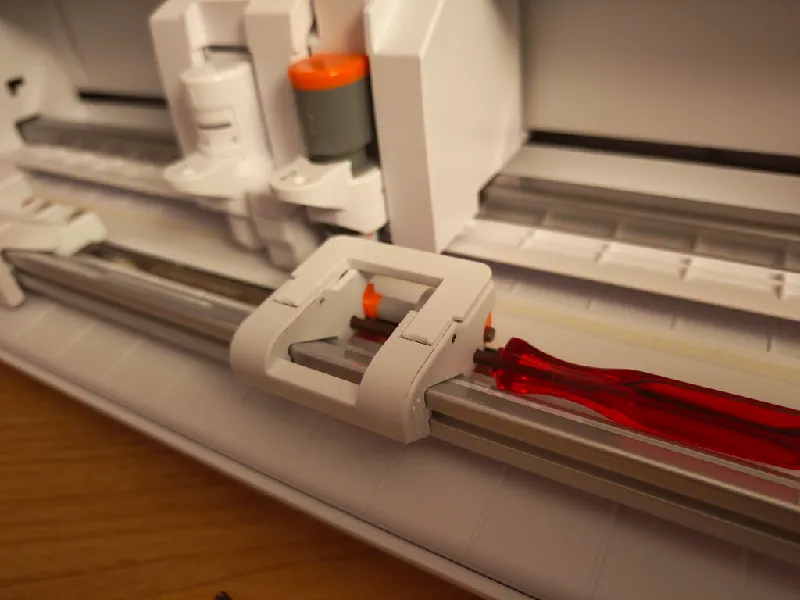
5. Test the mechanism. When installed the roller bearing should touch the long metal roller bar on the machine and remain tight but also disengage and move freely when the flap is lifted.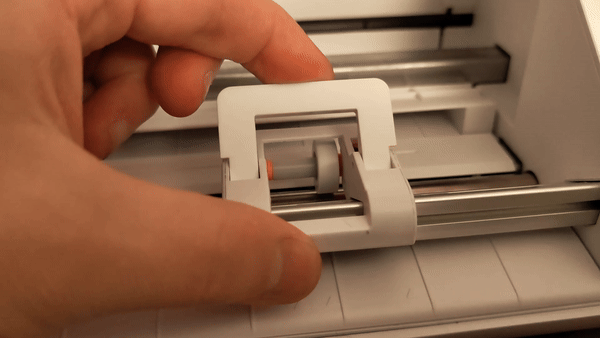
Follow me on socials
Twitter / X: https://twitter.com/wafflecart3d
Instagram: https://www.instagram.com/wafflecart3d
TikTok: https://www.tiktok.com/@wafflecart
YouTube: https://www.youtube.com/@wafflecart
Tip me
https://www.buymeacoffee.com/wafflecart
https://ko-fi.com/wafflecart
Patreon
Want to support me and allow me to create more models for 3D printing?
Check out my Support Tier on Patreon
Want to sell prints of my models or use them for promotional materials?
Check out my Commercial Tier on Patreon
Tags
Model origin
The author marked this model as their own original creation.