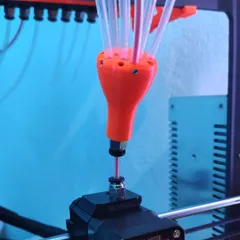
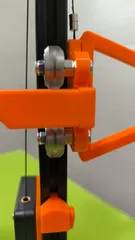
Prusa MK3S Idex
Description
PDFThis project was born to try and learn about Idex printers. I had a Prusa Mk3s printer so I modified the X carriage to add a second extruder.
This is not a finished project and some work is needed to have a fully functional Idex printer. Please refer to the "To-do" section and use at your own risk.
To get printer firmware files, go to https://github.com/gonchogsm/Mk3s_Idex
What do you need
Hardware
- Prusa Mk3s.
- Raspberry Pi. To run klipper.
- Nema17 motor with pulley. To move the extra extruder in the X axis.
- Complete Mk3s extruder. Motor, gears, fans, hotend, etc.
- Board to run the extra extruder and X motor. I used a SKR Pico that I already had but any other board should work as well.
- 24v power supply. I used a 200W 24v power supply to power the SKR Pico as I didn't want to mess with the original power supply.
- 2x GT2 16T pulley https://es.aliexpress.com/item/32817328238.html (16T W6 B3 without T).
- Linear rail 350mm. If you use a wider frame, remember to buy a longer linear rail.
- 2x carriage block MGN12H.
- GT2 belt for second extruder.
- POM nuts and linear bearings from old X axis.
Warning - Remember to check fan voltage! Original Prusa fans run at 5v but your additional board (i.e. SKR Pico) will run at 12 or 24v.
Screws (socket head if not specified)
X axis
- 2x M3x25 (tensioner)
- 2x M3 nut (tensioner)
- 2x M3x14 pin (to hold tensioner pulley)
- 3x M3x10 (to hold left motor)
- 3x M3x12 (to hold right motor)
- 4x M3x10 (Z rod clamps)
- 4x M3x18 (POM nuts)
- 8x M3 nuts
Tool backplate
- 1x M3x8
- 2x M3x10
- 1x M3x16
- 4x M3 nuts
Tool carriage
- 8x M3x6 countersunk head
Extruder 1
- Screws and nuts to mount the second extruder. Please refer to Prusa documentation.
Frame
Warning!!
Using stock frame will leave one or both nozzles on top of the bed when extruders are parked. You must ensure that first layers are ALWAYS done with the extruder that sits at a lower height. Otherwise the other nozzle will scratch your bed surface. I recommend using a wider frame, where both extruders are parked outside the bed, to overcome this issue. Please refer to the "To-do" section.
Printed parts
X axis
- x-axis-idler Idex.stl
- x-axis-motor-mount Idex.stl
- x-end-idler-tensioner x2.stl
Tool 0
- x-carriage Idex Tool 0.stl
- x-carriage-back Idex Tool 0.stl
Tool 1
- x-carriage Idex Tool 1.stl
- x-carriage-back Idex Tool 1.stl
- Print original Mk3s extruder parts. Except x-carriage and x-carriage-back.
Firmware
I recommend starting with a Prusa Mk3s running Klipper via RatOS.
Once everything works and you have calibrated pid, skew, etc you can add the second extruder.
You can use the provided printer.cfg with the configuration needed for the second extruder.
Slicer
Import "PrusaSlicer config.ini" configuration into PrusaSlicer.
Tool alignment
Tools can be aligned using a camera kTAMV or using printed patterns
To-Do
Endstops
I noticed inconsistent home positions when homing X. It could be an issue with sensorless homing or with my configuration. It would be worth trying physical endstops in X for both extruders.
Z endstop in second extruder
Pinda probe configuration in the second extruder is pending.
Frame
With stock frame you can't use all the bed. The frame should be replaced with a Prusa Bear frame but wider in X so both extruders are parked outside the bed. Note that each extruder is aprox 8cm wide, so the frame should be, at least, 16cm wider in X. Maybe extra 20cm in X?
Extruders
- Add a resting pad for each extruder to prevent oozing when parked.
- One extruder may be mirrored to increase clearance between extruders
Electronics
An alternative to use an additional board (i.e. SKR Pico), would be to use an EBB36 board in each extruder. Each board will control one extruder and they will be connected to the raspberry Pi via USB. That will free one stepper in the einsy board that can be used to control the extra X motor.
Mirror and copy mode
Both hotends must be at the same Z height to use mirror or copy mode. This has to be achieved by hardware. One solution is to use Slice Engineering copperhead hotend in both extruders. This hotend allows you to set the heat breaks at a different height as it's not a threaded heat breaks, it's secured in place by a screw. The idea is to loose both heat breaks, push both nozzles into the bed, then tighten the screws in both hotends to secure the heat breaks.
Credits
CM3D MK3S: https://github.com/ComunidadMaker3D/CM3D-MK3S
MK3 Caribou3D: https://github.com/Caribou3d/Caribou-MK3
Prusa Research: http://prusa3d.com
Prusa MK3s+ Lineal Rails X axis (Bear Project and CM3D remixed): https://www.printables.com/model/616378-prusa-mk3s-lineal-rails-x-axis-bear-project-and-cm
Warning
This is a work in progress. Use at your own risk ;-).
Tags
Model origin
The author marked this model as their own original creation.


