Rainy Day Key Hanger
Description
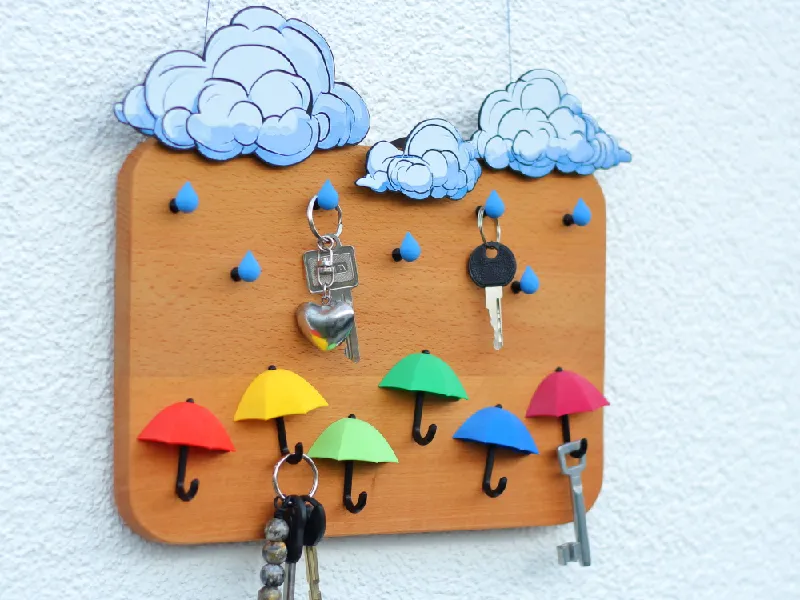
☔ Rainy Day Key Hanger☔
🌈 Make your own colorful key hanger! 🌈
🌞 Features 🌞
- Easy to print: no supports, no steep overhangs
- Dual-colored umbrellas: Two easy to assemble parts that are printed separately
- Hidden screw mounts for clean looks and durable mounting
- Beautiful clouds made with HueForge
This project is inspired by Thing 1995377 (Umbrella Hook by user msc82).
Bill of Material
- A wooden board, metal sheet or anything else that looks good and makes for a suitable base plate.
- M2 screws, washers and nuts.
- two of each for every umbrella. Length: min. 3mm + board thickness, max. 10mm + board thickness
- one of each for every droplet. Length: min. 13mm + board thickness, max. 14,4mm + board thickness
- Multiple filaments in different colors. The type of material doesn't really matter.
- For the droplets you'll probably want a light blue.
- Black works good for handles and the droplet's spacer, but you're free to try other colors.
- The umbrella canopies are entirely up to you - the more colorful, the better.
- Double-sided tape or PLA-compatible glue for the clouds
Required Tools
- 2mm drill
- Screwdriver
- Pencil or similar to mark spots on your base plate
- your 3D printer of course
Printing
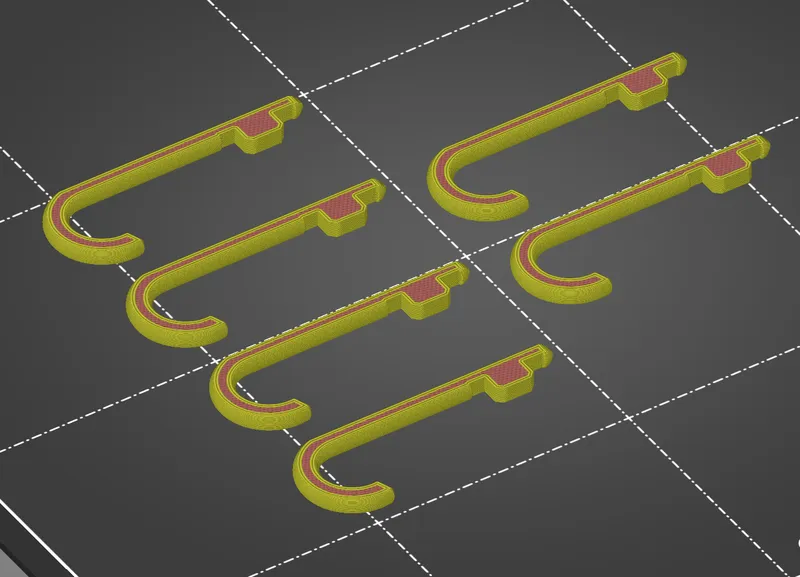
Umbrella - Handle
Place the handle lying flat on the build plate. Its sides are flattened for easy printing. You can simply print a whole batch at once, if you want them all in the same color.
Layer height: 0.1mm - 0.2mm
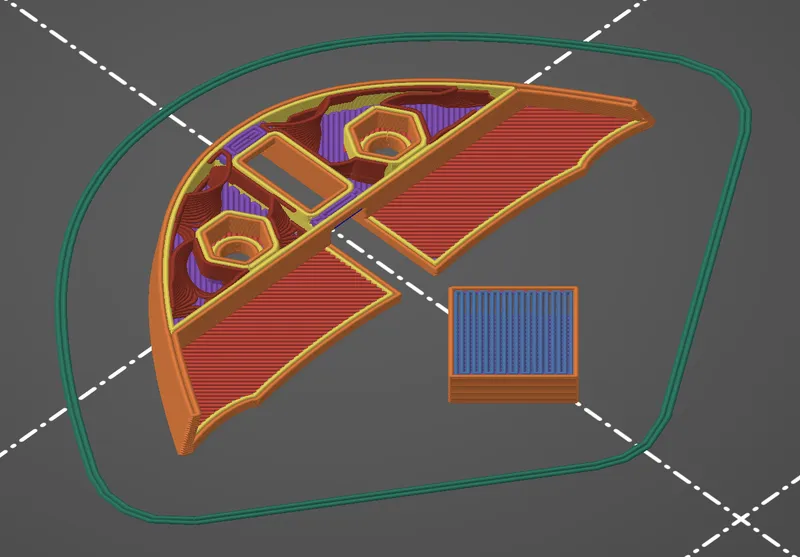
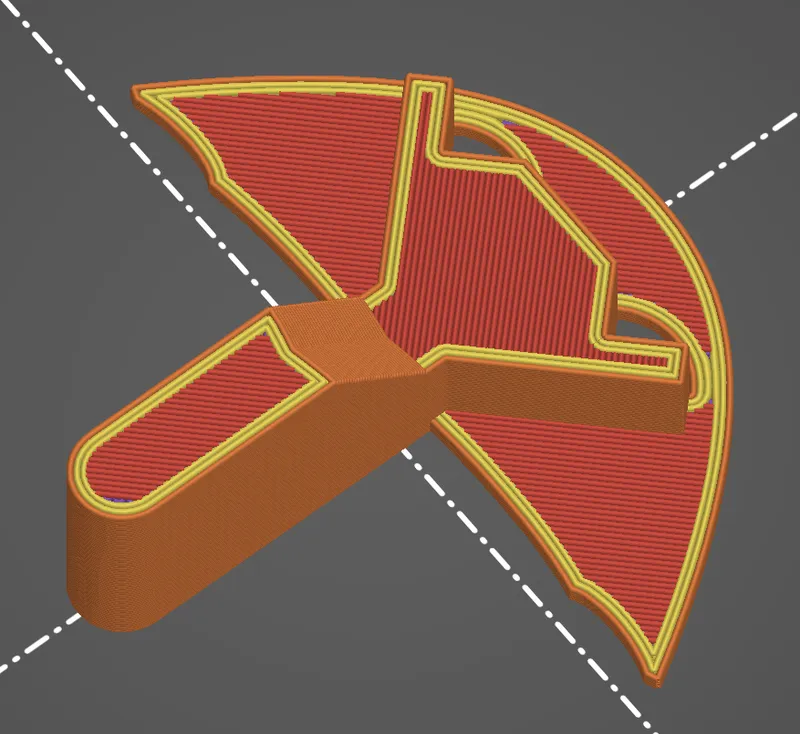
Umbrella - Canopy
Place the canopy with its back side facing down. Add a print pause at the next layer above 3mm (e.g. 3.2mm if printing 0.2mm layer height). Use the pause during printing to insert two M2 hex nuts into the canopy.
Painting the seams onto the inner side of the canopy will effectively make them invisible on the final product.
For convenience, I recommend to load my 3MF into PrusaSlicer. All the above is already configured there. Additionally the 3MF features a box, that has its top layer printed right after the pause, which will prime the nozzle again to prevent visible artifacts from under extrusion due to the nozzle oozing during the pause.
Layer height: 0.1mm - 0.15mm. The 3mf is set up for 0.15mm.
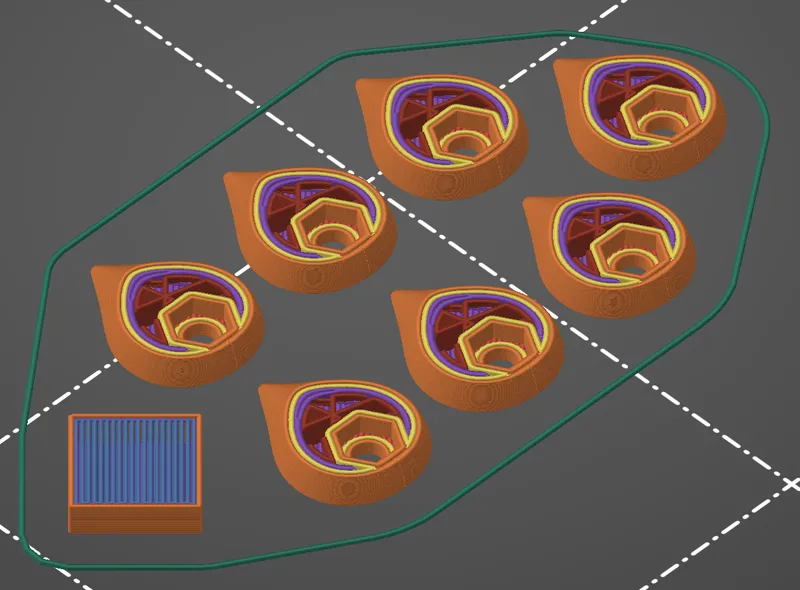
Droplets
Place the droplet with its back side facing down and add as many instances as you want. Add a print pause at the next layer above 3mm (e.g. 3.1mm if printing 0.1mm layer height). Use the pause during printing to insert an M2 hex nut into each droplet.
Layer height: 0.1mm, variable (thinner) layer height maked the upper part even smoother.
Again I recommend you to my 3MF into PrusaSlicer. All the above is already set up there, again including a sacrifical box to prevent under extrusion after the pause.
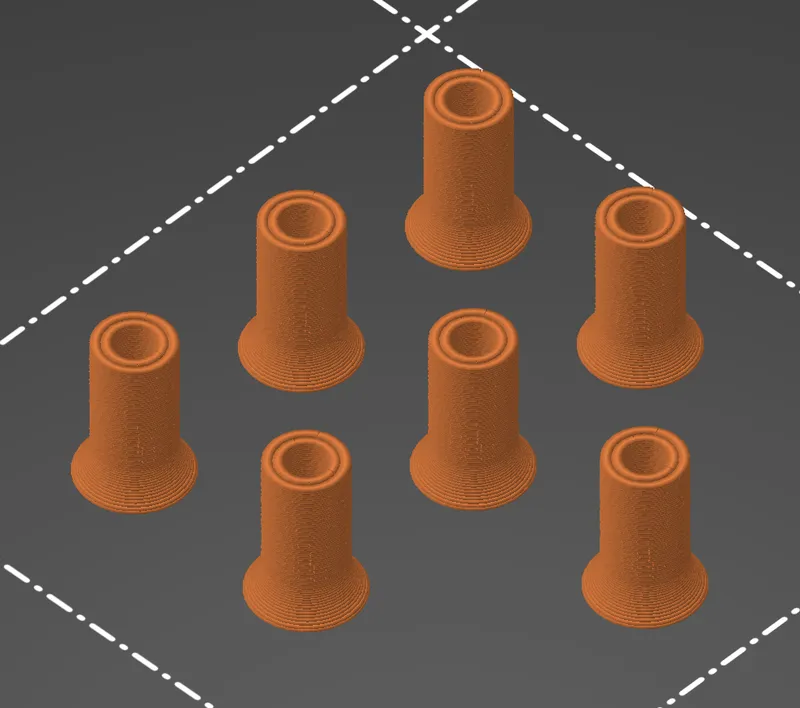
Droplet Spacers
Place the spacer with the sloped end facing down and add as many instances as you have droplets. Nothing fancy here.
Layer height: 0.1mm - 0.2mm
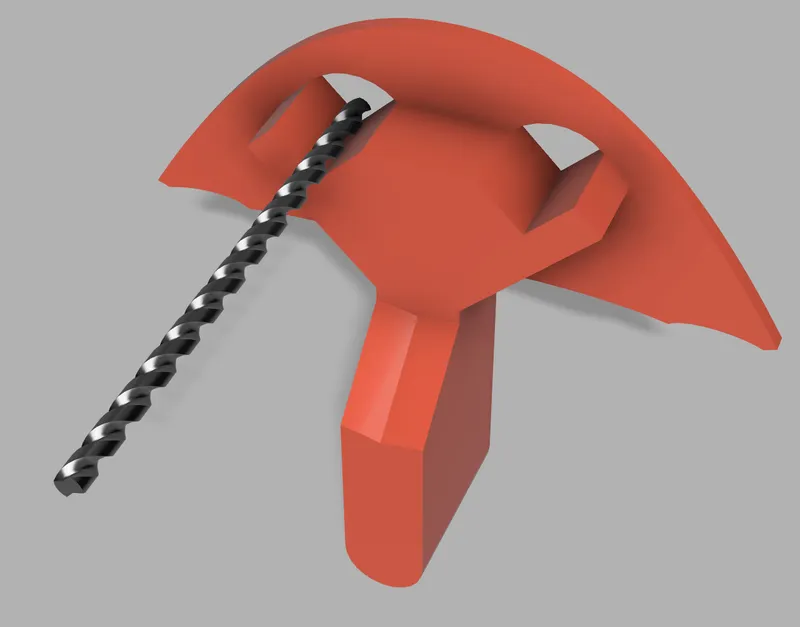
Drilling Guide
This piece will help you drill the holes for the umbrellas. Place it back side facing down. Doesn't need to be pretty.
Layer height: 0.2mm - 0.3mm
Clouds
Being a HueForge with non-rectangular shape, printing the clouds is a bit more intricate, but using my 3MF will give you a head start.
If you are new to HueForge and don't know the concepts filament painting - especially transmission distance (TD) - please take a look at the HueForge Wiki.
The basic facts: 0.04mm layer height, 4 different filaments:
- eSun ePLA-lite Black (but pretty much any black PLA will do)
- DasFilament PLA Himmelblau (= sky blue), TD 1.8. This is the same filament I used for the rain drops. Look at the photos, most filaments with a similar color will probably work.
- Elegoo White PLA, TD 6.3. Of course any white PLA with TD around 6 will work.
- DasFilament PLA Weiß (= white), TD 2.0. Any low TD white will work here - it won't contribute much to blending, but rather just makes sure to get pure white in the end.
The background is not zero-height in the STL, so you must cut out the clouds in the slicer!
The provided 3MF (PrusaSlicer) already includes all the filament changes, layer height optimizations, slicing optimizations and shape cutting. So this is probably what you want to use!
If you need to use a different slicer, you'll still want to import the 3MF as object (not project), because this will at least also import the negative shape for cutting out the clouds.
However, if you still want to opt for starting with just the plain STL, read the following instructions.
First of all, here's the description generated by HueForge:
Print at 100% infill with a layer height of 0.04mm with a base layer of 0.2mm
The Model is 150x121.47mm in size

You may print at higher layer heights below the Min Depth of 1.4mm
The Max Depth is 2.4mm and the Actual Depth is 2mm

Filaments Used:
PLA eSun Black Transmission Distance: 0.5
PLA DasFilament Himmelblau Transmission Distance: 1.8
PLA Elegoo White Transmission Distance: 6.3
PLA DasFilament White Transmission Distance: 2
This print uses 4 unique filaments

Swap Instructions:
Start with Black
At layer #33 (1.48mm) swap to Himmelblau
At layer #38 (1.68mm) swap to Elegoo White
At layer #43 (1.88mm) swap to DasFilament White for the rest.
Layer Height Optimization
- Use a first layer height of 0.2mm.
- Add a height range modifier from 0 to 1.36mm setting the layer height to 0.2mm.
- Add a height range modifier from 1.40 to 1.64mm setting the layer height to 0.08mm.
After applying these optimizations the layer numbers of the filaments swaps will not match the description above anymore. Stick to the Z-heights in parentheses, these always stay correct.
Slicing Optimization
This is general advice for slicing HueForges:
- top solid layers: 0
- bottom solid layers: 999
This might seem an odd setting, but doing so will speed up slicing a lot for some reason.
Shape cutting
Cutting out the shapes in the source image prior to HueForge will give you pixelated, rough edges, but I prefer them nice and clean. Therefore, I designed the clouds on a solid background and cut them out in the slicer using an SVG.
Remember: this is already prepared in the 3MF and you only need to do this, if you chose to start from scratch with just the STL.
This is how it works:
- Download the “clouds_cutting_tool.svg” from the additional files section.
- After loading the STL in the slicer, right click it on the plater or the object tree and select Add negative volume > SVG
- Select the downloaded SVG
- Press ‘1’ on the numpad. This will make the camera face the plater in an exact top-down view.
- In the SVG editing pop-up click Face the camera. This will ensure that the negative volume is perfectly alined with the XY plane.
- Make sure Depth is at least 2mm.
- Select the SVG in the object tree.
- In the Part manipulation box below the object tree select Object coordinates from the drop down box.
- Set X and Y to 0.
- Click the little Drop to bed button next to the input box for Z.
If you set up everything correctly, you should end up with something like this after slicing:

Assembly
Umbrellas
- Press the handle into the slot on the back side of the canopy.
- Arrange the assembled umbrellas on your base plate (wooden board, metal sheet, etc.) to find a layout you like.
- Replace a single umbrella with the drilling guide and mark the spots for drilling.
- Repeat #3 with all of your umbrellas
- Drill the first hole. The drilling guide wil help you to drill perpendicular if used like in the picture below.
- Insert a screw into the first hole through the guide and press the guide against it. Then drill the second hole.
- Repeat 5. + 6. for all umbrellas.
- Insert screws and washers from the back, feed them into the umbrella's screw holes and tighten the screws.
Droplets
- Arrange the droplets to your liking.
- Drill a hole for every droplet.
- Insert a screw and washer into the hole from the back for every droplet.
- Put a printed spacer onto the screw with the widened end towards the boards.
- Screw on a droplet and tighten the screw.
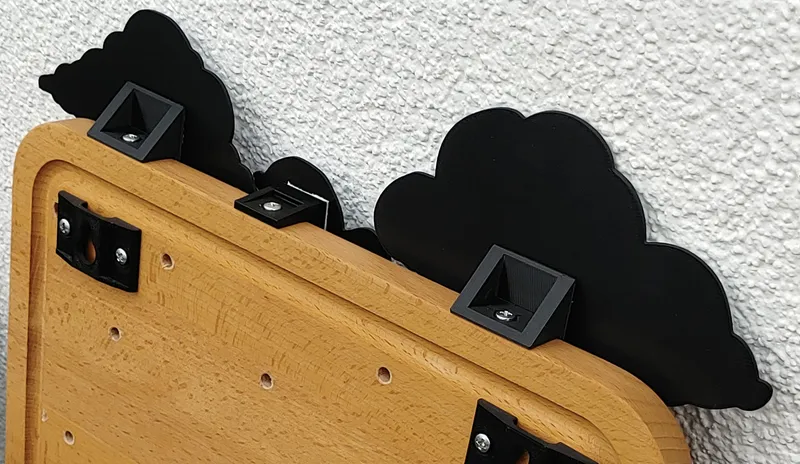
Clouds
Being a HueForge, the clouds are flat without mounting points. If you use a wooden board as base like I did, you can make use of the mounts I put into the Clouds directory.
You can screw these into the top edge of the board and they will add a little depth to the clouds. Use some double sided tape to glue the clouds to the mounts.
CloudMount1 adds 3mm and CloudMount2 adds 8mm of space, while also moving the glueing surface a bit down. I used CloudMount1 for the outer, big clouds and CloudMount2 for the small center cloud.
Wall Mounts
You can find my wall mounts here: https://www.printables.com/model/856364-wall-brackets-for-boards
Thanks for reading all this to the end and happy printing!
Tags
Model origin
The author marked this model as their own original creation.


