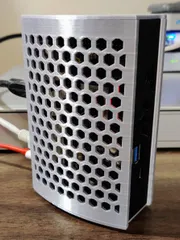
Raspberry Pi 5 - Geek Pi M.2 NVME drive to PCIe hat case
Description
PDFBought a Raspberry Pi 5 along with the "active cooler" from Chicago Electronics Distributors and a "GeeekPi N04 M.2 NVMe to PCIe Adapter for Raspberry Pi 5, Support M.2 NVMe SSD 2230 2242 2260 2280" from Amazon. Needed a case, so voilà. Enjoy!
Print Settings
Printer Brand:
Prusa
Printer:
i3 MK4
Rafts:
No
Supports:
No
Resolution:
.2 mm
Infill:
15%
Filament: SUNLU PLA+
Notes:
Printed at .2mm (speed setting) and it prints in 3 hrs 37 min., and it still looks pretty good.
YOU NEED TO FLIP THE TOP HALF SO THAT THE TOP PRINTS ON THE BUILD PLATE.
Post-Printing
May need minor clean up.
Run your finger nail under the tiny snap clips that are on the top half of the case to make sure they are clean and without obstruction. You will need to insert the Raspberry Pi 5 into the bottom half first with the USB-C and micro HDMI ports angled down. Then carefully snap the Pi into place with a firm push at each corner. Then carefully snap the top of the case on. If you need to open up the case, I have found it easiest to turn a flat head screw diver in the gap on the back side that gives access to the GPIO pins.
There are also cutouts on the bottom side for applying four stick on rubber feet. Look for "Scotch SP951-NA Bumpers and Door Stops, 1/2" Round, Clear".
How I Designed This
About the design process...
I run Ubuntu Linux on all my home computers. This limits my choices for CAD software so I have taught myself how to use FreeCAD since there is a native Linux version that seems to be getting more stable as time goes by.
Category: Computer
Tags
Model origin
The author marked this model as their own original creation. Imported from Thingiverse.


