Collapsable Tennis Ball Thrower
Description
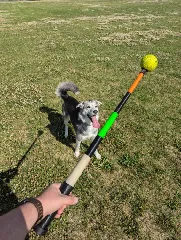
PDFWhen you have a dog that loves playing ball, a thrower helps save your shoulder and keeps you from handling drooly gross tennis balls.
But carrying a 2 foot long thrower can be awkward. So I designed a collapsing thrower, so that it's easier to get to and from the park.
It works quite well, my dog loves it.
It has a small hook to allow you to use a rubber band to keep it closed.
Tennis balls work best, but it's compatible with any tennis ball sized balls (ChuckIt, Nerf, etc). I recommend lighter balls, as the heavier ones (for example the full rubber ChuckIt balls in the pictures) put more stress on it.
When extended it's about 2 feet long. When collapsed it's about 9 inches long.
Parts Needed:
It's designed to use an M3 bolt and an M3 heat press insert. Alternatively you can use an M3 bolt and nut or it's 1/8" imperial equivalent.
It can also be glued instead of using bolts, but that makes it so parts are not replaceable when they break.
Printing Instructions:
Turns out I've accidentally been using both PLA and PETG and both work well. I recommend making the seams random, that'll make the tubes fit and slide more easily with less post-processing.
The grip and end cap can easily printed together, as the same settings are recommended. Same with the tubes and tip.
Starting at the bottom:
End cap - There are 2 files, one with a belt clip and one without. The one without the clip is the one I prefer, the clip can snap pretty easily, despite a pretty beefy design. No supports should be needed. Print with the bottom on the bottom.
Grip - No supports are required. Print with the threaded end (bottom) on the bottom.
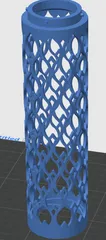
Tubes - No supports. The tubes are numbered from the widest to the narrowest, 1 being the widest. Tube number 1 is thicker than the other tubes, as during testing it broke. The file is for 4 sections, but they can be separated and printed individually if you have a break. Print with the numbered end at the bottom. I recommend an outside brim for all of these.
Tip - More solid than the tubes, and has a hole through it for the bolt/heat press insert. Print wide end at the bottom, outside brim recommended.
Head - The most complex bit. Best in PETG. I use 4 walls. Requires supports. Best orientation I have found is pictured. It's minimal supports, and could probably work with just a brim, but I haven't tried.
Assembly Instructions:
After getting rid of any supports or sharp edges:
- Put the tubes into the grip
- Install the heat press insert (if used) into one side of the hole in the top of the tip. Wait for it to cool.
- Put the tip into the the remaining space in the middle of the tubes
- Screw on the end cap
- Slide the head onto the tip and line up the holes. Insert the bolt through the holes and screw in (or attach nut).
- Throw the ball.
May 14, 2024 update - Thrower head updated to latest, easier to print and stronger version.
Tags
Model origin
The author marked this model as their own original creation.


