Quietmode! Flashforge Adventurer 5M (AD5M) Back Panel w/ 120mm & 4010 fan
Description
PDFDisclaimer:
Before you start doing anything with electrics, make sure that you understand what you are doing and comply with all conditions for your safety, the safety of others, as well as the safety of equipment.
__________________________________________
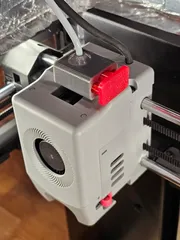
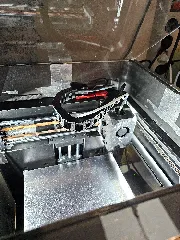
The model was adapted for the 5M non-PRO version in official print enclosure, so the PRO version will have a small slot on top when installed, but the engine compartment will be normally closed
__________________________________________
Why:
I wanted to install a fan to filter the air when printing smelling ABS. I also noticed that when printing ABS (100 degrees bed), the heated air from the printer chamber through the belt holes got directly to the motors and warmed them very much. I solved all the problems with this back panel. But you can use this panel simply for additional blowing of the board / motors, or in order to get rid of the noisy little fan in the engine compartment
1) Filtration of air by pulling it out using a 120mm fan from the chamber through a carbon filter. After installing the entire system, the odors from the ABS disappeared by 90%, however, I used another filler, folding it in several layers and very tightly in a box.
2) 4010 fans installed on the motors not only reduce their heating, but also compensate for the pressure created by the 120mm fan, due to which the warm heated air is almost not pulled through the belt holes in the housing, but is pulled through a carbon filter. I checked the temperatures in the chamber and they changed only slightly, no more than 2 degrees.
3) The printer began to work much quieter because I used a step-down DC-DC converter LM2596, all fans (including stock fan blowing drivers) in the engine compartment operate at extremely low speeds (about 7-8V voltage) (You don't have to do this, but only power the new fans directly from the power supply).
4) The assembled panel is screwed to the frame on the using the stock screws. This panel can be used with a self-printed official enclosure (downloaded from the flashforge wiki), but I think it should work with anything because it completely repeats the dimensions of the original cover.
Optionally: you can use the version without fans 4010 and without the power button (there is a folder in the files for this option). You can also not use the LM2596 step-down converter, but install a 24V 120mm fan.
__________________________________________
What do you need:
The complete set consumes ≈120 meters of filament (≈300g ABS)
The panel is assembled with M3x5mm screws, and you can also use screws with a longer length of 8 or 10mm. Below is a list of what you may need for this modification:
Screw M3 5mm — 10pcs
Nuts M3 — 18pcs
Screw PC fan — 8pcs
12V 120mm fan or 24v 120mm fan
Screw M3 15mm (optional) — 8pcs
4010 fan 24v (optional) — 2pcs
On-Off 2pin switch 15x10 (optional)
DC-DC LM2596 (optional)
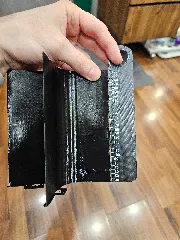
If you use a carbon filter: be sure to plug the lower filter hole with something, such as a cloth, insert the carbon filter into the upper hole. I also recommend sealing all the cracks from the print body into the engine compartment using foil tape or other material convenient for you.
For proper filtration, the 4010 fans must blow air into the housing, and the 120mm fan must blow air out of the housing
__________________________________________
How to:
I recommend using hard plastic, such as ABS or ASA, however, when using it, keep in mind that they have shrinkage (reduce) and the final model may turn out to be less than intended, so be sure to specify the shrinkage coefficient of the material in the slicer (it can be found using test prints with this plastic).
However, you can use any plastic (PETG, PLA) that is convenient for you because there is no physical impact on this panel, but when twisting the panels, try not to overdo it ;)
Print 100% infill, 3-5 perimeters, supports are not required, membranes are installed in places where they might be needed, panel B and panel C, you can remove them after printing, or do nothing and screw directly into them. Also, nuts need to be inserted in these panels, this may require a little effort, I made them very tight so that when removing the lid they do not fall out
<3
Tags
Model origin
The author remixed this model.
Differences of the remix compared to the original
Adapted to the non-pro version AD5M in official print enclosure, with the possibility of installing a standard (non-slim) 120mm fan and additional 4010 fans for blowing stepper motors


