Easy printable bokeh kit for photography

Description
PDFEnhance Your Photography Experience with Our Unique Bokeh Kit!
Explore a new dimension of creativity with our custom-designed 3D-printed Bokeh Kit, crafted to elevate your camera experience to unprecedented heights. Bring your photography to life by transforming traditional bokeh effects into breathtaking shapes and figures that complement your unique style.
Creative Freedom in Your Hands
With our exclusive design, you can endlessly experiment with bokeh shapes, giving you the freedom to tell your visual stories in a unique way. Create magical effects, from heart-shaped lights to starry skies, and add a personal touch to every image you capture.
Easy to Attach, Instant Results
Our Bokeh Kit is designed with your convenience in mind. Easy to attach to your camera lens, it delivers stunning results instantly without complicated installations. Unleash your creativity without hassle, and enjoy the effortless transformation of your photographic world.
Here are some examples of what it looks like when you photograph with this kit.


Photographing with a Bokeh Kit:
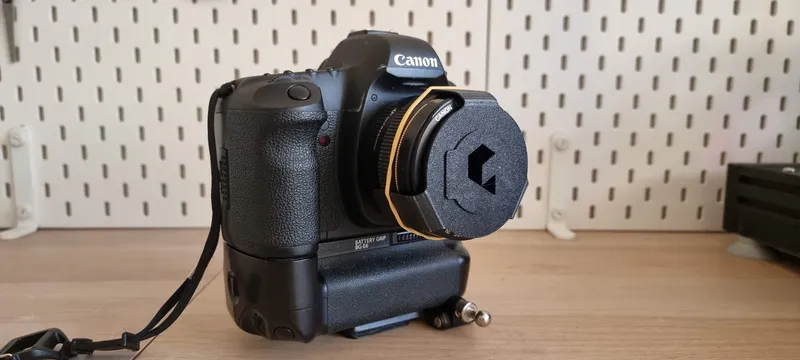
Step 1: Attach the Bokeh Kit to your Lens
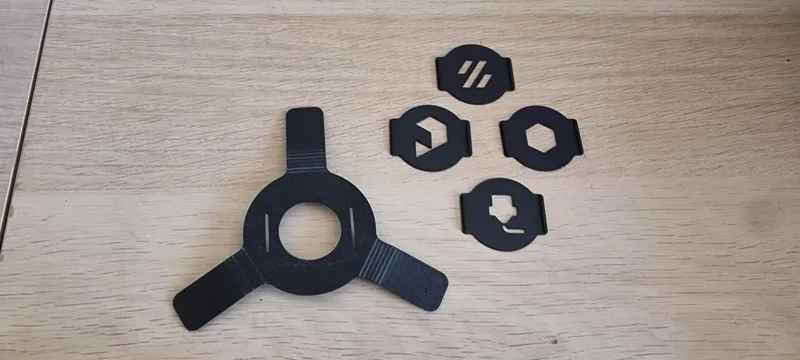
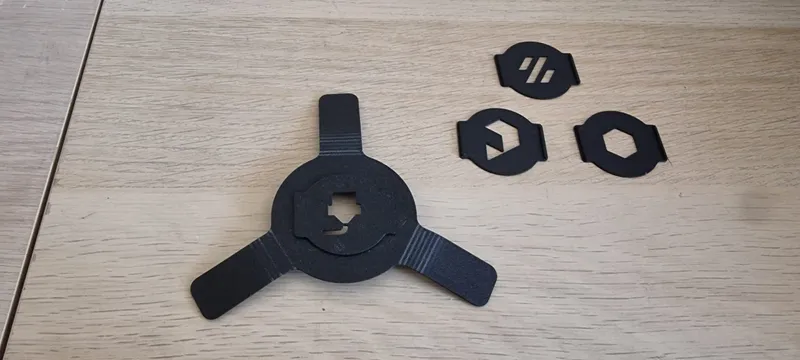
Place the bokeh kit on your lens by securing the circle in front of the lens. Fold the three flaps around the lens and secure them tightly with the elastic. Ensure that the kit is well attached and that your lens is free from fingerprints or dust.

Step 2: Choose your Favorite Bokeh Shape
Select the desired shape for your bokeh effect by placing the corresponding shape insert into the bokeh kit. The shape you choose determines how the light points in the background will appear. Choose a shape that complements the atmosphere you want to create in your photo.
Step 3: Adjust the Settings
Set your camera to a wide-open aperture (a low f-number such as f/1.8 or f/2.8) to create a shallow depth of field. This ensures that your subject is sharp while the background becomes blurry with the chosen bokeh effect.
Step 4: Select the Right Subject
Choose a subject you want to photograph and place it in the desired position in the frame. Consider composition and make sure there are interesting light sources in the background.
Step 5: Focus on the Subject
Focus on your subject to ensure it is sharp and clear. Use manual focus if necessary for more precision.
Step 6: Experiment with Exposure
Play with exposure settings such as shutter speed and ISO to find the right balance between capturing enough light and maintaining the desired atmosphere in your photo.
Step 7: Shoot and Evaluate
Take the photo and review the result. Experiment with different shapes and settings to discover which bokeh effect suits your photo best.
Step 8: Edit if Necessary
If needed, you can further edit the photo in photo editing software to optimize colors, exposure, and sharpness.
By following these steps, you can create creative and engaging photos using a bokeh kit. Don't forget to experiment and develop your own style!
Tags
Model origin
The author marked this model as their own original creation.


