Zaunkoenig M1K PCB

Description
PDFSTEP file for the PCB of the Zaunkoenig M1K. This file is not intended to be printed out. It is intended to help you design a gaming mouse shell for the M1K PCB. See our blog article «The worlds lightest gaming mouse PCB» for more information on this PCB.
If you are looking for the STL file for the M1K bottom shell, you can find it here on printables.com.
A note about the screws used for the M1K PCB:
We use three T6 M2 screws to screw the M1K PCB onto the M1K bottom shell (two more of these screws are used for the cable stress relief and the carbon fiber shell, by the way). See this M1K disassembly video by BeardedBob for more information.
A note about the distance between the sensor and your tracking surface (your mouse pad):
PixArt in the 3360 data sheet recommends a «Distance from Lens Reference Plane to Tracking Surface» of at least 2.2 mm, 2.6 mm at most with the typical value being 2.4 mm.
Weight overview:
- M1K PCB (including lens): 6.8 grams
- All seven screws: 1.4 grams
A note about the cable setup we use for the M1K PCB:
- Pinout: The black conductor (ground) should be inserted into the Molex receptacle so that it is the one closest to the sensor, followed by yellow (D+), white (D-) and red (5 Volt).
- The M1K cable has a diameter of 2.5 mm ±0.15 mm.
- Crimps: The little golden thingies that are on the end of each of the four conductors are called crimps. The ones on the M1K cable are made by Molex and are from their Pico-Lock product family (MPN: 5040520298).
- Crimp receptacle: The black plastic part that you insert the four crimped wires into (MPN: 5040510401).
- PCB header: This is the part that you insert the crimp receptacle into. This part is soldered onto the M1K PCB, so normally you do not need buy it for a mod with the M1K PCB (MPN: 5040500491).
- Crimping tool: The official crimping tool for the above crimps costs $540, which is pretty expensive (MPN: 0638270900). If you only want to crimp one cable it is not worth it spending that much. Instead just get the Engineer PA-09 or the PA-11 (see this article for a comparison of both).
A note about the modding capabilities of the M1K PCB:
You can modify the M1K PCB either by modifying the open-source firmware of the M1K or by using ten modding pads (a small golden circle with a hole in it, so you can easily solder a wire to it) on the left and right side of the M1K PCB.
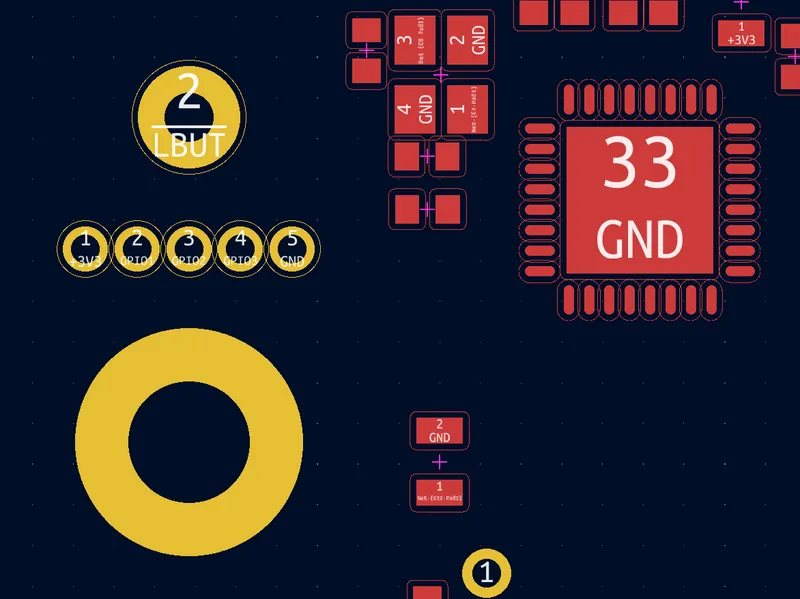
The following picture shows the five modding pads on the left side of the M1K PCB (below the left switch):
The following picture shows the five modding pads on the right side of the M1K PCB (below the right switch):

Tags
Model origin
The author marked this model as their own original creation.


