Macro Photography Diffuser


Description
PDF👋 Introduction
In Macro Photography, you rarely have enough light as you need to close the aperture very far in order to get enough depth of field. To counteract this, many photographers use a flash to illuminate their scenes. Unfortunately flashes have a few problems:
- They are built to illuminate objects further away and not so close to the lens. Therefore their angle is often not great for macro photography
- They tend to create white reflection spots on reflective surfaces (like chitin of insects) that do not look very nice
To improve the situation, a diffuser is placed between the flash and the object. As its name says it diffuses the light and creates a more even illumination of the object. There are many DIY instructions online on how to build such a diffuser with various materials like pringle cans (I liked this one or this german one). Also commercial solutions are available like the pope shield or AK-Diffuser. As an owner of a 3D printer, I liked the idea to build my own diffuser.
🖇 Compatibility
This diffuser was designed to work for my own setup which is the
Sony 90mm f/2.8 Macro Lens (SEL90M28G) (amazon)
In addition to that, it was designed so that it also works with the additional
Raynox DCR 250 super macro conversion lens (amazon)
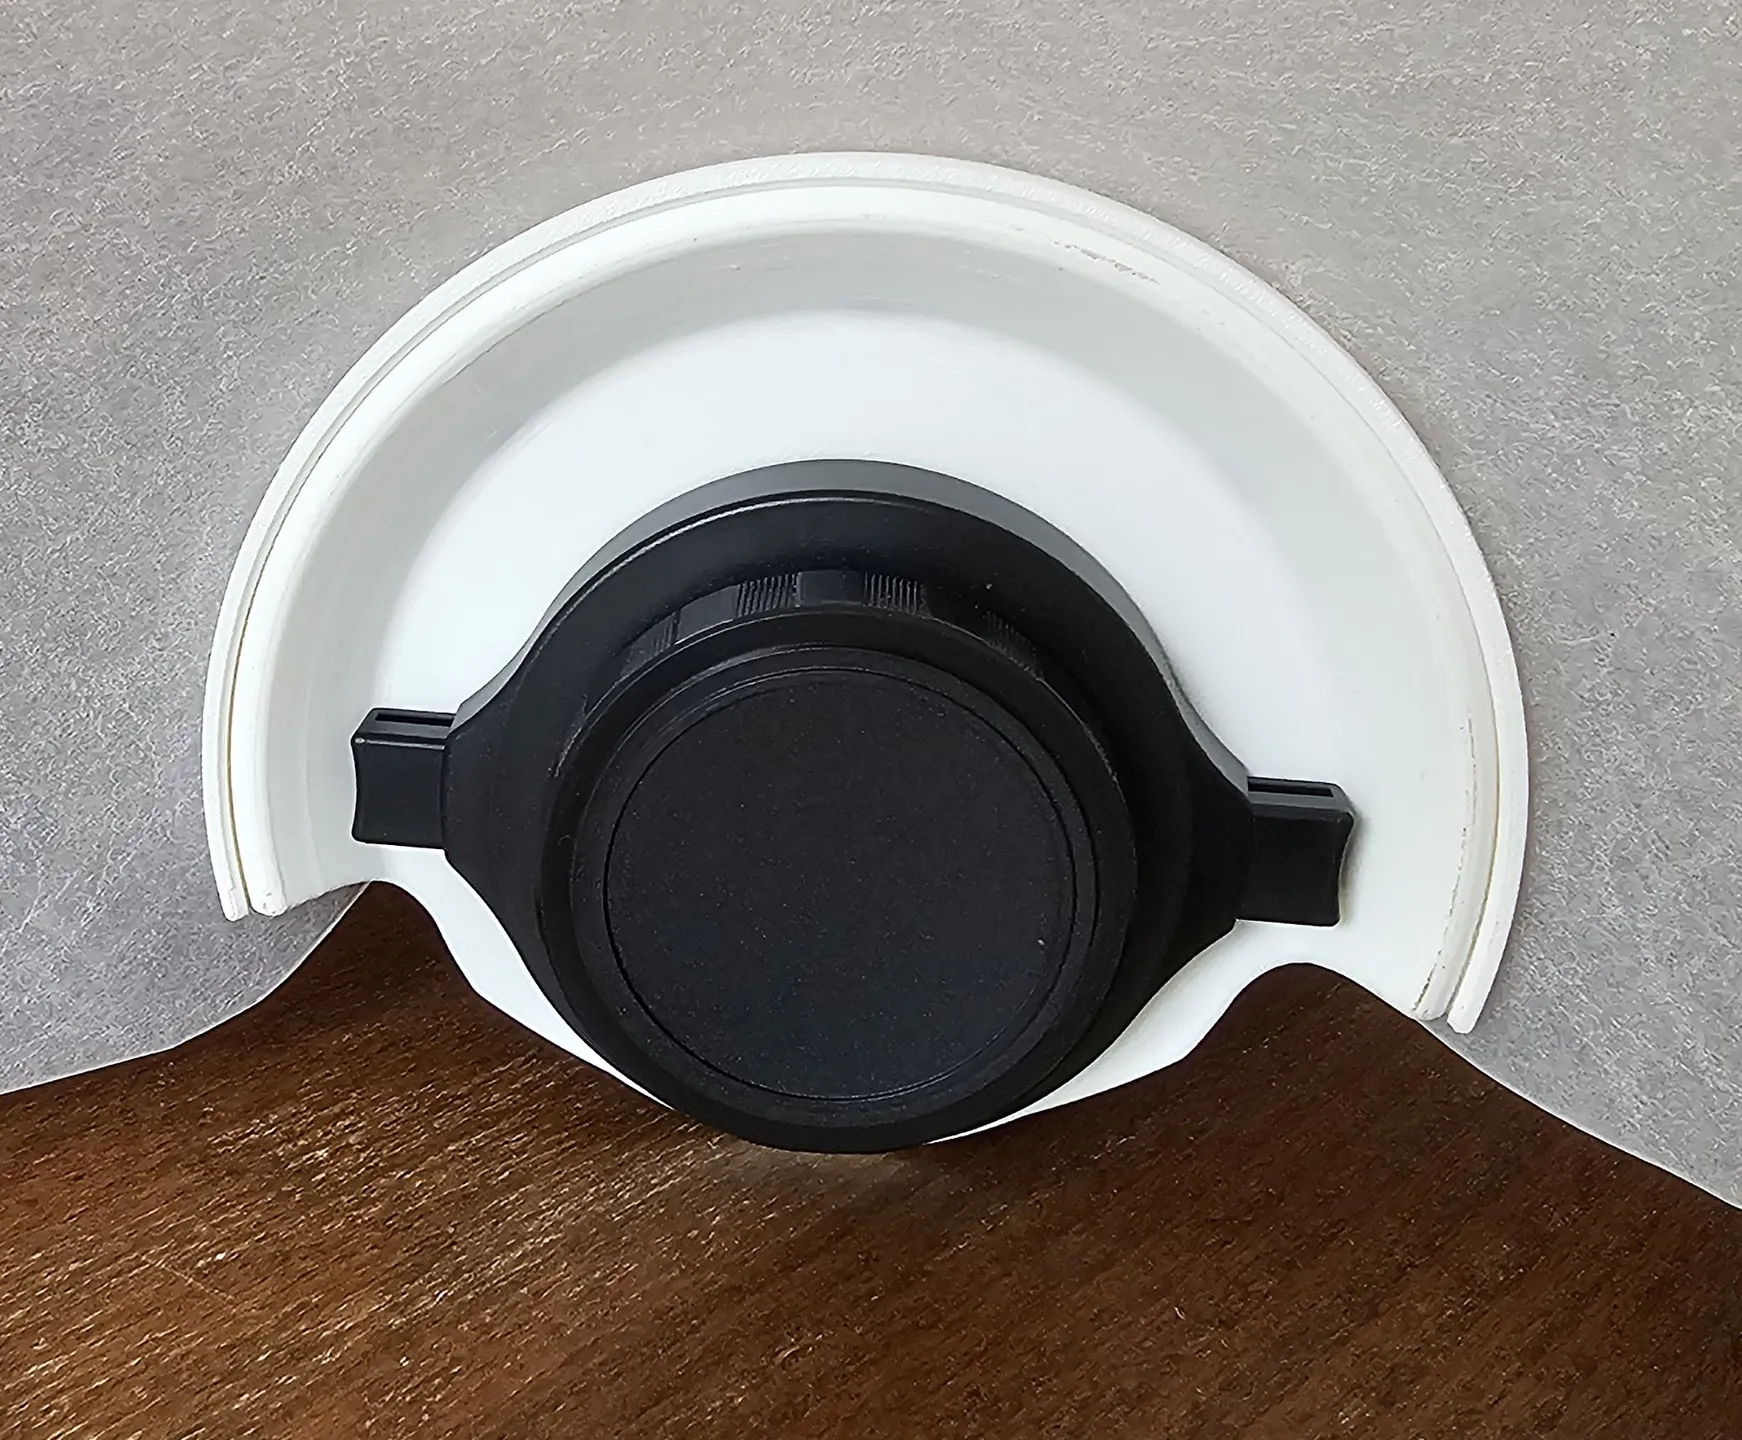
It attaches to the mounting ring of the sun visor of the lens. I do not know if the adapter may fit other lenses.
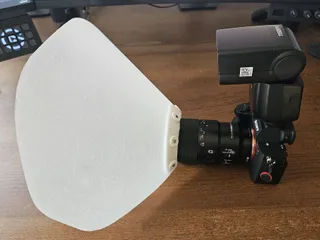
I further use a Sony Alpha 7 IV with a Godox TT685 II S Flash (although that is not a requirement)
📃 What you need
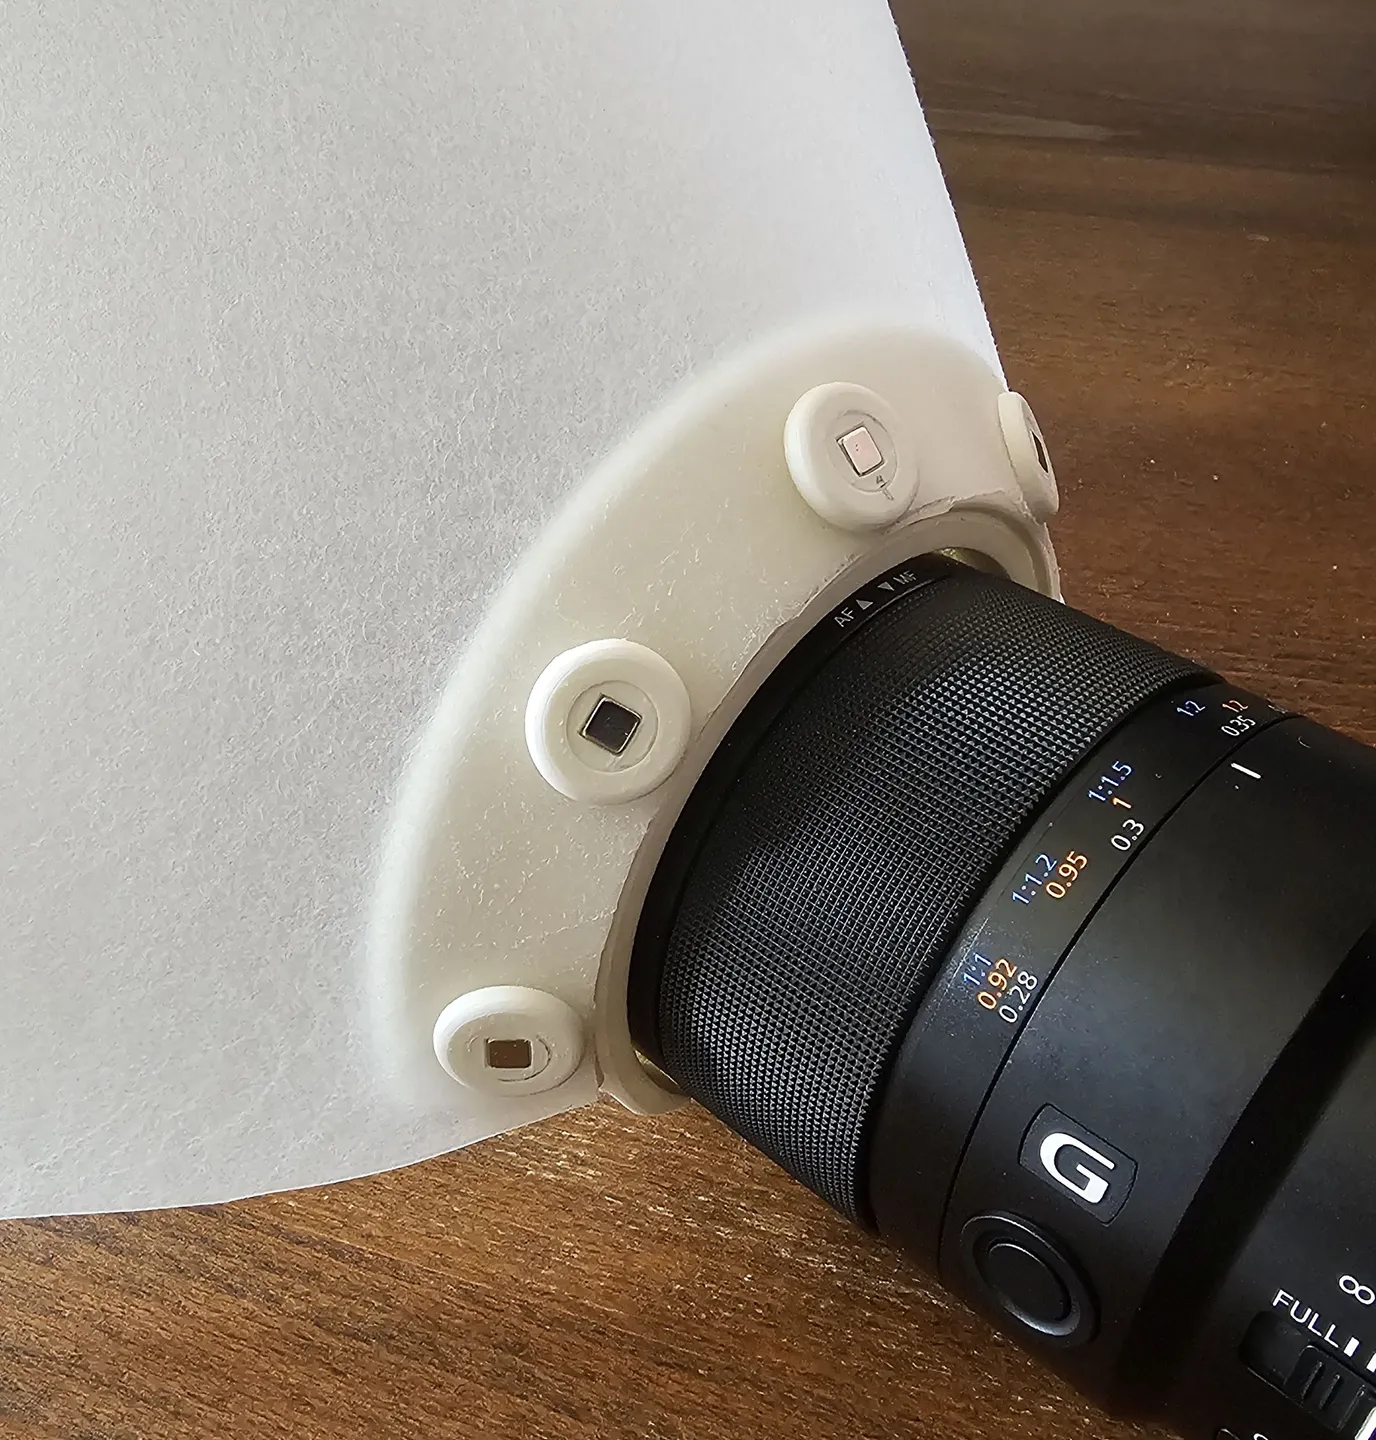
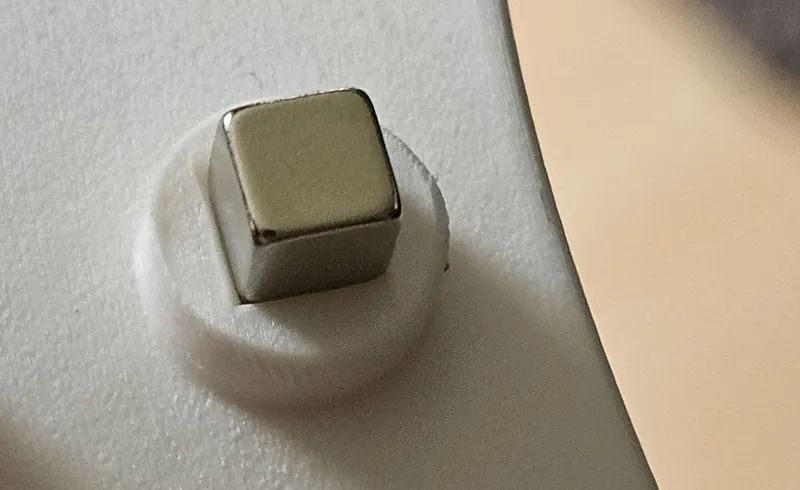
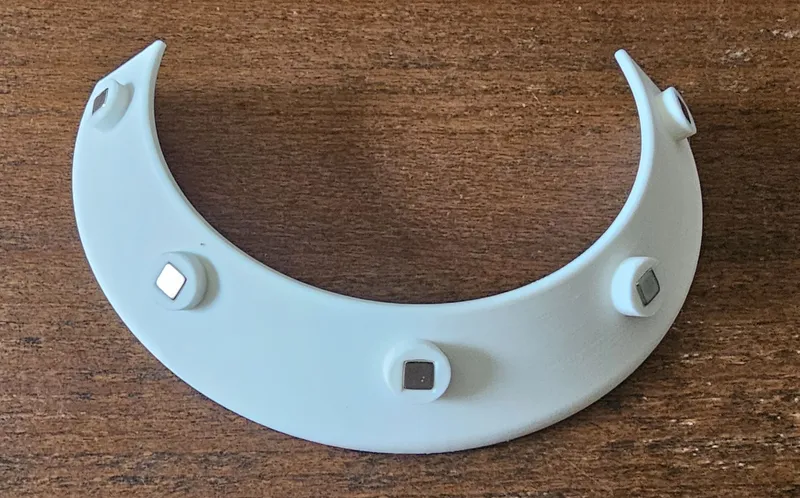
- 10x Cubic 5mm Neodynium Magnets (I used those)
- Rigid Diffuser Material. (I used 0.7mm PE dinig table mats)
- Sand paper P40
- Scissors/Ruler/Pen
🔨 How to Build
- Print the parts, you will need five of the small rings. I used the Extra Fine 0.08mm Profile of my Bambu Labs X1C Printer, but I guess you will get away with less. The camera adpater needs supports, the other parts can be printed without.
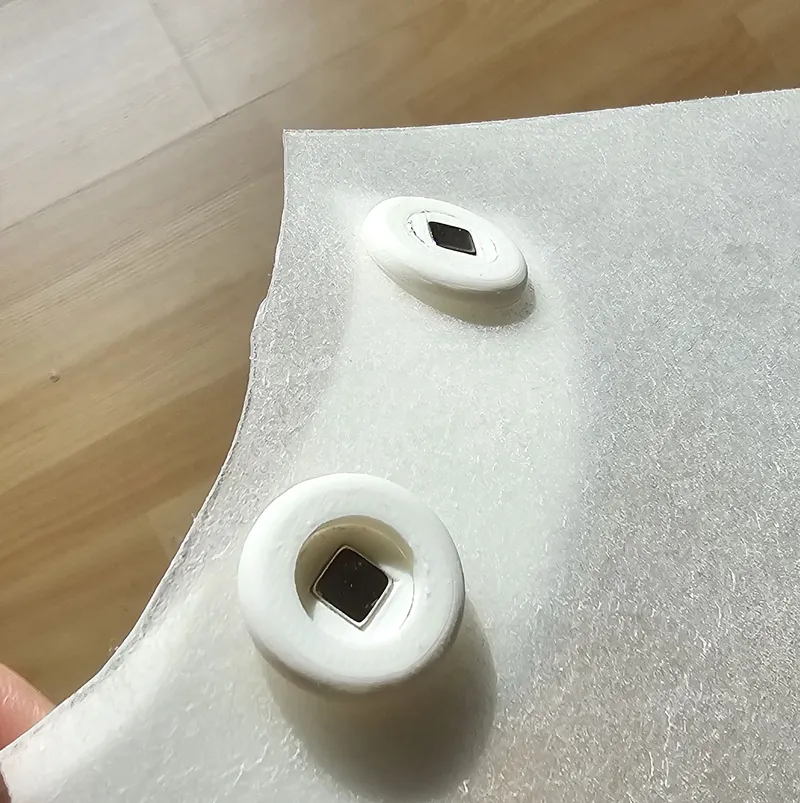
- Press the magnets into the holes. For this, try to align the magnet as shown in the image. Then firmly press the magnet inside using a ruler.
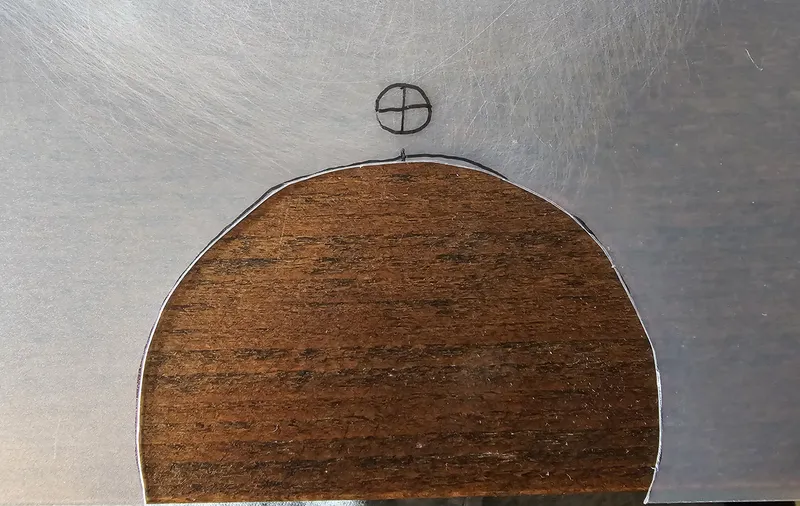
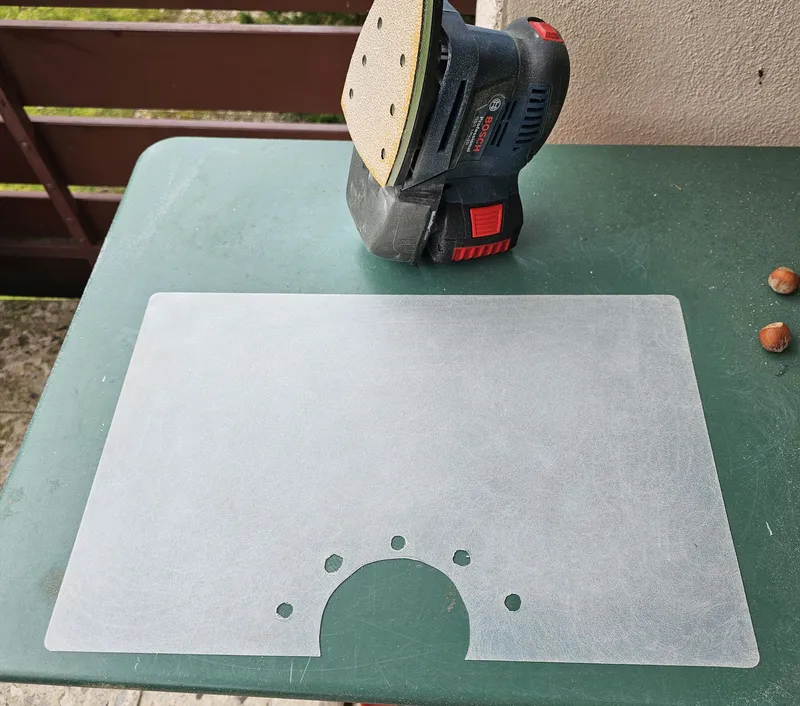
3. Grab your diffuser and try to mark the outline of the adapter as shown below. Then cut out this first shape.

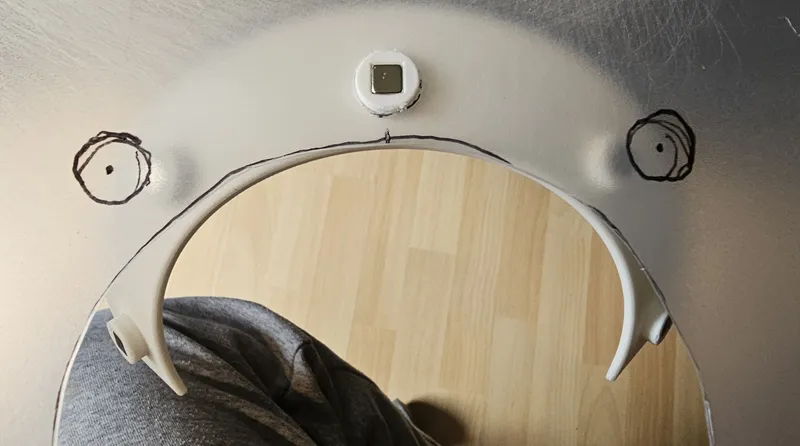
4. Again align your cut with the adapter and mark the first hole and make a hole using a 10mm drill
5. Continue marking and drilling the next holes
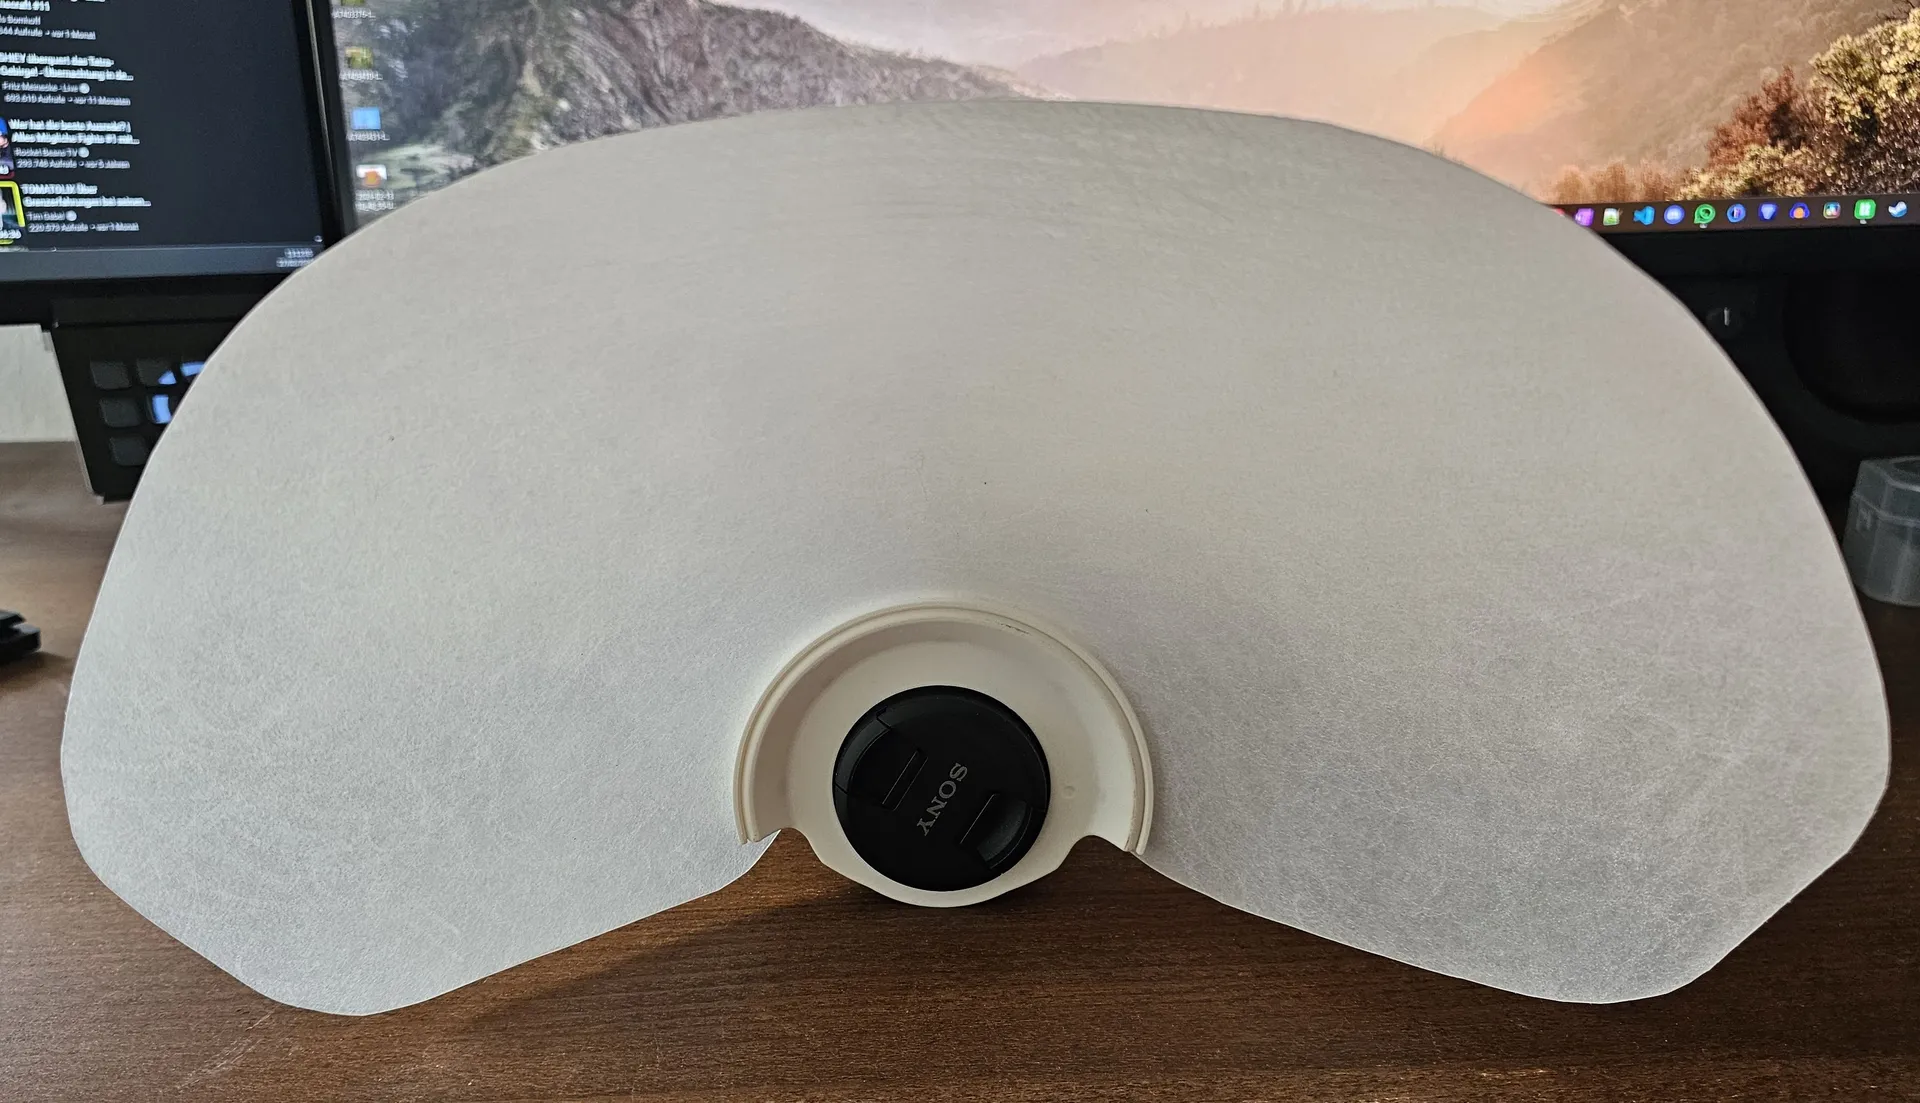
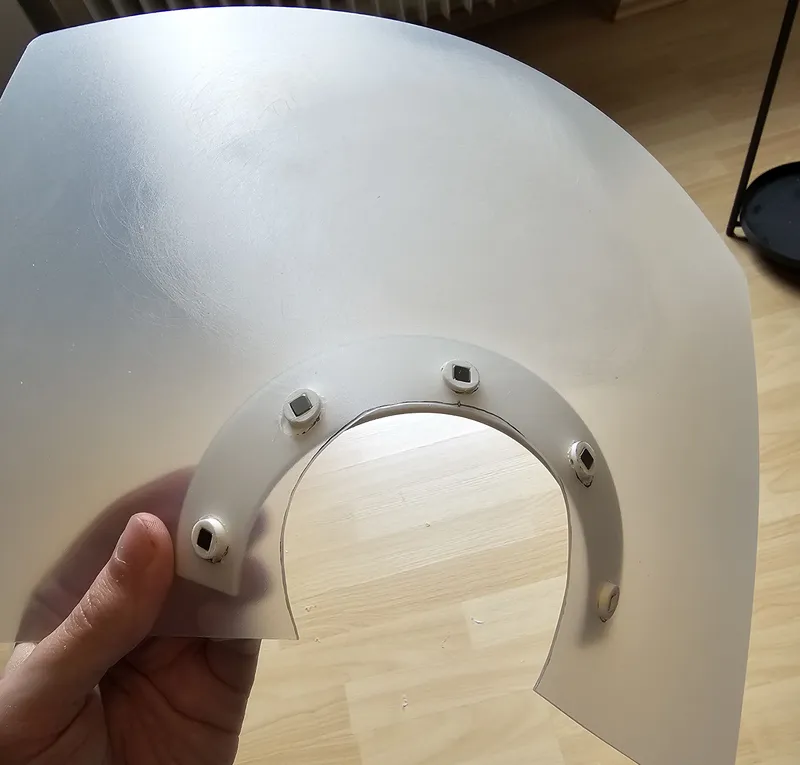
In the end it should fit over the adapter something like this:
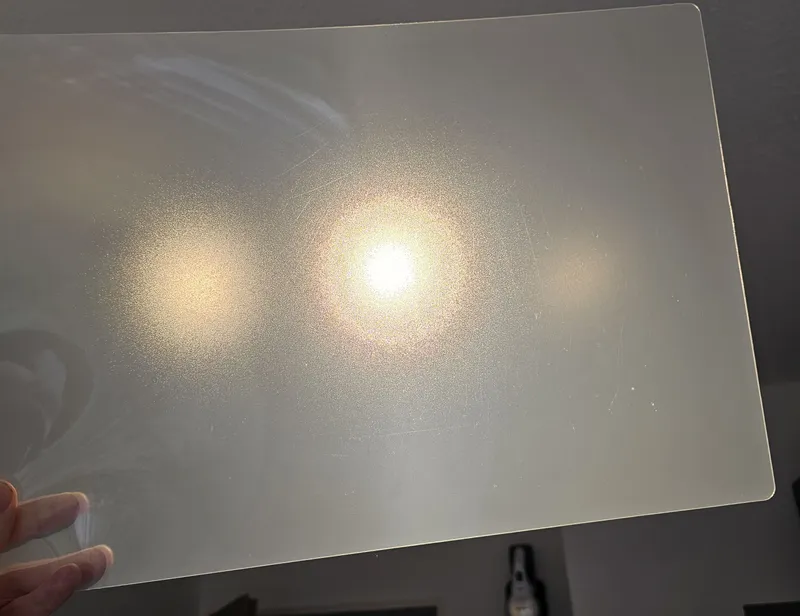
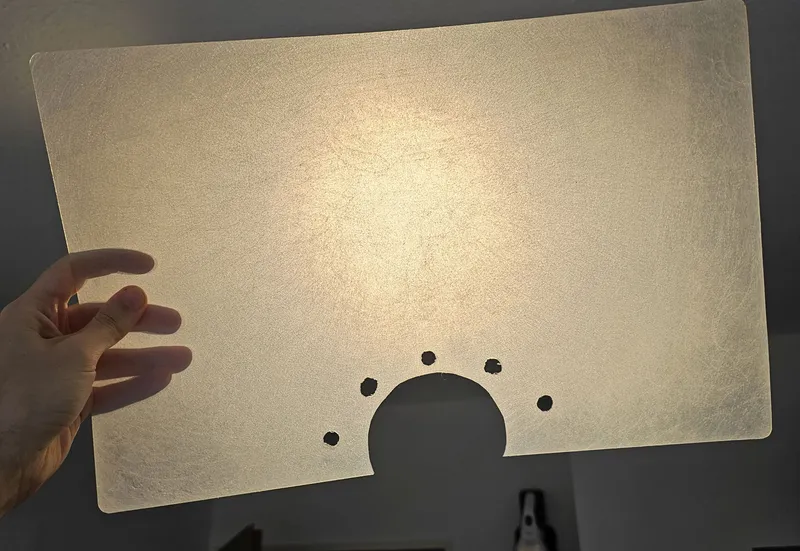
6. Sand the diffuser with some P40 Sanding paper until it gets diffusive
Before Sanding:
After Sanding:
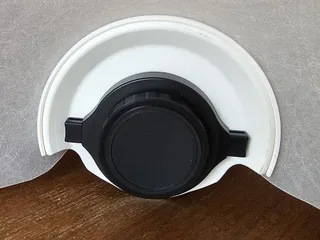
7. Attach the rings to the adapter so that the diffuser is held in place. I used some woodworking clamps to join the parts. Make sure your diffusive layer lays evenly flat on the adapter and there is no waving
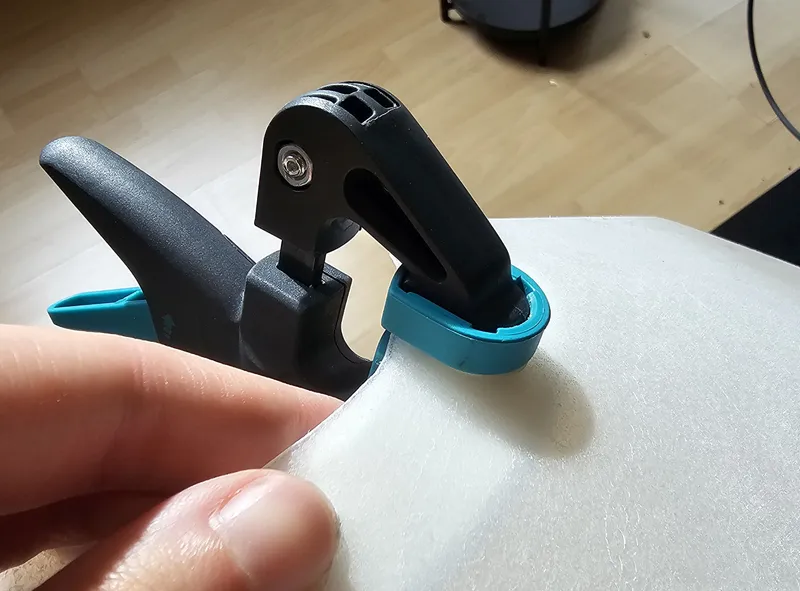
8. Remove the excess diffuser Material using scissors
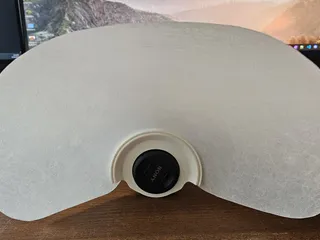
9. Prepare the camera adapter. Make the surface nice and smooth, especially the surface that was in contact with the support and all the parts that are part of the adapter mechanism. You do not want to scratch your lens.
10. Attach the camera adapter to the lens. The adapter has a small marking on its front for alignment. It attaches as the regular sun visor.
11. Attach the diffuser to the camera using the magnets and cut the diffuser to a shape that you like.
12. Optional: Attach some additional packing foam if you find that the diffusion is not enogh for you.
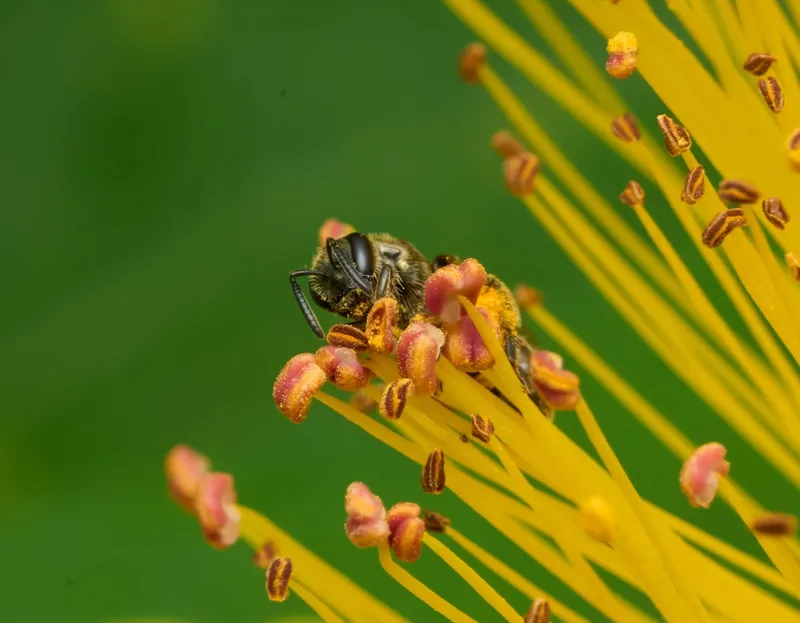
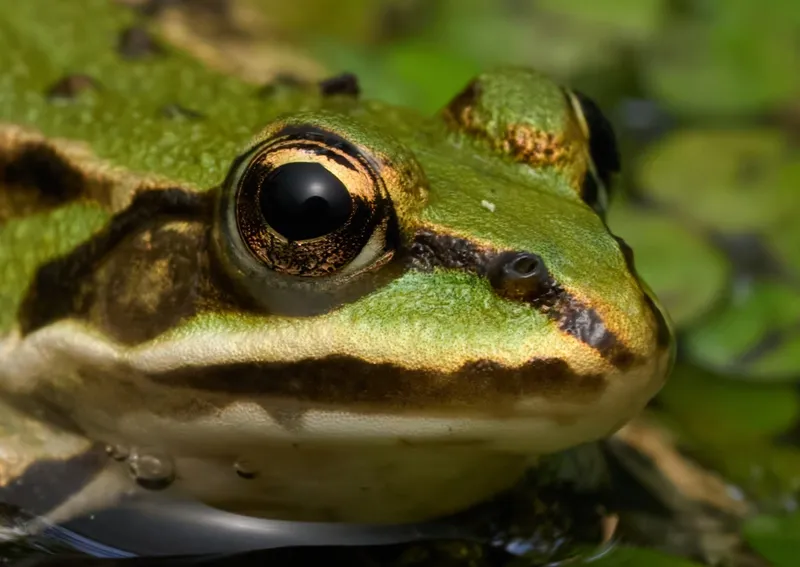
📷 Example Images
This shows a very small bee (only few mm). I am quite happy with the soft reflection in the eye.
🔮 Future Improvements
- As already mentioned, diffusion can be further increased by adding an additional layer of package foam
- Cutting the diffuser is a bit tedious, it would be nice to have some template for it
Model origin
The author marked this model as their own original creation.


