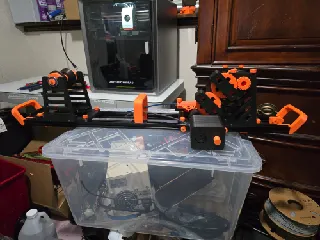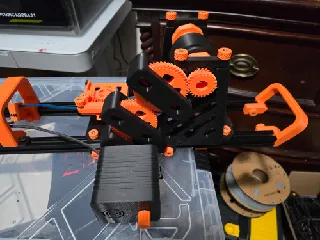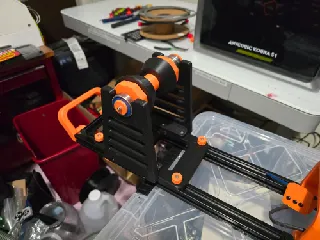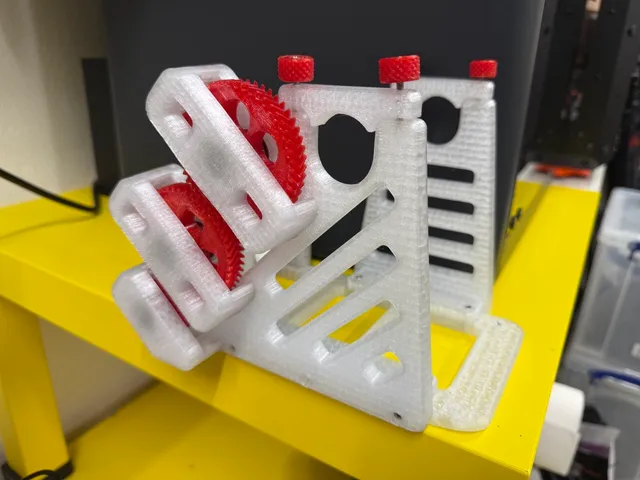
Bambu Lab - Winder Spool Frame 2 - Modular Design
Makes
Comments
@MilanRadivoj_2646947 Thanks for Printing
@David_836029 WOW :-). Thanks for Printing.
Ok going to start with saying Thank you! I believe that is well deserved.. Now to the issue-I'm so confused on where to start. There is so much here and so many different paths I don't know where to start. I printed the miklos before I found this version. My only issue that I came to is that the filament carriage keeps popping up. I have a creality printer k2 plus and k1 max. I only looked at filament transfers before I have one roll of creality filament (so far) that keeps getting stuck, like it's not wound correctly. I don't know if I'll have to move to the plastic rolls with the CFS or not. If so this is a good thing to have ready. So my question is, where do I start. So I did some more looking and although I'm still confused, I can ask some more questions. First How do I know what base I need? I'm not understanding the differences between the bases other then # of holes and where the holes are located. I don't know if I need lots of holes or a few holes. If somebody is experienced at this and maybe knows what questions to ask me to direct me the right direction, that may be helpful. (edited)
@Brianc_1939179 NVM I found the answer just not sure how to get it there
@Damian27 Hopefully this is my last question. I'm to the point where I need to put the motor together. I see the instructions for if I have the stand but I don't see it w/o the stand, am I missing this somewhere?
@SergeyFedosi_2751965 Thanks for Printing :-)
-Fellow maker, be aware this is a PROJECT (11 stages) that is and stays 'in motion'. Designer Damian is so kind to take into account the very different preferences of people contacting him. As a result, his personal project has gradually become 'complicated', especially for a novice reader/maker.
-At first I too felt overwhelmed and looked further for simpler projects. And I came back because of the beauty (esthetically!) and quality (technically) of Damian's project.
-But remember before you can start in your workshop there is a huge homework (at the table) to make! "What are my needs, possibilities, ambitions,...?" Once these things are clear one can start making adequate choices within the multitude of combinations within this whole project and built an 'own' version: first on paper, afterwards (sic) in the workshop.
-I feel sorry for the complaints some people made at Damian's address instead of saying one thousand times "thank you": so I do now! And I hope Damian will go further developing and improving -he is a perfectionist!- his masterpiece!
-At this moment I have printed most pieces of 'my paper' project and I continue step by step. Let it be clear: this is not a ready-made construction kit but a challenging work-to-do!
-The first step in doing my own homework was generating a clear overview of the 11 modules (see picture): I 'synchronized' the verbal list with the depicted modules because an image says more than many words. And on my PC I have numbered the subdirectories from 1 to 11. All that creates a lot of clarity and prevents unnecessary detective work!
-But it remains a time-consuming undertaking and in the meantime I can approximately imagine how much more time and effort it cost designer Damian... So THANK YOU again a thousand times!
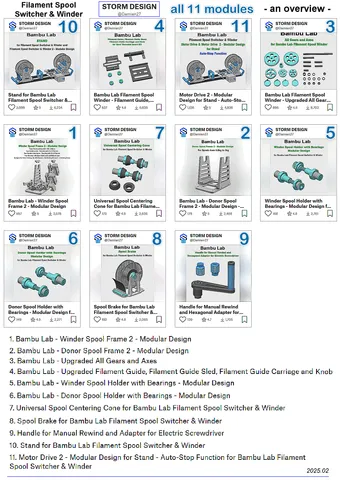
@William_154460 Yeah beware is absolutely correct. Beware that this version really doesnt work well without The Stand, the motor drive kit [ creator even says in a post I found after hours of reading - he doesnt believe in using the manual handcrank ] Which for the record - the handcrank design the creator never uses - sux. Dont bother. Beware that you'll need to order special bearing for the spool center shafts [ which are a super JANKY gizmo from the jump ], you need a motor kit, speed controller and 600mm+ 2020 alum extrusions to actually get this thing to wind any filament. Also - you can forget a large portion of any 3KG spools which this design cant accommodate several larger sizes. Tooo bad ... Dont be like me - waste hrs and hrs and a LOT of filament - only to find out you really need the motor kit and sooo much more. Mehhhhh
@William_154460 Hi William. Thank you so much for taking the time to write this comment. I appreciate it very much. If you have any questions in the future, feel free to contact me. Have a nice day.
Hi
this looks really great, but there are tons of files, I don't know what to print. I want to rewind some spools to bambulab spools to use it on bambulab printer. Are there any instructions what to print and how to assemble? There would be great to have on zpped file for all what I need to print.
@Blisk_455678 Hello. This is not my invention with so many versions. The community asked for it, so I adapted. They wrote to me that the base is too big for their printer. Other people wrote to create a smaller version to minimize the use of filament. So I created the smallest possible version, i.e. 200mm. However, it is not compatible with the "Stand" project, so I also added a 220mm version. A similar situation was with the arms. Some people were bothered by the number of screws attaching the arms to the base, i.e. 5 and 8. So I created a version with the minimum number of screws possible, i.e. 3 and 5 screws, to adapt to the needs of other people. So it does not matter which versions you use. Each element will fit together. Just remember that the 200mm version is not compatible with the "STAND" project - this is included in the instructions in the photo gallery. I personally use my two winders with the 240mm base version, and the arms are mounted with 5 and 8 screws. I hope I helped you. Have a nice day.
@Damian27 thank you, you helped me. Now I know what to do. Damian helped Damian :) (edited)
Sorry if I'm missing this, but why the three sizes of the base? Is it just preference?
@Mobius60_2822803 Hi. There was only one version to choose from 240x110. Several people asked for other sizes to reduce filament consumption. So, at their request, I added the remaining dimensions. I personally use the 240mm version. I hope I helped you. Have a nice day (edited)
@Damian27 Thanks for the reply, sounds good.
@Testzugang_7097 Thanks for Printing (edited)
This was a super fun build! It was challenging at times to figure out, but ultimately a perfect project for my first 3d print.
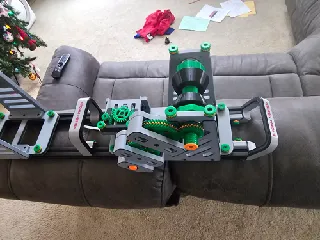
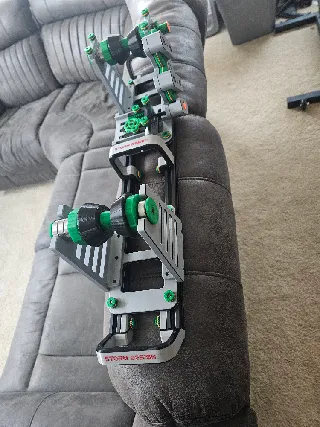
@ShaunMirk_2774403 Thanks for Printing. It looks amazing. Beautiful colors :-)
Is there a single page/re-pack of the up to date winder at all? Been on a hunt for a good model, after checking out and printing out others, and this seems to be the best of the best. what is confusing is that the collection seems to be a few bespoke upgrades, so as a new comer, I am worried of not printing duplicates should i go and chose various different sets of files from your collection. Brilliant work by the way. thank you.
@Damian27 much appreciated.
@gaborpapp_2035884 I have the whole project plated up in a single 3mf for a bambu printer. Not sure how I could share that though
I would like to be able to print the arm-gear parts upside down to eliminate having to use supports in the bearing pockets. To do this would require brackets on the frame itself to which the arm would be screwed from the side. I believe these brackets or pedestals can be added on top so again, not requiring supports. Can you provide Cad files for those two parts? Creating models from .stl files is a bit of a pain.
@JimKevern_2200857 Hello. I never design this way, but in order to shorten the design time as much as possible due to the large number of parts, I decided to design all the elements in one Cad file. With such a large number of parts, I would have to import the designed part hundreds of times to check the fit. Such a move, although it is not consistent with correct design, significantly shortened the time. I worked on the elements at the same time, so the steps are mixed up, which prevents me from exporting a given element to a steps file. If I understood correctly what you want to achieve, you do not need such files or even a Cad program because you can process it all in the slicer. Best regards
@Damian27 Thanks much for the reply - I hadn't thought to use the slicer for things like this, having the simple view that all the slicer did was slice. Thanks for the tip.
@PedroTavares_415606 Thanks for Printing


