Custom Volvo V50 S40 C30 C70 phone mount

Description
PDFNew Version can be found HERE
The Volvo P1 platform, we love them.. but modifications are far & few between!
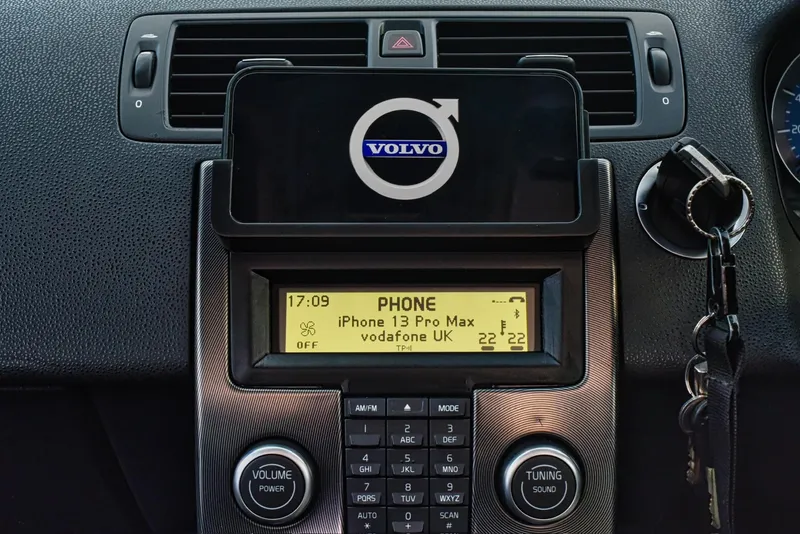
What I have here is a fascia that replaces the original radio fascia to hold a phone in a very stylish & flush manor.
Please read for how it was designed, design criteria, how to print & how to edit.
Edit 18th February: I've included some pre-made generic sizes to print. Can't guarantee fitment of phone. I went for different iPhone sizes for this generic sizes.
Let me go through what's been made here.
The fascia has been replicated in Blender by KurtKurtsen on Thingiverse which has a Creative Commons - Attribution. Allowing us to modify freely, just no editable CAD file to work from, only a mesh.
Which was a shame.
Kurt's original phone mount design was fine, great design work, it works for most phones..
not for me, the iPhone 13 Pro Max camera bump is tall and that was with an Apple Leather case which isn't exactly a thick case.
Additionaly I wanted to be able to plug my phone into the USB port & THEN drop into the cradle. I found this easier to do rather then insert into a holder & try find the port. Then vise versa when removing.
Felt more natural this way.
My creation,
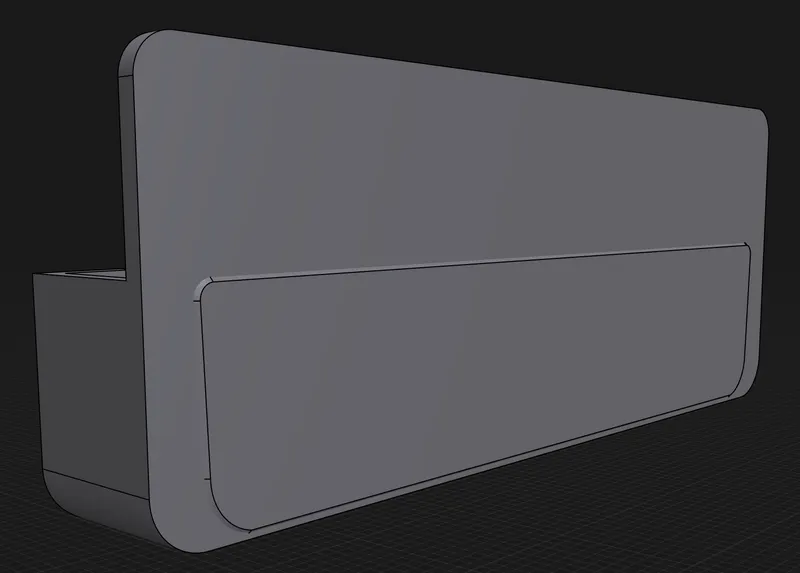
Using that fascia as a backing, I designed a slot to hold a phone, it needed to have big enough walls to retain the phone in place whilst driving.
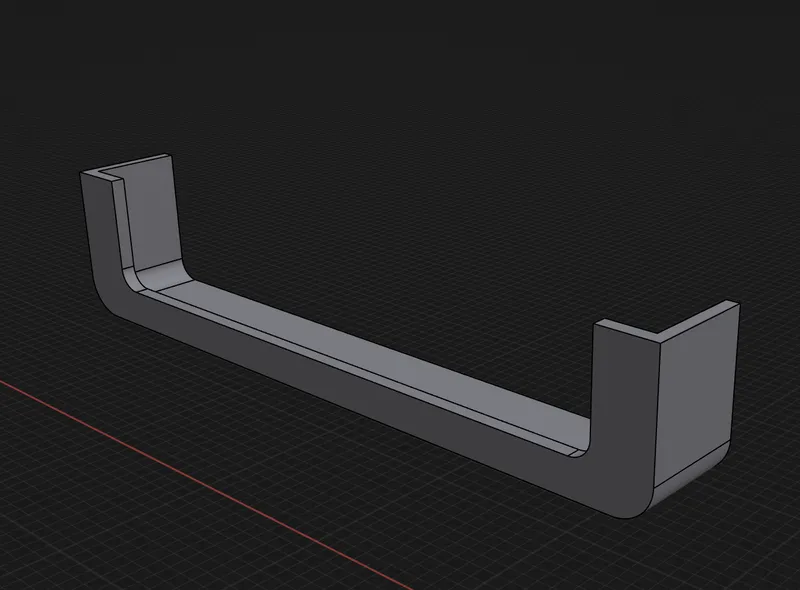
Next, it of course needs a backing plate to the phone wouldn't just fall backwards onto the air vents of the interior but also for the phone to have enough lean back so it wont fall forward all the time.
Also i wanted the back to protect the phone from any heat from airvents. This is because hot air makes a phone hot... yes... I said that.. and when a phone gets hot, they go very slow or even just turn off altogether.
(I've had this mount in my car for 6 months and even with heavy accelaration it doesnt fall off)
Thats that bit ticked off. 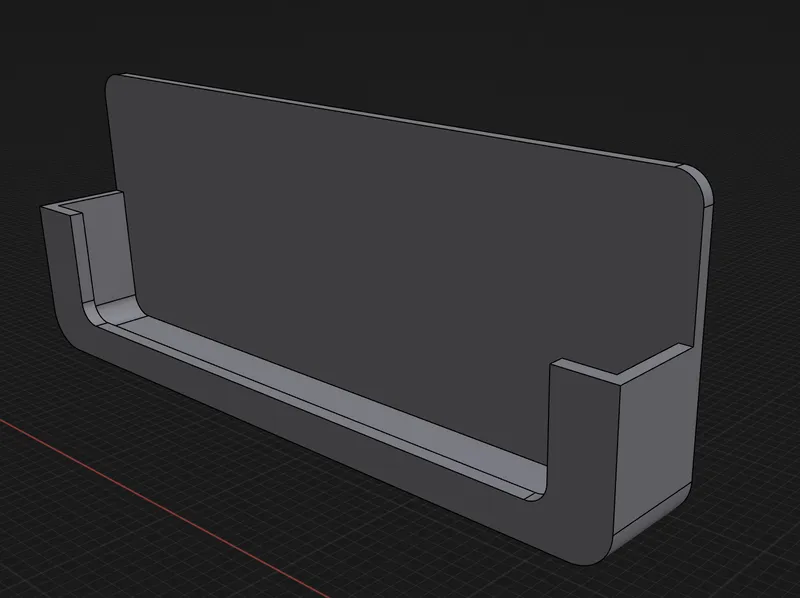
Next, i needed to join my design onto the fascia at the correct angle & to off set from the dashboard to prevent rubbing & creaking. This was tricky to get right, I didnt want the phone sticking out like a sore thumb.
How to edit
I've include a STEP file that I designed which allows you to edit the phone holding part. This will allow you to edit to your size requirements & dimensions as needed.
I HIGHLY RECOMMEND editing this and printing it as a stand alone part to make sure it's correct sizing to your adjustments before committing to the full fascia print. Save your plastic!
Then I'll include the STL for the fascia from thingiverse as it's not on Printables, you're going to need to open CAD & stick the two together to fit along the lines from what I've mentioned above and export as a STL to print as Kurt didn't release it as a STEP file. So my CAD software (Shapr3D) doesn't like me export Mesh's into a STEP file. So this remains an STL.
I've included my own custom mount as an STL to have a look at how it looks altogether
Unless someone can convert it to a body for us all, that would be appreciated!
If you're doing CAD please remember to save your STEP files :) They are editable for all of us to enjoy and tinker :D
How to print
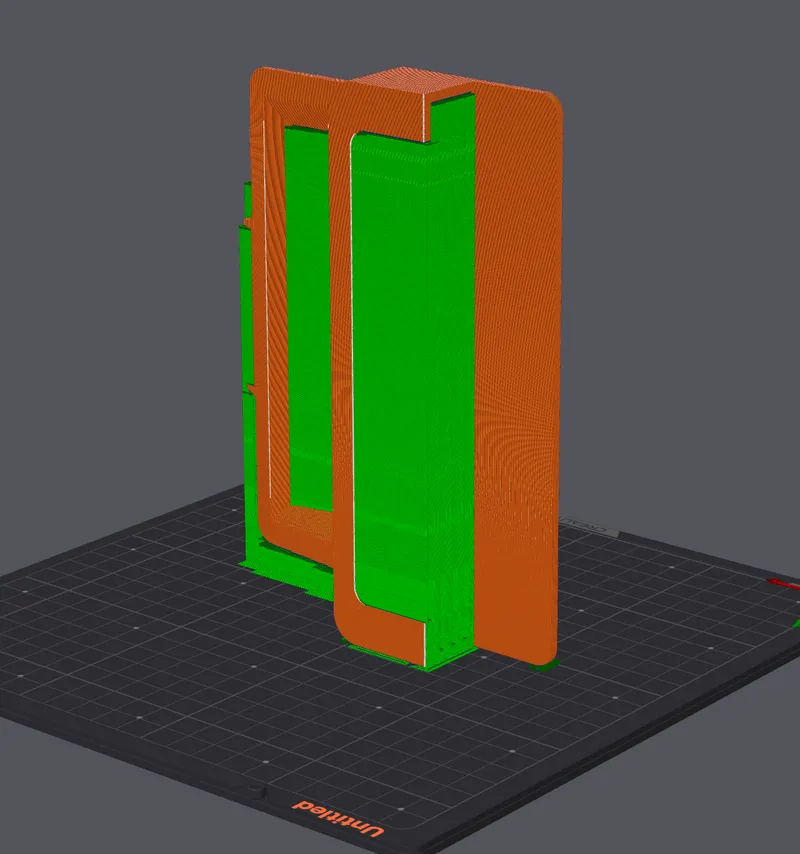
This is a tricky print... if anyone wants to design any sacrificial mounts in aid of printing you go right ahead!
Firstly, materials.. ABS, ASA or PETG is a must.. Any material that can withstand heat! PLA is out the question, it will warp in a hot car in no time. You can try if it you live in cold climates for sure!
Mines printed in ABS but PETG was my second choice.
This needs to be printed on its side as imaged below,
You could print laying flat but you'll be printing ALOT of support materials and you'll see alot of layer steps on the face. Up to you.. My advice from a pro printer was, on its side.
After print you can install this right away after cleaning up any supports.. I decided to fill mine using laquer & sanding it down then painting matte black. It looks super smart!

Please enjoy this creation, it's taken a long time to develop, back and forth prints and trial and errors.
Tags
Model origin
The author marked this model as their own original creation.


