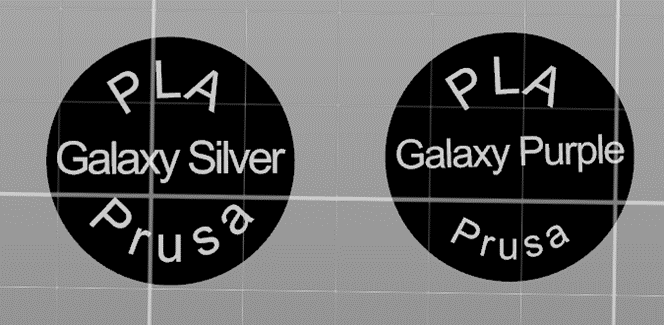
Mini Filament Spool Swatch with printed text - MMU
Description
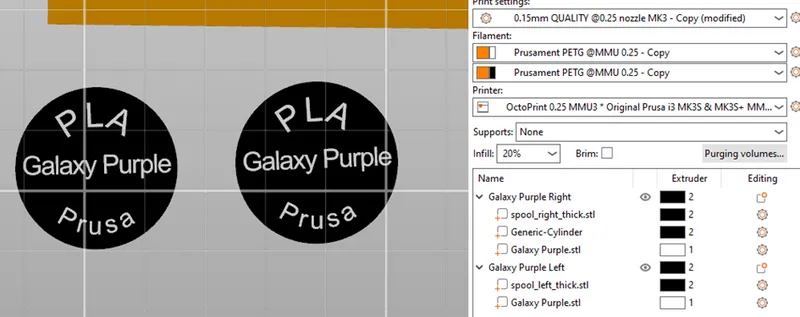
PDFPrint Settings
Layer hight: 0.15 mm
First layer speed: 6 mm/s (Important to get the details from the text)
Support: none
Fill pattern: Concentric
Nozzle size: 0.25 (might work with a 0.4, but i recommend 0.25)
These are the settings i found to work the best and most reliable.
How to print
Just a little heads up, this is most likely not going to print perfectly on first try. I had to do a lot of tuning to get the text to print properly. Since the text it quite small it’s difficult the get all the details and get it to stick to the bed. That’s why I really recommend a 0.25 nozzle. The first layer calibration also needs to be perfect.
This print relies on multi material printing and uses 2 extruders.
There are ways to achieve this without an MMU, but I have not really tried. So, I recommend looking up a guide on how to do this.
The spool is set to extruder 2 and the text is set to extruder 1.
I have not modified the original model of the spool.
I have created a model of the text and added it as a model to the original in the slicer and set it to extruder 1, this is to make sure the text is printed first.
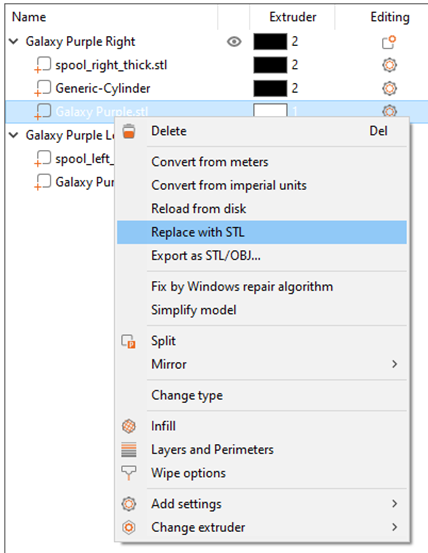
To change the text, you right click on the text STL and click on “Replace with STL” and click on the STL you want to change it to. You have to do this for both of them.
To make more you can duplicate the whole object and replace the text.
Create the text
Since there are quite a lot of different filaments out there I have not made a model for all of them.
If you don’t want to create the text yourself, let me know and I’ll see If I can make one for you.
But I have tried to make it as easy as possible If you don’t know how to use a modeling software.
I have uploaded a f3d file that can be opened in Fusion 360.
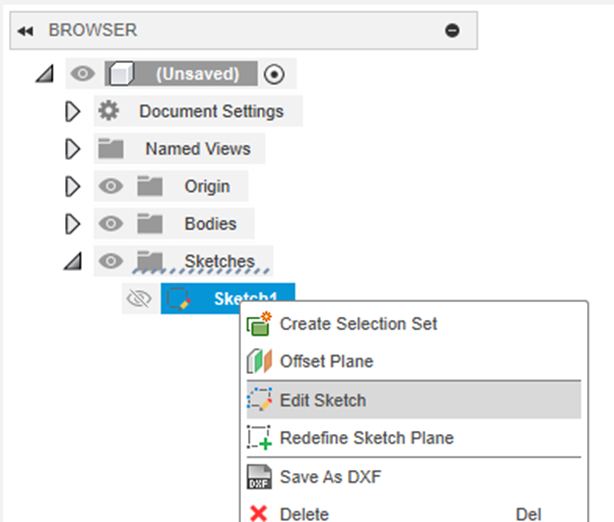
Open the file > Right click on Sketch1 > Click “Edit Sketch”
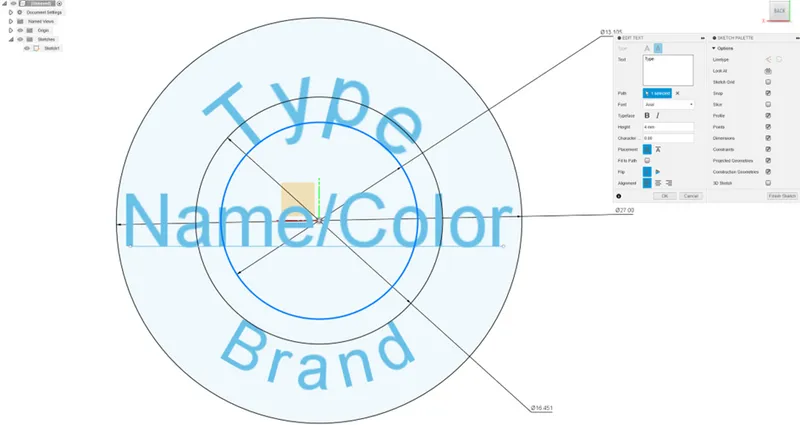
Double click on the text you want to edit > Change the text in the text area > Click Ok > Finish Sketch
You might have to rotate the text, right click on the correct line/circle and select Move/Copy and change the z Angle
Do note for longer names, a height below 3 mm might not print properly.
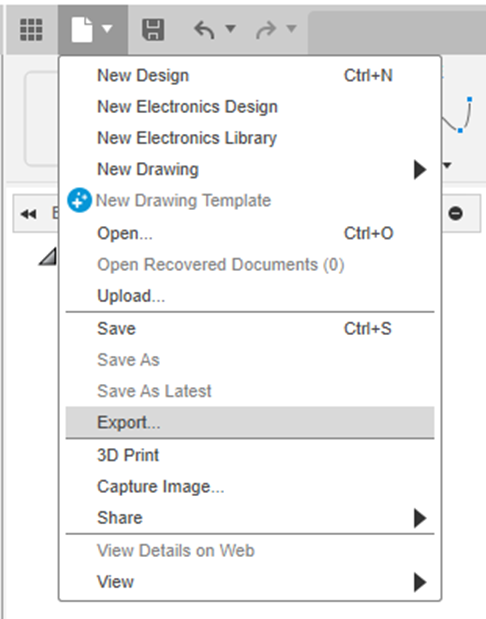
Click on file > Click on Export
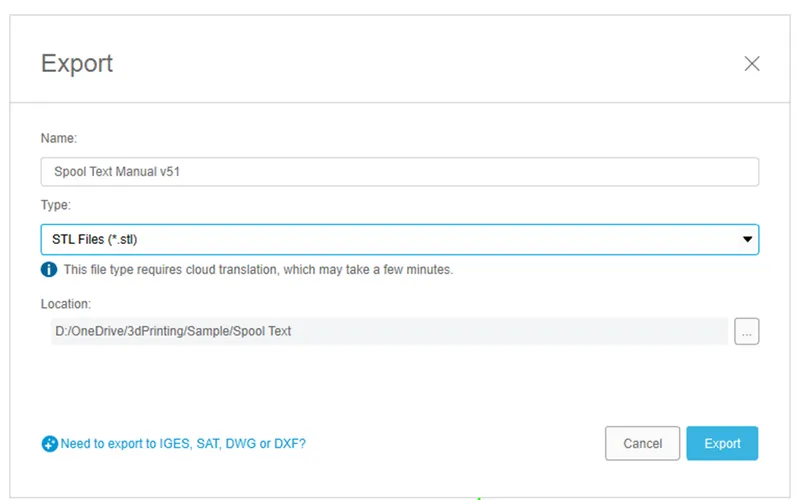
Select STL from the dropdown and select the location > Click Export
Tags
Model origin
The author remixed this model.

Differences of the remix compared to the original
This adds type, name and brand of the filament on the side of the spool with another color instead of having to add a sticker.