Prusa XL Air Seals
Description
PDFThese seal closes the air gaps in the XL. Adding up the gaps on all panels equals a hole 80 mm in diameter, a significant source of leakage for an XL using an enclosure.
An additional benefit that I discovered serendipitously is that these seals also dampen resonance of the metal panels. The OEM setup has absolutely no dampening of components for resonance so anything that can reduce that phenomena will reduce the noise footprint of the XL.
Seals are included for around every metal panel (TPU), the tool bay (PETG), electrical ports (TPU), handle holes (TPU), and the hole in the front-top extrusion (TPU.
Two each are required for the electrical ports, handle holes (upper and lower), and the holes in the front of the extrusions. For five tool machines, the electrical ports are already filled.
Approximately 15 360mm strips and one 405mm (for the back, bottom) strip were required to seal the all the panel edges. The included model is the 405mm version. For the 360mm version, cut it down in the slicer.
The tool bay requires three different seal models of PTFE or equivalent.
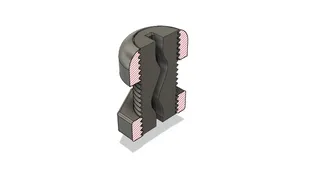
For the tool bay, insert the #1 seal (50mm) in between the tools, and to fill in the empty spaces. After inserting the #1 seal, insert the #3 (60mm) seal at the far end (ground plug location). The #2 seal goes under the tool holders and over the edges of the #1 and #3 seal. Slide it to the rear first, then once in place, push forward to engage the cables and PTFE tube. The cable bunch may have to be moved to the vertical to fully engage the #3 seal.
To install the 50mm and 60mm seals, push the flat end under the extrusion, then while holding down the front (the part with the catch) down, push up from the bottom until the catch clears the edge of the metal grate. Let the seal relax and it's home. To remove, press from the bottom in the middle of the seal until the catch releases. It's a little tricky but easy enough.
Printing the #1 and #3 tool bay seals requires supports. I arranged the seals at 60 degree angles to each other, touching at the tip of the “fork” as supports, and used brim to successfully print.
I made at least 15 iterations of each design before I found the exact right size and shapes. In order to replicate the part so it goes in easily but does the job, I suggest using as close to the same printing conditions as I used.
Printing specifications: (except tool bay seals which are PTFE or whatever)
Overture TPU Shore 95A
Copied “Generic TPU” profile and changed nozzle temp to 225C and bed temp to 50C - Name it TPU instead of Flex or the temperature will default to 210C when heating the bed. That's messy and way too hot.
2T Input Shaper 0.6mm Nozzle (stock brass)
0.20mm Structural
5 perimeters, 5 top, 5 bottom layers
For bonus points, add “TPU” to the custom gcode beginning procedure to lower the temperature to 165C . At that temperature, there's no leaking and glopping from the nozzle.
Tags
Model origin
The author marked this model as their own original creation.


