Bassoon low A extension, tunable
Description
PDFSometimes the low B-flat on the bassoon is just not low enough. Composers want a low A (or even lower). See for https://orchestrationonline.com/bassoon-a-extension-dos-donts/ for explanation.
On the internet there are several models to solve this issue (search on “bassoon low A”). The model with the big belley seems to be the best (so low notes B and C are easier to play with better timbre. NB no low Bb because the extension changes it into a low A).
To make this model printable (on my printer) I had to cut the model in two parts.
When searching for a nice way to assemble those two later, I found the “Sturdy vase-mode screw container” and decided to use that, with all the advice attached to it:
- Print in vase mode, to get a nice looking and super leight-weighted extension
- Use the threading to assemble and to adjust the intonation.
Before printing comes measuring and calculating and deciding
- The extension has to fit perfectly on the bassoon. The width of the bassoon bell is about 38 mm, but could be more or less. To measure I added a “fitting ring” of exactly 38 mm.
- Print (vase mode!); Test (it should fit very easy, fall out if held upside down. (the fine fitting will be done later using electrical tape) ; Scale in your slicer (if needed); repeat
- Depending on nozzle size the “wall thickness” has to be choosen. It is possible to make the wall thickness up to 2,5 times the nozzle size, without any problems. With a nozzle of 0,6 mm you can go up to 1,5 mm. For my printing I have choosen 1,2 mm. Below 1 mm was a bit floppy, 1,5 mm was not needed).
So in your slicer set “extrusion width” to your choice. (NB: Change all width's to same size (first layer; (external) perimeters, etc. Just to be sure). - The upper and lower part will be threaded together. Depending on :
- size of the bassoon bell (see above).
- wall thickness - "extrusion width"
- printer features/possibilites
you have to decide what tolerance is needed, to easily fit, but also no too sloppy, to avoid leaking.
I added testfiles for that. They are simply cutted off the originals. So same here:
Print; Test ; Scale in your slicer (if needed); repeat NB: Only change the upper part, because the lower is connected to size of bassoon bell!
On my printer I found best tolerance is 1 mm.
- To make it a bit easier: these are the calculations:
- Scale X and Y (who are the same) (not Z!) of lower part to size of bassoon bell. Original is 38mm, so if you have (as example) 37,5 mm to scale with 37,5/38 98,68%
- Scale X and Y (not Z!) of upper part to size of lower part. This time in mm's.
X and Y must be: "X of lower part" + 2 times wall-thickness + tolerance. In my example I had to add: 2 times 1,2 mm = 2,4 mm + 1 mm = in total 3,6 mm.
- Layer height for lower part and upper part should be different to make it so much more easier to turn the parts in the threading.
- For lower part I used 0,22 mm
- For upper part 0,18 mm
- Time to do some printing:
- PETG. PLA is possible (did not test myself) but will be more breakable
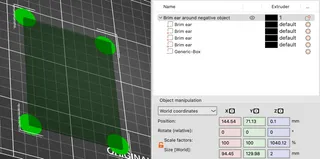
- No brim. It can be done with brim, but much cleaner without.
- temp settings I used: nozzle 240 and bed 75
- Precise fitting to the bassoon bell.
- Use electrical tape and put enough turns on the fitting part that is does not fit anymore.
- remove just enough to give it a nice fit and the player can put the extension on safe and sure in the middle of the concert.
- Adjust tuning.
Turn the upper part carefully (hold with both hands) in/out to adjust the tuning. When done properly. (Maybe a little dot of glue or one turn of electrical tape to ensure it does not move afterwards) You are done. Enjoy the results.
Tags
Model origin
The author remixed this model.
Differences of the remix compared to the original
Printed in vase-mode
Two parts threaded for tunability (and make it printable)
From the container model I used the vase_screw_top_80_40.3mf because of the better finishing at the top and bottom edge (easier to merge and fit together).
And DrJones gave great advice on:
1. layer height (differences between top and bottom part 0.18 mm <> 0.22 mm so the threads run more smooth.
2. line width → up to 2,5 x the nozzle size (I used nozzle 0,6mm)
3. choosing the closest fit model and rescale (mostly X and Y direction)


