Pocket Santorini (with box)

Description
PDF
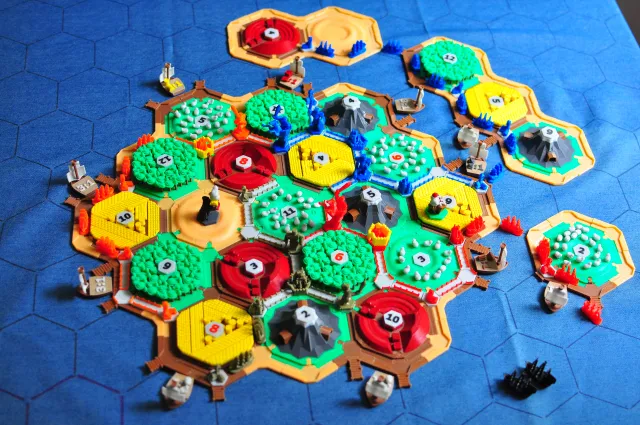
Santorini is a 2-4 player board game that's almost completely made out of 3D shapes that stack on top of each other, which makes it perfect to 3D print. You can find the official rules of this game here: https://roxley.com/products/santorini . I have also provided a model for a piece that is not necessary for the official game - Roof (red) which you can use to block 1st and 2nd level buildings in case you want to play like that (In the original rules you can only block 3rd level buildings).
This model was made in order to make it as simple as possible to 3D print on a FFF printer. I tried to minimize bridges and support material. All models are designed from scratch but I have taken inspiration from other designs on the web. I wanted to have all models fit without XY Size Compensation, so I made everything with fit offset of 0.4mm for loose fits and 0.3mm for tighter fits.
For the complete game you should print:
| Part | No. |
| 1st and 2nd level Block | x40 |
| 3rd level Block | x14 |
| Dome | x18 |
| Roof | x10 |
| Board | x1 |
| Box | x1 |
| Box clip | x1 |
| Player piece (per player) | x2 |
Notes for printing
1st and 2nd level Blocks, Domes and Roofs - Are fairly straight forward for printing, just copy the right amount and print them in color you like. There are 4 different designs for 1st and 2nd level, so you can print 10 of each. You can see my models for these bellow


3rd level Blocks - Print these upside down (or as it is provided). this is because bridging is much easier that way. The picture bellow shows the way 3rd level looks when played in the game and on the right you can see the orientation at which you should print it.

Player Pieces - Even thou Santorini is best as a 2 player game, it can also be played with 3 or 4 players. Bellow are my designs for player pieces.

Board - You can print the board with a single filament if you wish, or you can have some fun. Simply load the model in your PrusaSlicer, position it where you like, click on: Split to Objects (it should make 12 objects) and deactivate the main body (should be the first object, do not delete it!). The other 11 objects spell out “Santorini”. You should be able to see something like this when looking at the plate from underneath

You can go ahead and print this in a filament color you like at a first layer height of 0.2mm. Make sure that you don't turn off the heat-bed at the end of printing and don't remove letters from the heat-bed! Once this first print has finished, change the filament to a different color, and in slicer, deactivate these 11 letter objects and activate the main body object. Keep the first layer height at 0.2mm and print the main body. The following image is the result:

The board works like the lid of the box also! You can also add some layer changes to the main body when printing if you like. This is why my board looks green on the other side.
Box - Box should be also fairly simple enough to print. I don't think you will need any supports as there are no major bridges. As you can see bellow, the box should be able to contain all the pieces.

Box clip - This is the only piece that should be printed with some supports because of the long edge that overhangs. The clip fixes the board/lid to the box so that it can not fall out, by enveloping the perimeter of the box. You can see it bellow

If you would like more details on my settings for this build, feel free to comment or message me directly.
Thanks a lot for checking out my design and I hope you have fun printing it and playing it with your friends :)
Tags
Model origin
The author hasn't provided the model origin yet.