K1 Max High Riser - with Upgrades!
Description
PDFThis is a remix of the wonderful K1 Max Riser by Fred Boisselier, including the improved corners from OneMikeOneGame. This remix differs from the original in several ways.
The height of the panels is increased significantly, to allow for a much more gentle angle on the Bowden tube. This riser is 155cm or just over 6 inches tall. In addition to a solid panel and a vented panel, there's two new panels you can use to customize your riser.
Given the larger panels, it makes it more difficult to see the upper parts of the chamber. So there's a frame for a clear acrylic panel! The pictures above are looking through the acrylic panel. The steps to assemble it are:
- Print the Acrylic Panel Frame and the Acrylic Panel Top Bar.
- Cut a piece of 1/8th inch (~3/3.25mm) clear acrylic that's about 273mm wide and 139mm tall.
- Glue the acrylic into the panel frame to make a complete panel bar.
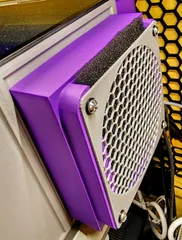
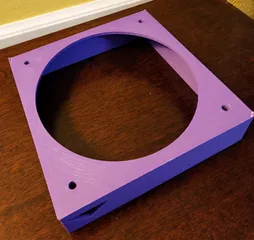
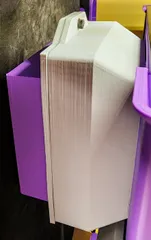
There is a panel to allow adding 120mm fans for active cooling of the chamber. I like to keep the chamber closed when printing to reduce sound getting out and dust getting in. However I want to also keep temps down, and avoid heat creep when printing PLA. Using a pair of fans to exhaust warm air and intake cooler air does the trick! Any 120mm fans will do, but to limit dust and printer fumes, I use a pair of filters on the fans.
- Intake fan dust filter: https://www.printables.com/model/737138-120mm-fan-filter-holder
- Exhaust HEPA filter: https://www.printables.com/model/737294-hepa-filter-adapter-for-120mm-fan This link also contains my preferred Noctua fan setup.
I also like to use this fan cover to make things look nicer: https://www.printables.com/model/722956-120mm-fan-cover
You can control the fans manually if you like. But if your machine is rooted, you have access to the Moonraker configuration, you're comfortable editing Klipper configs, and you're using Orca Slicer, there are more options.
- I use TP-Link Kasa smart plugs (specifically the 3-tap KP303 https://www.amazon.com/gp/product/B083JKSSR5 ) and the configuration options found in Moonraker here: https://moonraker.readthedocs.io/en/latest/configuration/#tplink-smartplug-configuration
That allows control of the power for the fans via g-code macros. You'll end up with 4 macros total, one to turn each fan on, and one to turn each fan off. - Orca Slicer has an option to control the existing chamber exhaust fan located in the Filament/Cooling section. The setting is called “Activate air filtration”.
I have a post-slicing script that locates the commands generated from this setting. It then adds the g-code macros from Moonraker to turn the riser fans off and on, whenever a similar command is sent to the existing chamber exhaust fan.
The script is included, but you'll need to rename it to be a .py file, and add it to the Post-Processing Scripts section of your slicing profile. The details on how to do that are beyond the scope of this post, but there's plenty of resources available to help with that! - You may need to edit the included script to adapt it for your macro names set in step 1. My macro names were: INTAKE_FAN_ON, INTAKE_FAN_OFF, EXHAUST_FAN_ON, EXHAUST_FAN_OFF.
- Important: While you can control the power state via this method, it does not give you control of fan speeds. So you'll either need to rely on a PWM control set manually, or just use the fans at full speed.
- One last note. My built-in chamber exhaust fan is loud and awfully high-pitched when running at full speed. I set it to 60% during printing in the slicer so it's not so loud, and let the added intake/exhaust fans handle the load.
Tags
Model origin
The author remixed this model.
Differences of the remix compared to the original
Increased height, added support for 120mm fans for active cooling, and an acrylic panel for increased visibility.


