Japanese Shinto Shrine Gate (Torii) No Supports

Description
PDFUpdate: Prusa XL 5T (4 Color) Multi Material Single Print project file added
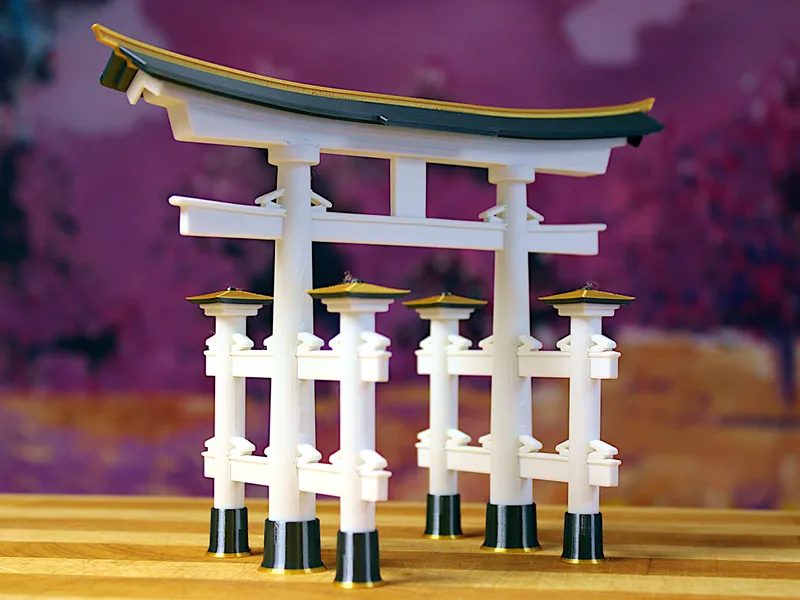
In my pursuit of a 3D-printable Torii, I faced a common issue – all models out there weren't quite compatible with FDM printing.
They required more support material than the actual model and those left ugly surfaces after removal.
Striving for a cleaner, FDM-friendly remix, I settled on Dantech's detailed copy of the Itsukushima Floating Torii Gate to base a remix on.
Big thanks to Dantech for the great work – it's been a joy to build upon.
This remix adds extra details, like tiny roofs covering the wedged joints.
The wedged joints have been promoted from mere decoration to serving a structural purpose, turning the Torii into a cool 3D puzzle that showcases Japanese construction techniques.
Frankly, regarding overall ease of printing, we are trading off excessive supports, bad surfaces and wasted material, for very sharp corners to print and connections and bushings to fit.
Its still one of the more challenging prints and you should have your bed leveling in order.
When succeeding, we are left with great surfaces, tight fit, strong build quality and customization options regarding color and size.
And hopefully much fun during assembly and using the model for decorative, scale model purposes or as a cool toy.
Let's dive into the details of printing and assembly for a smooth experience.
Printing advise:
- Print Surface & Exact Thickness: The print has been tested on a smooth, flat print bed, which is typically well-suited for PLA. Textured beds may introduce slight variations in tolerances. Pay special attention to the exact thickness of the parts, particularly the planks. Two halves of the planks need to fit through tight posts and pillar bushings, where errors can accumulate. Smooth beds are recommended for precision.
- Take Cooldown serious: As hinted above, exact straightness of the parts does matter for the connection to fit. Do not remove your parts from the build plate prematurely and let them cool down to room temperature. We want to have perfectly level parts to prevent gaps between joined half parts and ensure that the joints do fit and work
- Z-Offset & Elephant Footing: Minimize elephant footing to ensure proper fit of connections. Consider giving a tiny bit more Z-offset than usual in case that is a known problem on your printer. Especially since all print bed surfaces are hidden on the insides of connected halves. Imperfect solid infills can be tolerated in this case.
- Tiny Wedged Joints: The small wedged joints are challenging to print. For optimal scale and proportion to the original Itsukushima Otorii, they would need to be even smaller. However, the current size has been settled upon after many iterations for reliable print results. A build plate with all 24 wedged joints is attached in form of a PrusaSlicer .3mf project file.
Print the first layer very slowly. A speed of 15mm/s has worked well on MK4.
- Warping Prevention for Roof Parts: The two long roof parts are prone to warping. To mitigate warping, print slowly with a layer height smaller than .2mm. A successful approach involves doing the first layer at 15mm/s with a continuous layer height of .15mm. Turn off the cooling fan for the first 6 or more layers for improved bonding.
Multi color/material print:
To achieve the captivating look showcased in the title pictures, Tinmorry Silk Copper & Iron and Sunlu PLA+ orange were employed.
A Prusa XL 5T project file with 4 different colors defined for a convenient single print buildplate has been added. The forth color is a greenish tone that is to be found on the top roof posts. Another change to the single extruder version is the black name plate and authentic orange under-part of the roof.
Update:
PrusaGuy was so kind to post a video of the MMU print in 3 colors
https://twitter.com/PrusaGuy/status/1788998263812616351
For single extruder printers, to achieve an efficient color transition, consider following these steps:
1. Roofs and Feet:
Initiate the print with Copper, Bronze or a similar color for the initial layers of the roof and feet. At 0.15mm layer height, transition to a black filament after 8 layers (or 1.4mm z-height).
2. Post Roofs:
Print the small post roofs last, after completing the main roofs and feet.
These post roofs exhibit the opposite color change, commencing with black.
Transition back to your metal highlight color for the last 8 layers (or 4.25mm z-height)
When starting with your base color, only 3 color swaps are needed when using the numbered 3mf project files in order:
plate01 & plate02 = base color
(swap1 to metal highlight after plate02)
plate03 start = metal highlight
(swap2 to dark roof color at 1.4mm z height)
plate03 end = dark roof color
plate04 start = dark roof color
(swap3 back to metal highlight at 4.25mm z height)
plate04 end = metal highlight
Assembly:
- Make sure you got following parts printed:
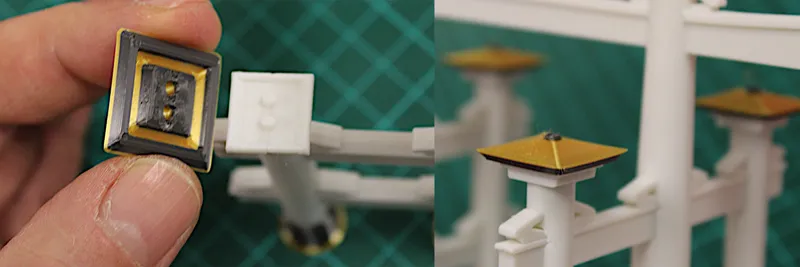
(Do not mind the black roof decoration piece top left in the pictures. Yours will print in base color (here white) when using the supplied 3mf build plate project files. It being black in the pictures, is a prototyping artifact)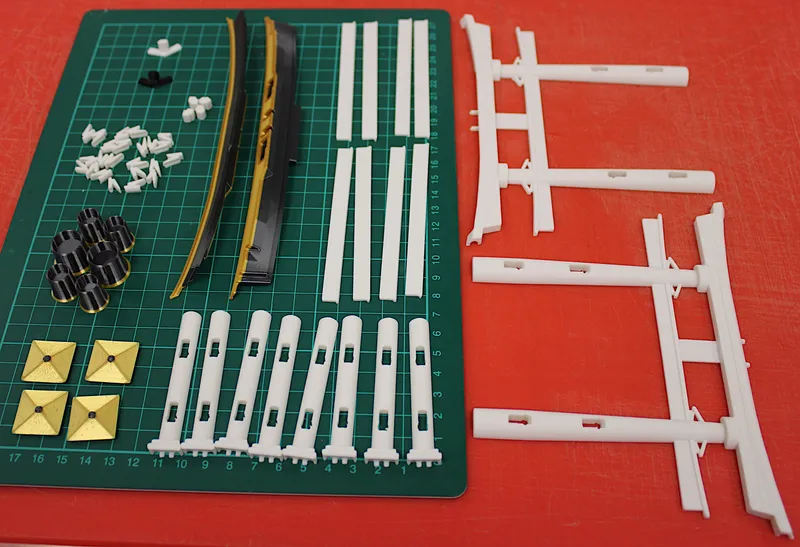
- Begin by inserting the four joint keys into the lashes of one of the roof and gate parts.
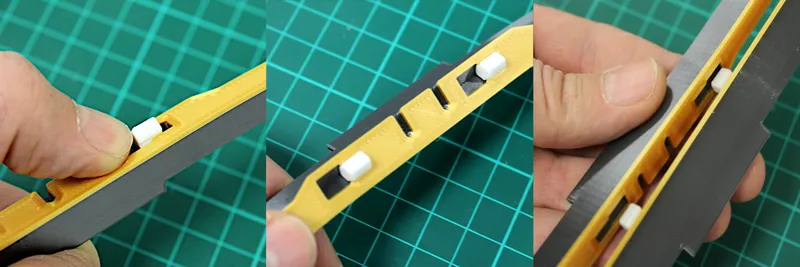
- Slide the gate and roof half parts into the keyed joints to securely connect them. If your printer produces with too high tolerance, you can try two gradually smaller sizes of the joint keys as an alternative. The standard tight fit is the 3.9mm version. 3.8 and 3.7mm are available for download.
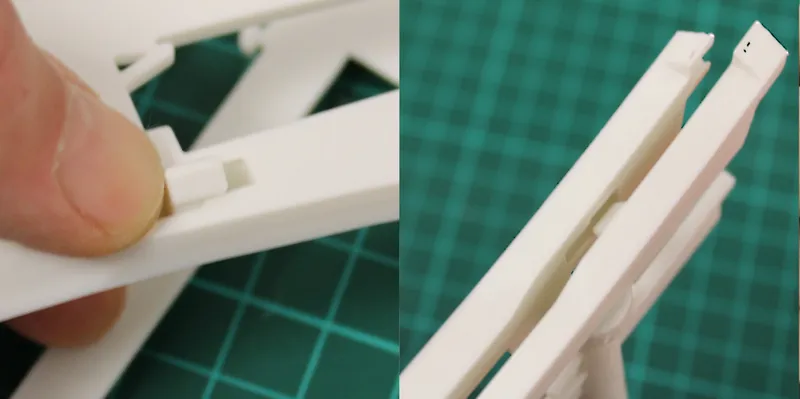
- Secure the two gate halves into position by pressing the pillars into the large pillar feet.
Repeat the process for the four posts. Ensure that the two post halves fit snugly and completely into the smaller footer ring bases. Compare their height to be sure.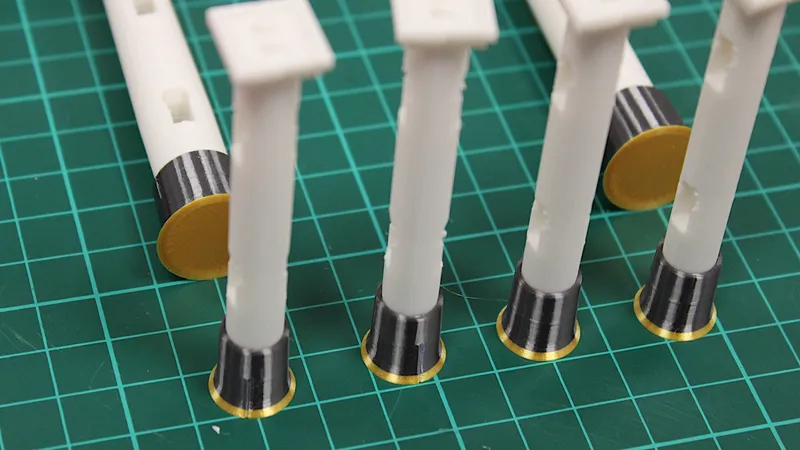
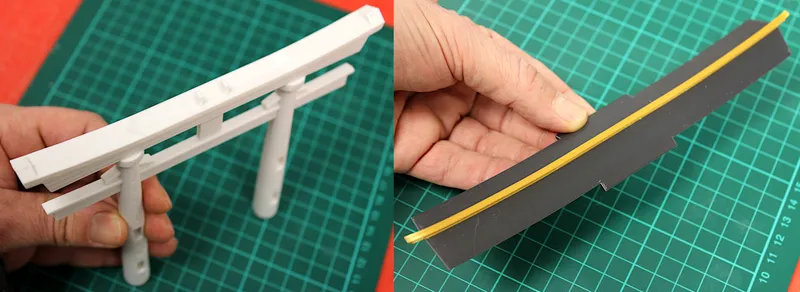
- Slide two plank parts into each of the four recesses of the gate pillars.
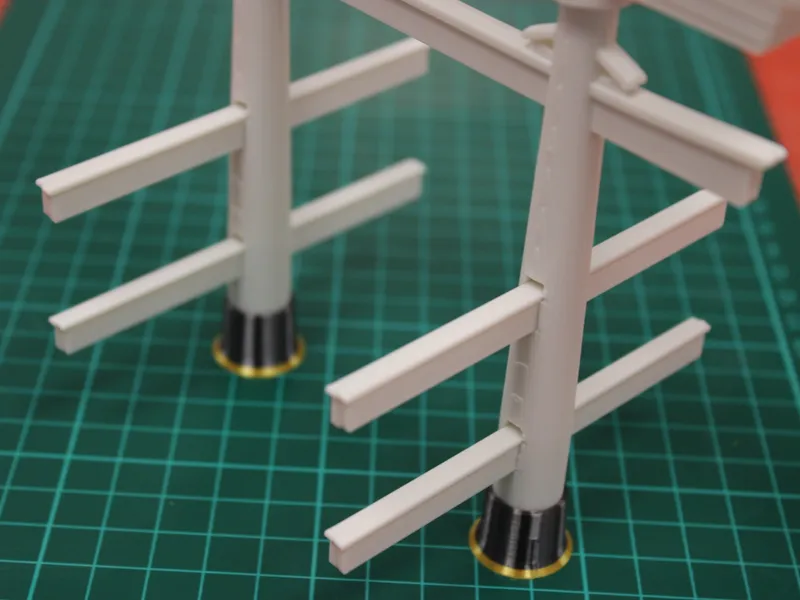
- Roughly center the planks and secure their position using the wedged joints.
Insert the wedged joints in an angle and push them downwards while sliding them in.
If the wedged joints are too thick due to print tolerances or elephant footing, consider sanding them down a bit on the flat top surface. They will be hidden inside the posts/pillars, and any rework will not be visible.
You should now be able to still move the planks to exactly center them.
- Slide the posts onto the planks and secure their position with wedged joints.
Do this on a flat surface to ensure the post being straight.
Start from the inner joints that face the gate to have a tad more room for your fingers.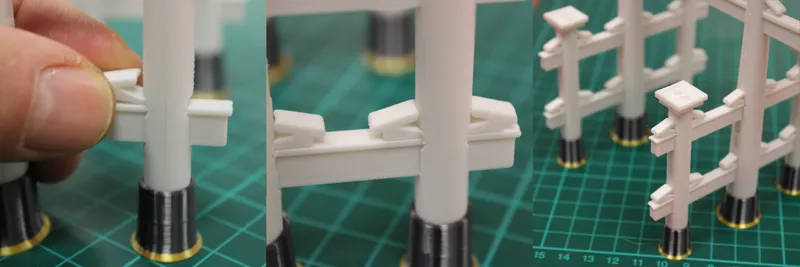
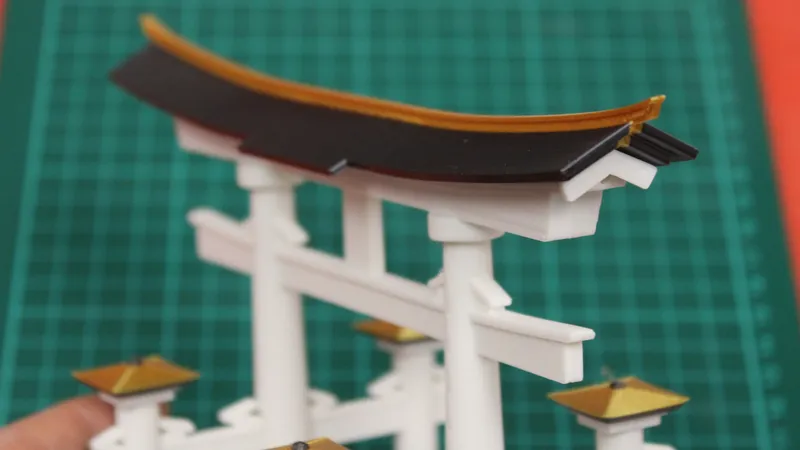
- Complete the post assembly by clicking the small roofs on top. Ahhh, so satisfying.
- Insert the main roof decoration, it might need a convincing push to get it all the way in.
If it pushes the gate parts apart, sand the key down a bit, its hidden when assembled.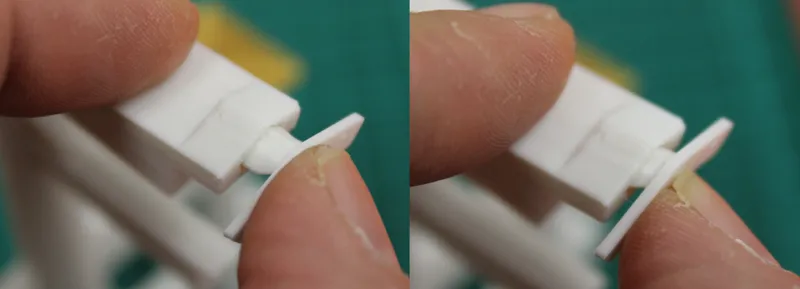
- Finally, click the main roof onto the connector pins to finish the assembly.
And now look for a gorgeous setting to take the photo of your make <3
If you want to support me, please check my other models!
I do very niche projects mostly. Thus, understandably, only few of my models become popular.
But chances are high that you can find inspiration from my specialized works.
https://www.printables.com/@moWerk/models
Thank you and happy printing!
Tags
Model origin
The author remixed this model.

Differences of the remix compared to the original
- Changed the scale from roughly 1:100 to 1:112.
- Overall enhanced print ability of the original model by addressing excessive overhangs to make the model printable without the need for supports.
- Sliced the gate in half and re-imagined it as a 3D puzzle for improved structural integrity.
- Separated posts and planks, introducing wedged joints for structural reassembly, closely resembling authentic torii construction technique.
- Transformed the center pillar base into a connecting ring for the two halved gate pieces, allowing for different colored prints.
- Detached the 4 small post roofs from the posts for a simplified two-color print and added connector pins for effortless reattachment.
- Optimized post roofs for printing with a maximum overhang of 45°.
- Split the main roof from the gate and sliced it in flat surface halves for a straightforward two-color print of the raised roof top decoration.
- Implemented a keyed-joint system to seamlessly reconnect flat halves of the gate and roof.
- Added missing main roof element
- Added a rounded end to the pillars.
- Added roofs on top of the 28 wedged joints to complete the refined design.
- Made the planks longer to better resemble the original proportions and give the model better stability. This also helps with inserting the wedged joints, since there is more room for the fingers now.
- Added sphere decoration on top of the post roofs.
Apologies, the stl files are not rotated facing the build plate yet.
Please use the 3mf project files to have them properly rotated.


