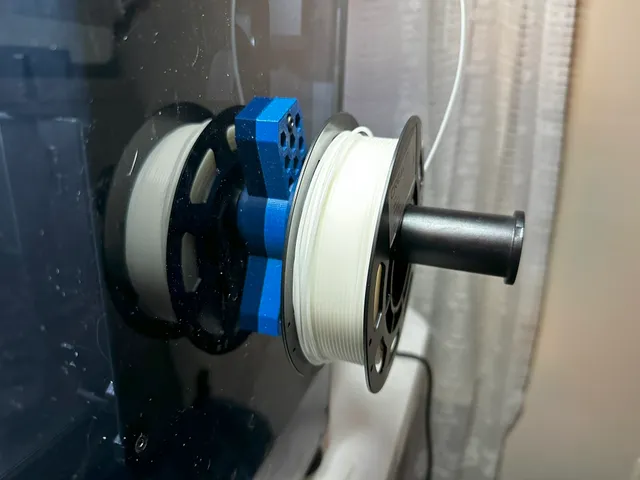
Sample Filament spool (easy loading, quick change)

Description
PDFOn the backside of the magnet pockets, there is a 3mm hole to allow the removal of the magnet if the pole is installed incorrectly (repel). Or to recover the magnets if the spool is no longer useful to you.
You will need 4- 8x2 mm or 8x3 mm neodymium magnets (each model has the magnet size)
One pair of channel locking pliers or parallel jaw pliers, these are to press in the maginets.
I printed mine in ASA (what was loaded and had an abundance of); these can be printed in PLA, PETG, ABS, or what you have loaded.
0.2 layer, 33% infill.
Print (2nd part) first, press in the magnets, and place the main parts' magnets on top of these; this is the best way not to get the polarity wrong.
Print the main part, then put the 2nd part in place over the main part and press the magnets into the main part; these should now be flush together and ready to be loaded with sample filament.
Tags
Model origin
The author remixed this model.

Differences of the remix compared to the original
I printed the original, not really thinking of the size; found it was too small, and the filament wouldn't stay on the original spool. I resized this one to accommodate my vast MakerBox samples.
Added magnets for quick change and not to rely on the original friction fit to keep the two sides together.
Changed from the original side-viewing holes to ones that would use minimal filament to print.