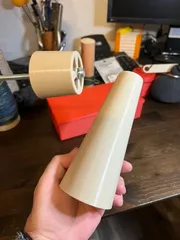
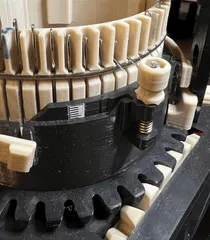
CSM adjustable ribber stop (upgrade)
Description
PDFThe original ribber dial adjustment procedure was something like this:
To adjust the ribber needle position in relation to the cylinder, you had to unscrew the dial adjuster screw, try to find the position, tighten the screw or take the ribber off to start over again if you went too far. Quite fiddly. Live adjustment during knitting was possible, but hard.
This upgrade makes it possible to live adjust the ribber needle position during knitting, which makes it a lot easier.
It will also help if you want to adjust between half-pitch or full-pitch ribbing.
Things you need
- Compression spring, 20mm - you need a fairly strong one, like the springs on manually adjusted 3D printer beds (ie. https://www.amazon.com/Printer-Springs-8mmX20mm-Leveling-Compatible/dp/B0C6F23ZX9)
- M4 screw, 6mm
- M4 screw, about 70mm (CSM with its original frame mounted to a 16mm wooden surface)
- M4 nut
- M4 metal washers
Printing
Nothing special, see picture for orientation that worked for me and parts with support.
Assembly
See CAD picture on how things go together. Put washers between all moving parts, including top/bottom of spring. The Spring is preloaded, that means, if you screw the arm straight up, the spring has to be in work already. It should not be loose. You can adjust the amount of preload by adding more metal washers.
To mount the assembly to the cylinder, simply roughen the surface of the cylinder wall (where you want to put the adjuster) and the surface on the base and glue both parts together (epoxy or industrial ca). Make sure, the base sits flush with the bottom of the cylinder.
Initial setup
I suggest, you set the adjustment arm straight up (or just a little bit tighter, depends on spring length) and make a rough set up of the desired ribber position without any yarn attached by using the original ribber dial adjuster. Then cast on some yarn on the machine and fine tune the position with the adjustment screw.
Advice
I think you can imagine that this isn't for really huge adjustments, but for fine tuning the ribber position. So please, don't tighten the adjustment screw like crazy, be gentle - too tight will make the arm rub against the cylinder wall and too loose won't provide a stable position for your ribber dial - you don't want any of this. It really doesn't need much to significantly change the ribber dial position.
Hint:
Please let me know in the comments if you need a longer spacer tube in case you mounted the CSM to thicker surface and I'll add the additional length as new part. You will then need a longer M4 screw, too.
Model origin
The author remixed this model.
Differences of the remix compared to the original
With this upgrade, live adjustment of the ribber dial is going to be a lot easier.


