Simple cooling calibration tool
Description
PDFThis program uses Slic3r flow math to approximate the layer print time of square slices, therefore it's best to use this to calibrate filament profiles in Slic3r or its derivatives.
How to prepare your slicer:
I. Print settings:
1. Set the number of top and bottom solid layers to 0.
2. Disable the setting "Extra perimeters if needed:"
3. Set fill pattern to a zig-zag-like pattern ((aligned) rectilinear, monotonic).
4. Set fill density to 100%.
II. Filament settings:
5. Disable the setting "Enable auto cooling".
6. Set your minimum fan speed to the value of "max_fan_speed" when calibrating for "slowdown_below_layer_time" or to the value of "min_fan_speed" when calibrating for "fan_below_layer_time".
What to do here:
Transfer your slicer parameter values to the corresponding parameter under the "Customizer" tab.
"Time" parameters define how the calibration will proceed.
"Program parameters" affect the inner workings of this tool.
How to callibrate the dilation parameter:
1. Set dilation to 1.000.
2. Render the model (F6).
3. Export the resulting model (F7).
4. Find the ratio between the slicer print time and the time calculated by this tool (slicer / openscad), if your slicer compensates for custom gcodes, subtract them from the slicer print time.
5. Set dilation to this new value.
6. If you deem it necessary, iterate over steps 1-5 however much you like. Keep in mind, new dilation is the product of current/old dilatation and the ratio of print times.
How to calculate "OpenSCAD_print_time":
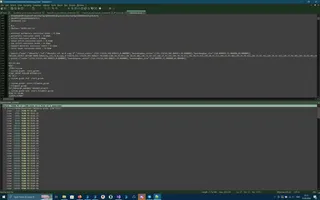
Under console you'll find a sequence of "ECHO: %f1, %f2, %f3", where %f1 is the segment number from bottom to top. The total calculated print time is calculated as the sum of (layers_per_segment * %f2 + %f3) for al segments.
E.g.: layers_per_segment = 10,
ECHO: 1, 10, 9.88012
ECHO: 2, 9.11362, 8.8164
ECHO: 3, 8.03068, 7.75042
ECHO: 4, 7.0716, 6.80701
ECHO: 5, 5.90847, 5.81443
ECHO: 6, 5, 4.77318
ECHO: 7, 3.92449, 3.8362
ECHO: 8, 3.0694, 2.87583
ECHO: 9, 2, 1.92376
ECHO: 10, 1, 0.864268
will result in a total print time of 10m 4.52s.
For a quicker estimation, calculate
(layers_per_segment + 1) * number_of_segments * (first_segment_layer_time + final_segment_layer_time) / 2.
When importing the model into your slicer, DO NOT rotate it. If you want to rotate it, change the "fill angle" value in both your slicer and this calibration tool.
How to analyse printed test models:
The best layer time will be that of the smallest segment with the cleanest edges (no or practically no curling at the corners) and the cleanest seams.
When calibrating for "slowdown_below_layer_time":
If all segments have clean edges and clean seams, consider decreasing the value of "max_fan_speed".
If no segments have clean edges or clean seams, consider increasing the value of "max_fan_speed" if possible, or increasing layer time even more.
When calibrating for "fan_below_layer_time":
If all segments have clean edges and clean seams, consider decreasing the value of "min_fan_speed" if possible, or decreasing layer time.
If no segments have clean edges or clean seams, consider decreasing layer time (will increase filament usage), or increasing "min_fan_speed".
Tags
Model origin
The author marked this model as their own original creation.


