Magnetic solar panel mounting brackets (fits Renogy)
Description
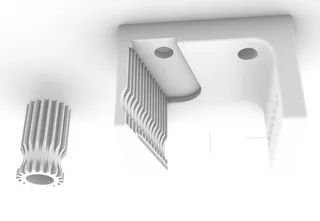
PDFThe brackets are intended to contain fully-encapsulated (i.e. weather-sealed) neodymium magnets, 60x10x3mm rectangular, which are added partway through the print process. (magnets I used)
It's best to add a pause or filament change right before the layer that would cover the magnets, and it may be necessary to glue the magnets into the bracket slots with a drop of super glue. I'd suggest alternating magnet polarity to increase the pull strength (not quite a Halbach array, but better than having all poles face the same direction); marking the magnets with marker before installation can help to keep track of the polarity.
The brackets have a dovetail channel around the periphery to hold a section of nitrile rubber O-Ring Cord Stock, 70A Durometer, 0.188'' (3/16" Actual) diameter. (product I used) The O-ring cord is essential to increase friction between the mounts and an angled metal surface. Directly pressing in the O-ring cord is difficult or impossible, but if the cord is stretched slightly it can be easily pushed into the channel (allow adequate extra length for retraction once installed).
The easiest way to attach the mounts to the solar panel "Z brackets" is with aluminum blind pop rivets, but stainless steel machine screws would work as well.
The rivets I used were TriFix Blind Rivets For Soft Materials, 1/8" Diameter, For 0.125"-0.375" Material Thickness (McMaster Carr 97545A130, ).
The best way to print the brackets is upside-down, relative to how they would be used for a solar panel. The brackets can print without supports in the upside-down orientation.
Tags
Model origin
The author marked this model as their own original creation.


