Vento Air Filter for Original Prusa Enclosure and other Printer Enclosures


Description
PDFUpdate 10 Feb 2024
Veetec3D EU vendor has started selling fully built Vento for the Original Prusa Enclosure. If you want a plug-and-play system checkout VENTO by Veetec3D
Introduction
A friend has his MK4 in an Original Prusa Enclosure and asked if I could design him a filter system that has low maintenance costs. Since he only prints pla and petg, I decided to design it as a single-pass filter with HEPA and refillable activated carbon filters.
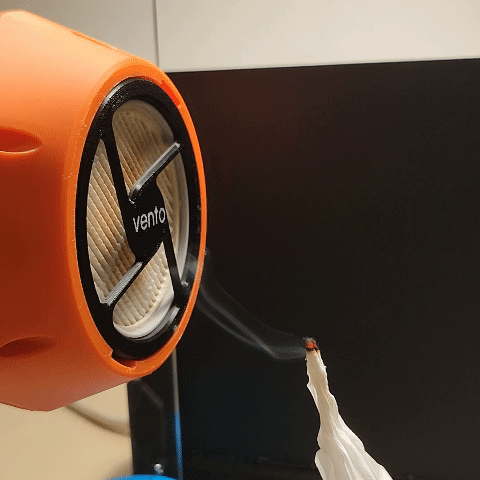
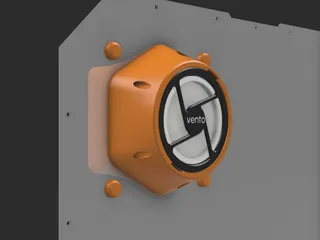
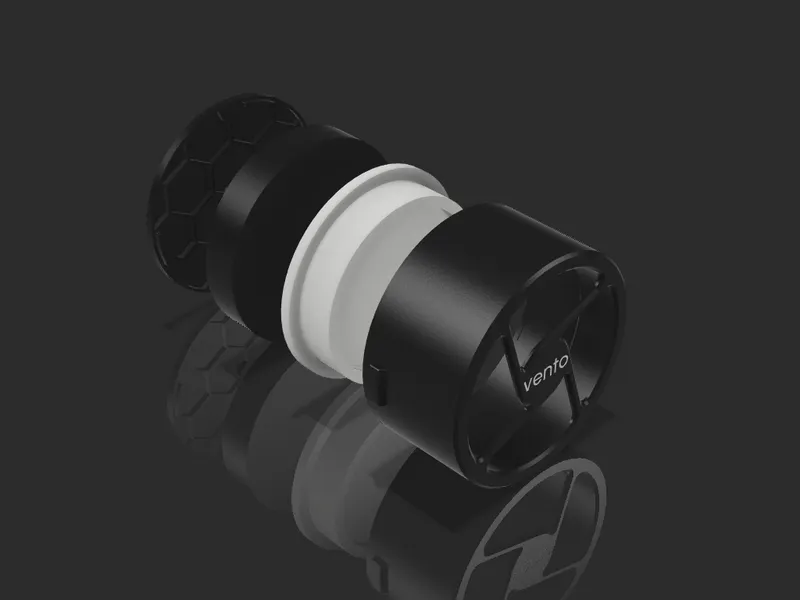
Vento is a single-pass activated carbon and HEPA filter that uses an 8025mm fan for your printer enclosures. The carbon container can be refilled, and the HEPA filter is readily available on both Aliexpress and Amazon.

Bill of Material
- BHCS M3x6mm - 4 pcs
- BHCS M3x10mm - 7 pcs
- BHCS M3x30mm - 4 pcs
- Brass inserts M3xOD5mmxL4mm - 11 pcs
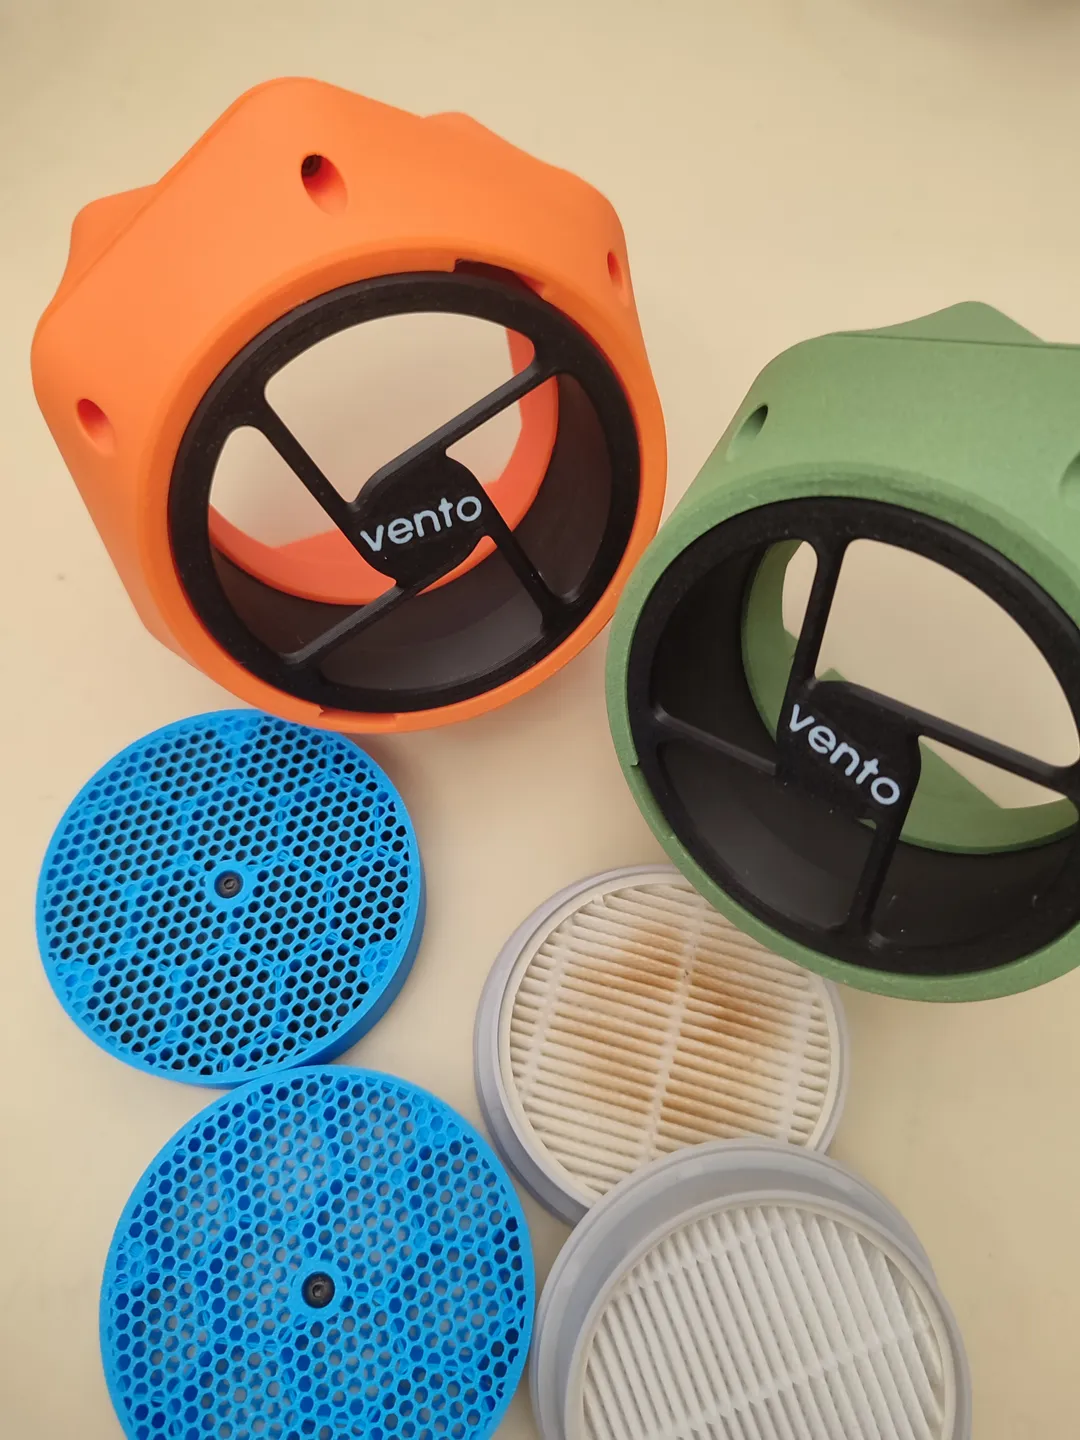
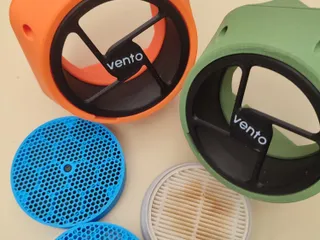
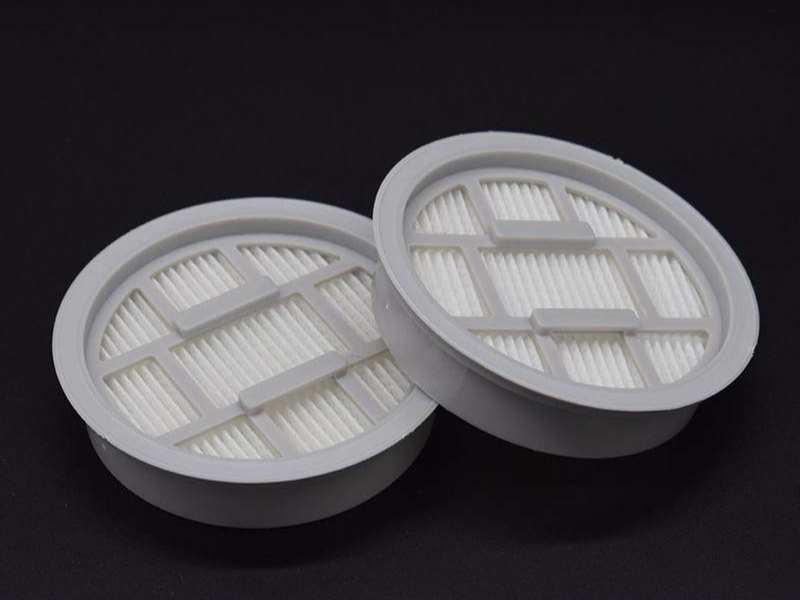
- Xiaomi Deerma-VC20S-VC20-PLUS-VC21 filter
- Acid-free activated carbon
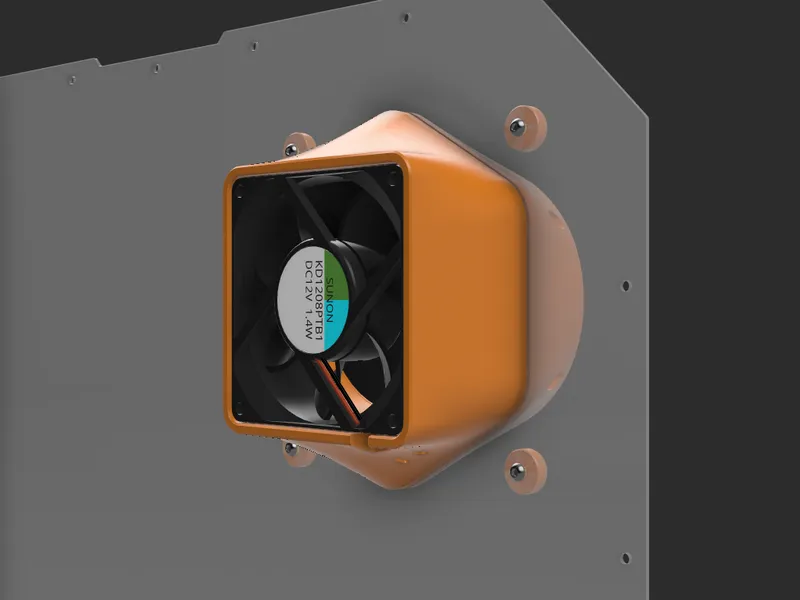
- 8025 axial fan - 5V if you intend to use a standalone power supply. 24V if you intend to use the printer's PSU
For the 8025 fan, get at least 4000rpm to generate enough negative pressure to pull air through the filters. Do note that the higher rpm will mean the fan noise will be higher during operation.
Where to Buy Your Consumables
( links below are not affiliated unless stated)
Acid-free activated carbon:
US - Voxelpla offers acid-free activated carbon in a 1lb pack. You can support the Vento project by buying it from this affiliated link: https://voxelpla.com/thrutheframe
EU - Veetec3D offers acid-free activated carbon and filter. You can support the Vento project by buying it from Veetec3D store.
JPN
- 「KOTOBUKI パウーバイオ」はテストしました、酸は含まれていません
- This seller in Japan was recommended by a user it has a PH of 9.8.
Instruction
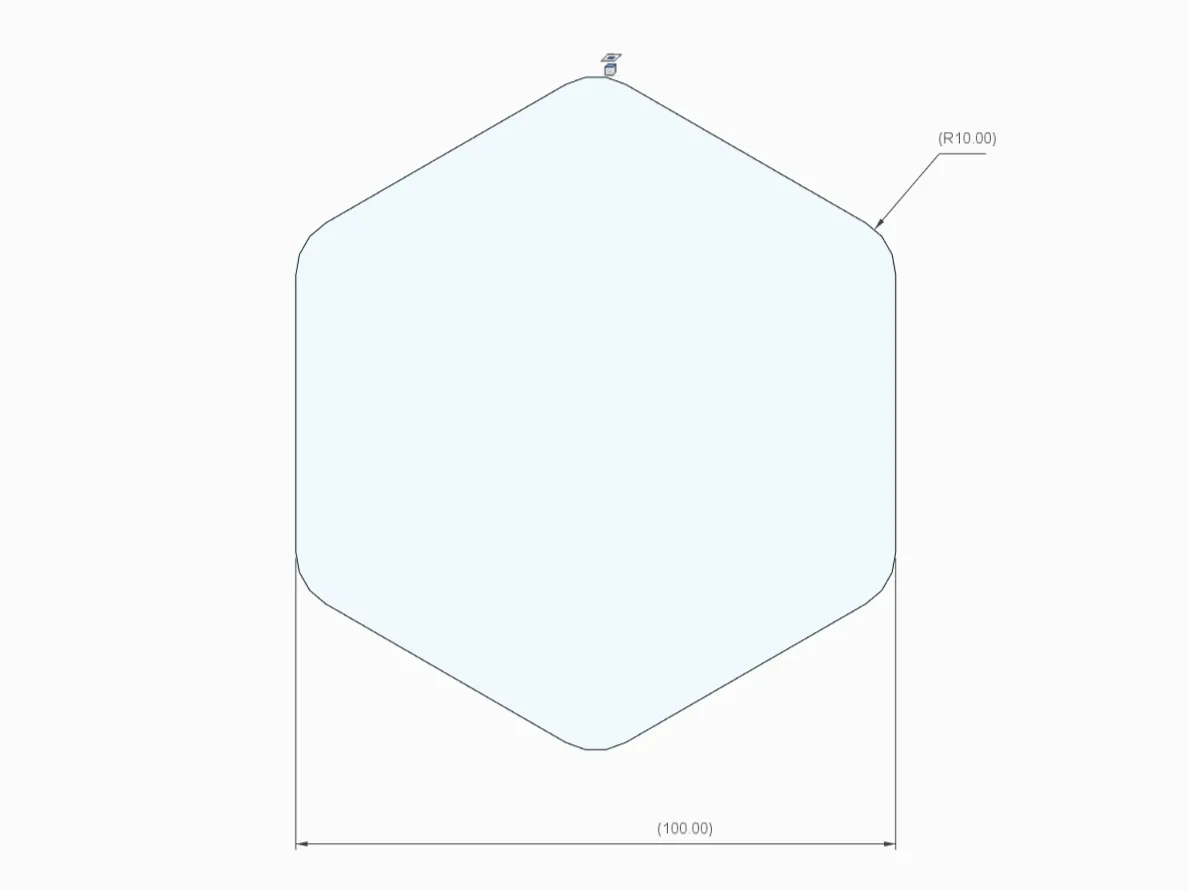
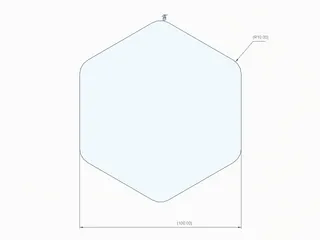
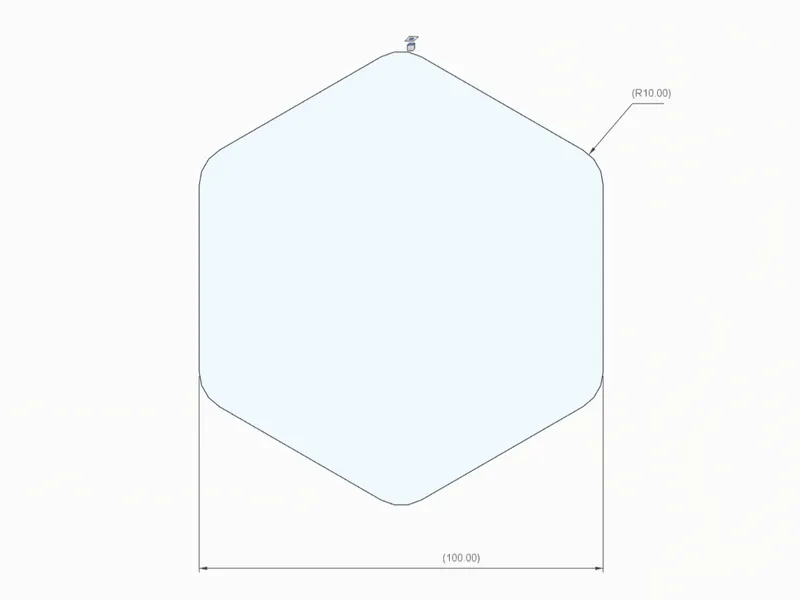
Vento is designed for Original Prusa Enclosure (OPE) and other DIY Printer Enclosures. For OPE the hexagonal hole is precut on the PC back panel which is 1.5mm thick. For most other DIY enclosures, the panel that is commonly used is 3mm and users will have to:
- print “2 Vento fan bracket 3mm panel.3mf”
- laser cut the hexagonal opening
I have prepared the DXF and SVG file which you can download.
If you are using PrusaSlicer for OPE, please print the plate:
- 1 Vento filter bracket 0.6mm offset.3mf
- 3 Vento fan bracket 1.5mm OPE panel.3mf
- 4 Vento carbon container 77.6mm.3mf
- 5 Vento filter canister.3mf
If you are using BambuSlicer for other DIY enclosures, please use VENTO P1P.3mf print plates
- 1 - filter bracket
- 2 - fan bracket for 3mm panel
- 4 - carbon holder screw
- 5 - filter canister different tolerance
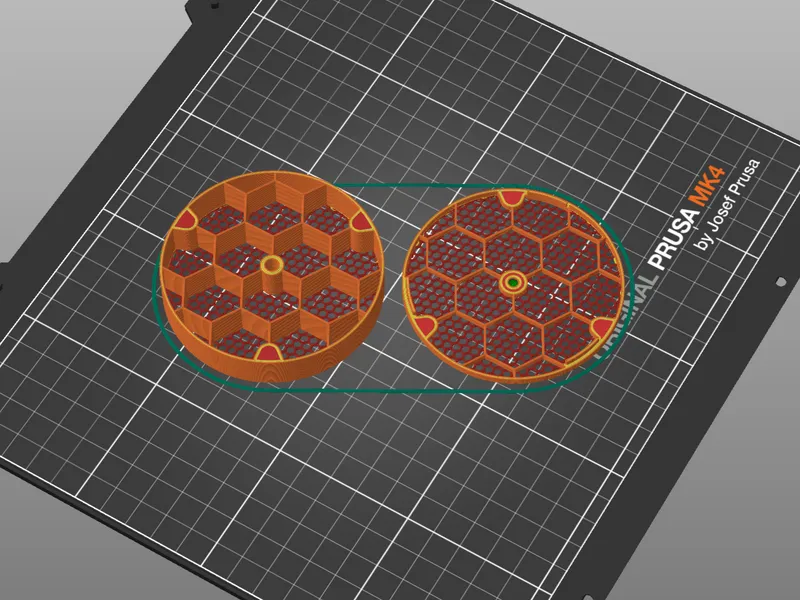
All parts orientation and supports are prepared. Because of the difference in tolerance between printers, I created 3 filter canisters with different tolerance settings. print all 3 and see which fits the best.
I have changed the settings on PrusaSlicer & BambuSlicer to create a grid pattern for the carbon container. Please click “slice now” to see the results.
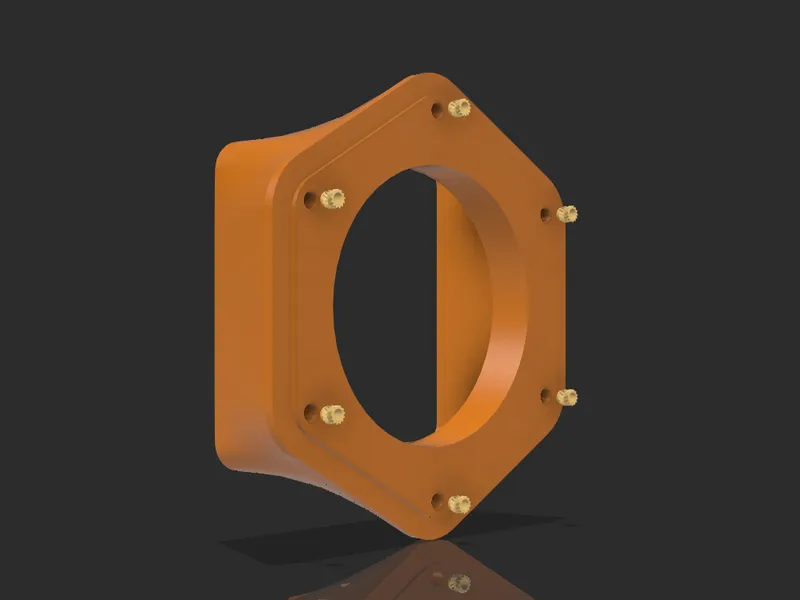
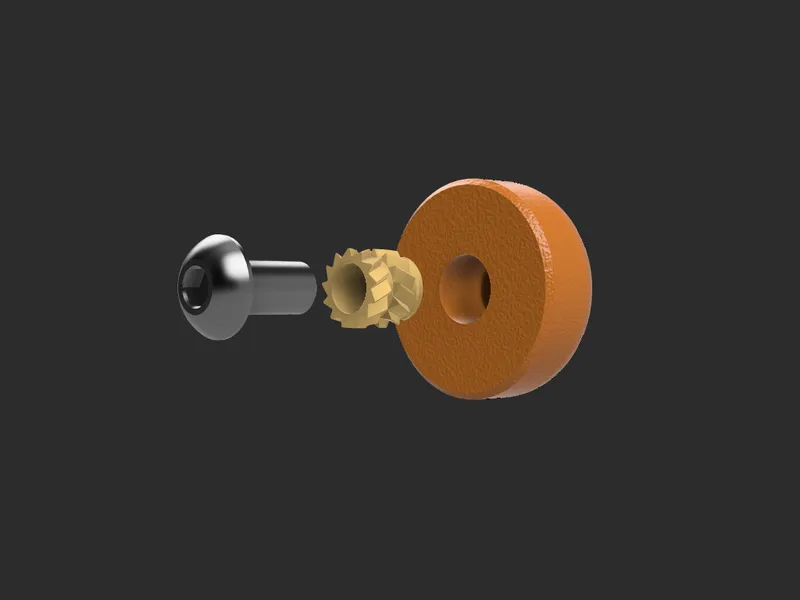
Install all 6 brass inserts. The brass insert has to be flush against the surface. DO NOT push them all the way into the holes.
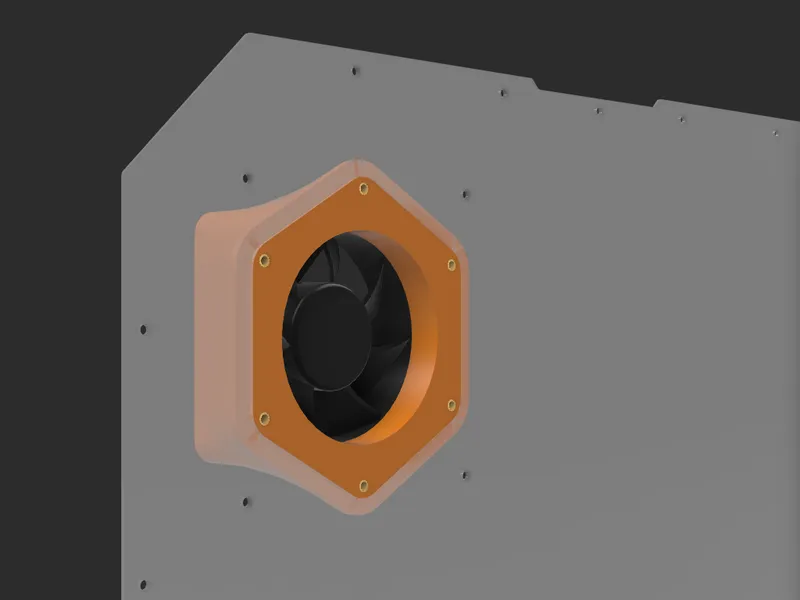
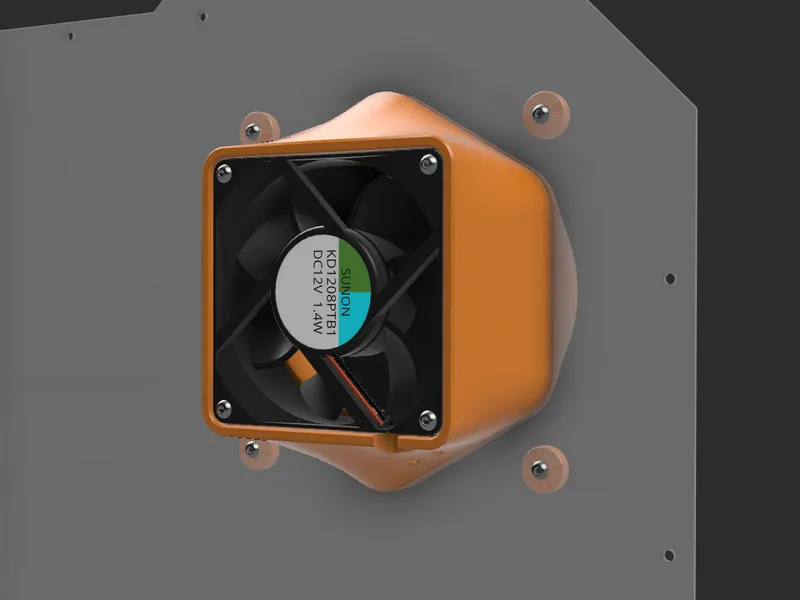
Install the 8025 fan with 4 pcs of M3x30mm BHCS. The holes are self-threading. There is a cut-out for the wire.

Install the fan bracket into the panel. For the Original Prusa Enclosure. You have to cut/remove the hexagonal cutout on the PC back panel. Please smooth the edges of the cutout. The fan bracket was designed with only 0.2mm space tolerance. So it can be a tight fit.
Install filter bracket with 6 pcs of M3x10mm BHCS.

You can now connect the fan to your preferred power supply. You can use a cable tie to secure the wire to the fan bracket. Please ensure safety when working with power supply and electricity. Turn on the fan to check that the fan runs as it should.

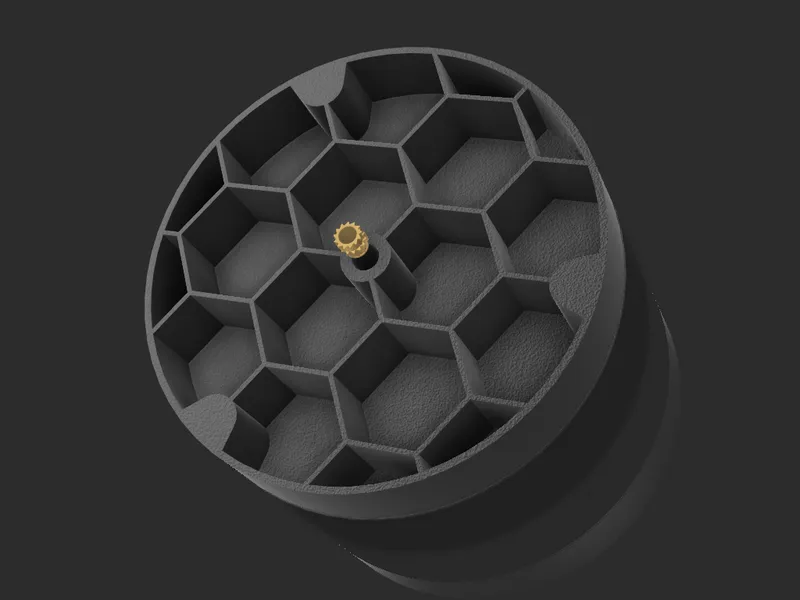
Install brass inserts into the carbon container. Fill carbon pellets, install the cover and secure with a single M3x10mm BHCS. There are guides on the cover, please ensure the guides align properly before securing the screw.

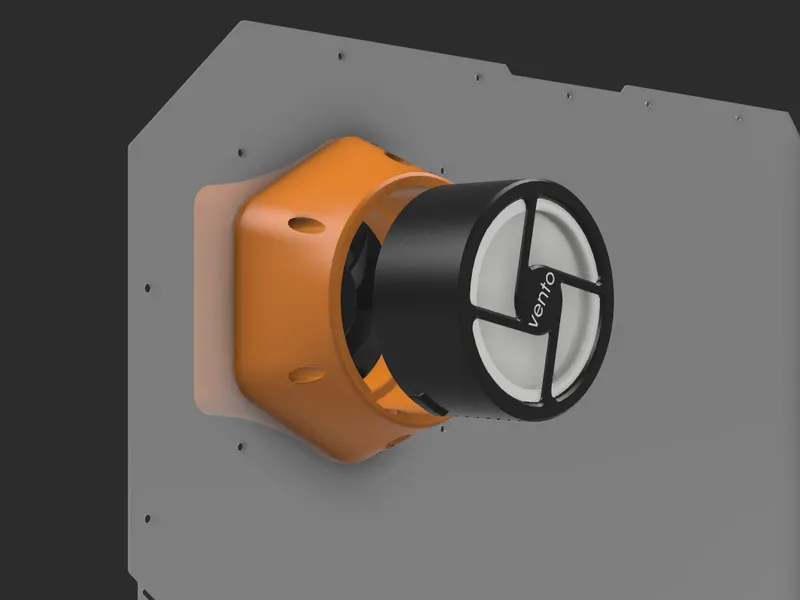
Insert the HEPA filter into the filter canister first followed by the carbon container (see image below). The fitting is tight, and the rubber seal on the HEPA filter will ensure no air leak.

Insert the filter canister into the filter bracket using the guide and twist 60-degree CW to lock.
That's all to it. Enjoy your Vento filter, clearing the air for the Prusa Enclosure.
Additional
The air movement through Vento is designed to be slow and steady with either a 4K/5K rpm fan. It is not supposed to behave like an HVAC system that moves a high volume of air at a very fast rate. This is to prevent a strong draft within the enclosure that can result in a failed print.
If you want to cover the four M3 holes, you can print out 4pcs of “M3 hole cover for OPE.stl” It will require 4 brass inserts and four M3x6mm BHCS to secure it.
Conclusion
To date, my designs are free to download and use. There is no Patreon or OnlyFan (hahaha). If you like my designs and wish to contribute to my coffee addiction & help fund the filaments and materials needed for prototyping, a donation of $5-$10 to Ko-fi or paypal.me will be greatly appreciated.
Caveat
As with all my designs, Prototyping and testing were conducted to ensure printability and meet my own expectations. However, I understand it may and may not work for you. I would request that you read all instructions and print and install them at your own discretion.
Tags
Model origin
The author marked this model as their own original creation.


