Customizable DIY macro keyboard RGB backlight USB C

A customizable DIY macro keyboard with RGB backlight and USB C, which uses cherry mx keys.
33
130
0
1318
updated April 12, 2024
Description
PDFA customizable DIY macro keyboard with RGB backlight and USB C, which uses cherry mx keys.
Features
- RGB backlight
- Fully customizable
- Compatible with all cherry mx keycaps
- USB C
- Simple assembly
- Cover for transport included
- No supports needed
Recommended print settings
- Layer Height: 0.2mm
- No supports needed
Electronics needed (affiliate links)
- 3 Cherry MX Keys: https://amzn.to/3QNLtqB
- Arduino Pro Micro: https://amzn.to/3SNcPQa
- A piece of a 60 LEDs/m WS2812B strip: https://amzn.to/3G846AA
- 2 M2x8 screws: https://amzn.to/3R4Z5PE

Assembly
- YouTube videos (German):
- Part 1/2: Coming soon
- Part 2/2: Coming soon
- Insert buttons into the case
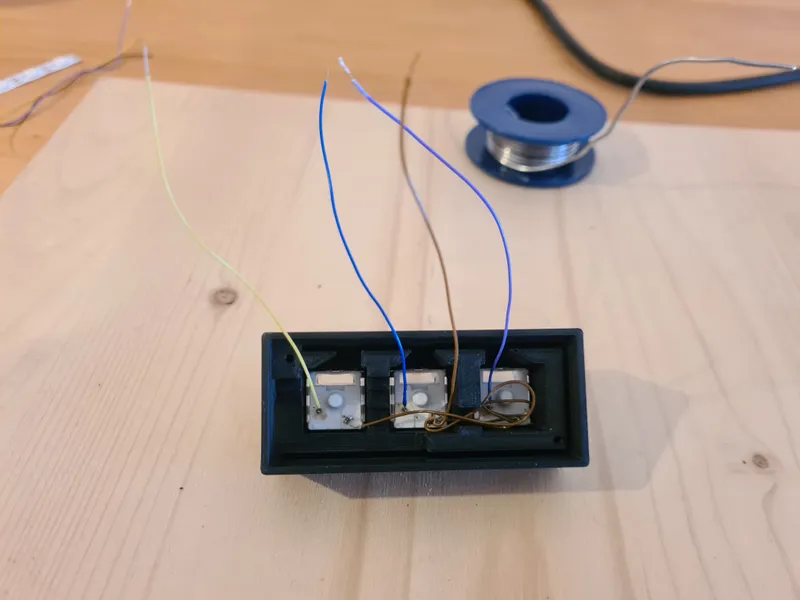
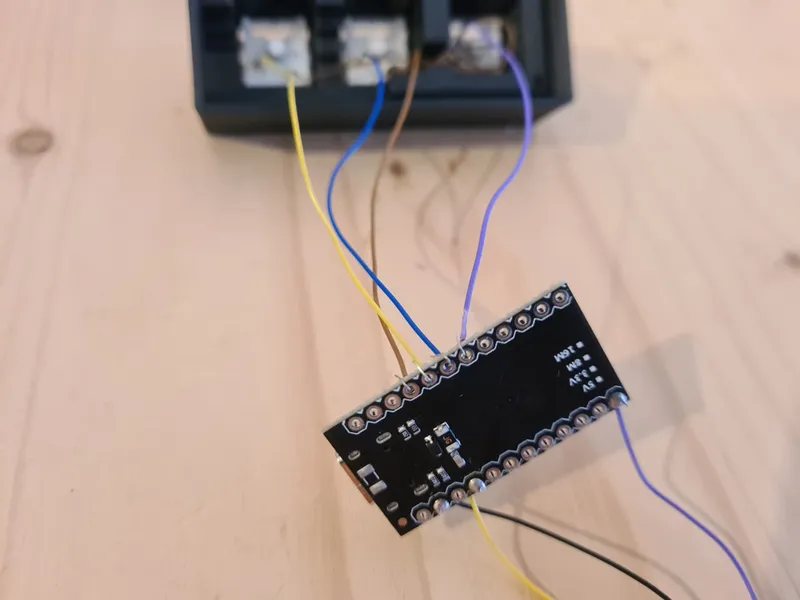
- Solder the electronics together (images of wiring are at the bottom)
- Fit the electronics into the case
- Add the PCB holder print between PCB and lid
- Screw the lid onto the case
- Get the Arduino code from GitHub: https://github.com/Molodos/DIYMacroKeyboard
- Edit the code if you want to customize it
- Connect the Keyboard to your computer and use the Arduino IDE to upload the code to the Keyboard
- Add keycaps (use the provided ones, create your own using the plain keycap or the blender source or use any other cherry mx compatible keycaps)
- Have fun with your new macro keyboard!
You like my work? Consider to buy me a coffee :D
Images of the wiring


Tags
Model origin
The author marked this model as their own original creation.