MMU3 Buffer Simple Loading Helper
Description
PDFThe loading of the MMU3 buffer can be done without removing the cassettes with this helper!
When building my MMU3, I decided to try build the MMU3 buffer. I upgaded my MMU2 using a kit. I still had the original buffer plates: unused: the protective sheets were still on it. I liked the cassettes with the wheels in the MMU3 buffer design. Before that I used an air buffer, no buffer, but the filament entering the MMU PTFE tubes from filament boxes 1 meter above the printer.
The MMU3 buffer was in my enclosure, next to the printer. Loading filament for the standard MMU3 buffer is done by removing the cassette, then push in filament, picking it up, push it back around the wheel of the cassette in the outgoing PTFE tube and then return the cassette into the buffer.
https://www.printables.com/model/598597-prusa-mmu3-buffer-filament-threading-support helps with loading, but still requires the cassette to be removed.
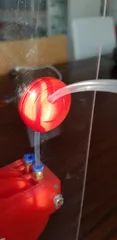
With this guide, you just push the guide from the top of the buffer onto a cassette. Next lock the filament guide into place with the clamp. Now push in filament, until it enters the MMU3. Ensure that your filament tips are cut at a 45 degree angle.
Cassettes stay in the buffer!
Remove the filament guide before printing. You therefore only need one for the buffer, use it for loading all 5 filament cassettes one compartment after the other.
Print Settings
Just don't forget to paint on some supports under the tips of the filament guide. Other settings are not critical.
- edit - 13/11/2023 I added an handle to prevent dropping the filament guide in the MMU3 buffer.
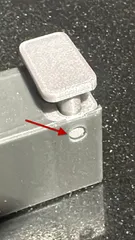
- TIP mark the filament guide, so that you have a better guide how to hold the guide to snap it to the cassette. See picture.
- edit 28 may 2024 - I attempted to adapt to the R4 (MK4) buffer. This work is in progress. For R4 the best fit is the remix from DonDallas71, follow his “remix” link.
Tags
Model origin
The author marked this model as their own original creation.


