Snapmaker J1 40mm Top Lid Riser
Description
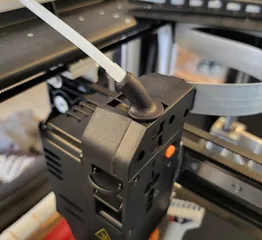
PDFBy raising the lid of the Snapmaker J1 you can adjust the angle of the filament guide to the print head, which makes filament loading a lot easier and reduces the friction of the filament. Furthermore the raised lid also allows to install a small camera in the rear top of the printing chamber (see my other models).
The goal of this modification was to make it look as clean as possible while keeping it simple and affordable. All you need is a filament color of you choise (I tried to match the anodized silver as closely as possible) and two meters of 40x20x2mm L-Shaped aluminum extrusions. By using L-shaped extrusions instead of flat bars, the riser gets a lot stiffer and it is possible to hide the screws.
When cutting the extrusions and drilling the holes you need to be extremely precise. Since this assembly uses countersunk screws, it is not possible to adjust for errors with elongated holes. To make this job easier I designed a guide which helps you when cutting the extrusions and gives you the exact location for the hole. The guide is clamped in place with an M4 screw. I used a small speed square to ensure the cut is as perpendicular as possible.
Two of the extrusions need to be cut to 445mm and the other two to 307mm.
Each corner piece needs two M4x4mm heat set inserts to attach to the aluminum extrusions.
There is also space to add some 5x2mm magnets on the corner pieces, but I don't even use them. It sits perfectly fine without them.
Tags
Model origin
The author marked this model as their own original creation.


