Traffic Signs (for scale models and key ring) - Set of 20 Informative Signs

Description
PDFTraffic Signs
I designed these traffic signs based on the official documentation of the National Road Safety Directorate of the Argentine Republic, the country where I live.
Informative signs
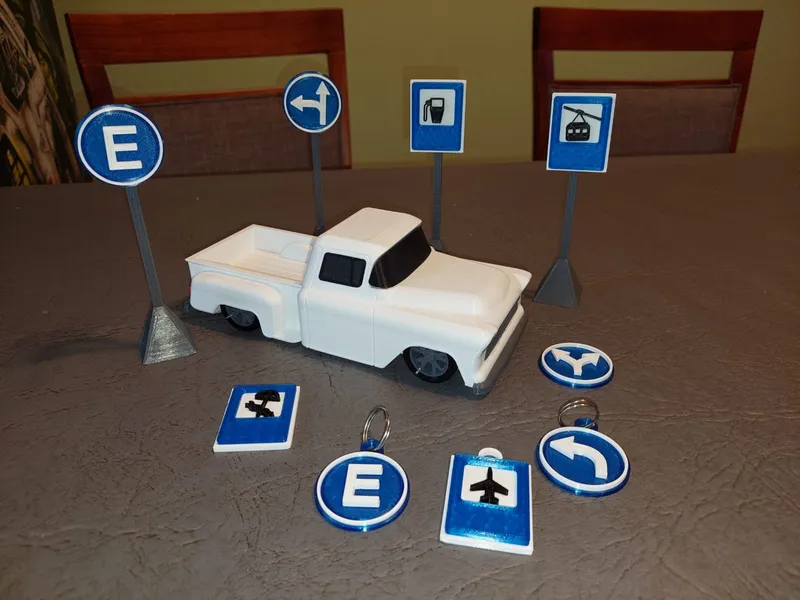
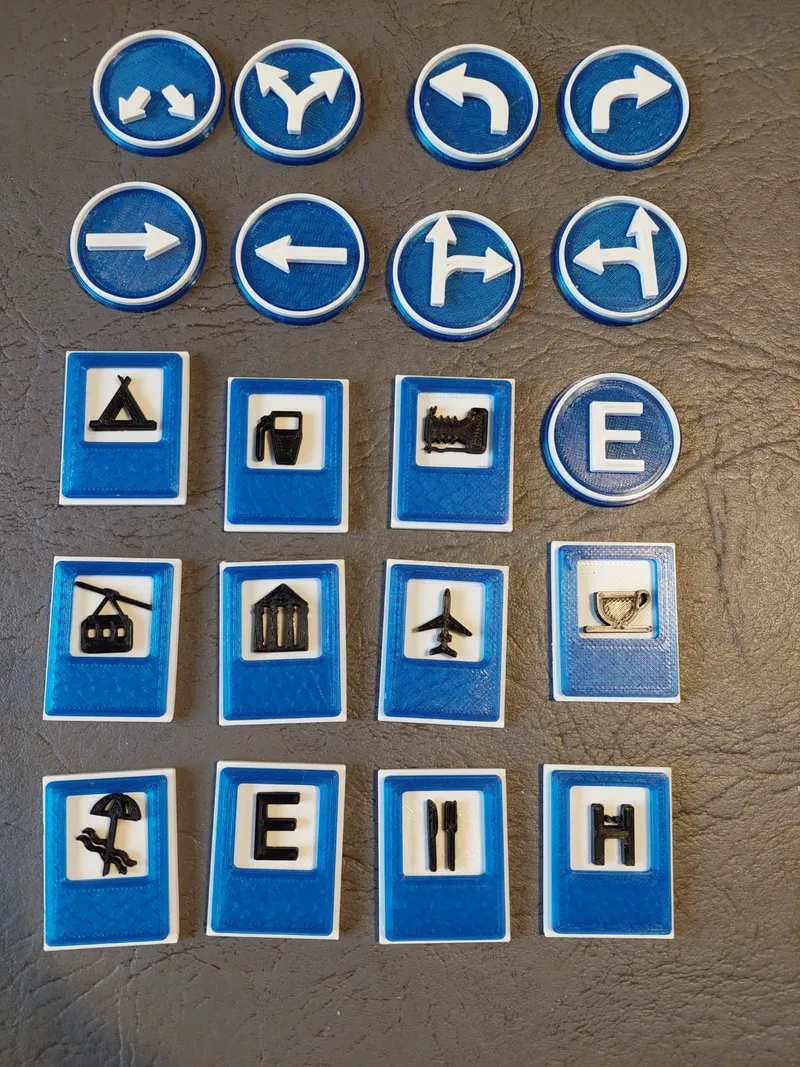
In this fourth stage, I design the Informative Signs, they are in the shape of a blue circle with a white border and a white rectangle with a blue rectangle on top . There are a total of 20 different signs.
The complete sign design is made in 3 parts, the base, the border and the sign itself. The base is printed in white or blue, depending on the model, the border is printed in white or blue and the sign is printed in black or white, depending on the model. These colors are the official ones, although it goes in each one if you want to make your own decorative version from now on.
Base
There are 2 types of bases:
- The normal model has a cutout in the back to be able to fit the post there and thus have a complete traffic sign.
- The model with a ring allows you to use any of these signals as a key ring.
The design of the pins and the corresponding holes in the signals to embed are for reference only, any of which can be used for any signal, since they can simply be cut by hand due to their small size. Given the small size, a good calibration of the printer is necessary so that the diameter of the pin and the hole fit together without problem.
Some of the signs use the base in white (rectaangle), and others in blue (circular).
Recommendation
All signs can be glued on with a bead of glue to ensure they don't come off their pin.
Borders
The borders fit nicely on the base and the use of glue is not needed, although it can be added if necessary of course.
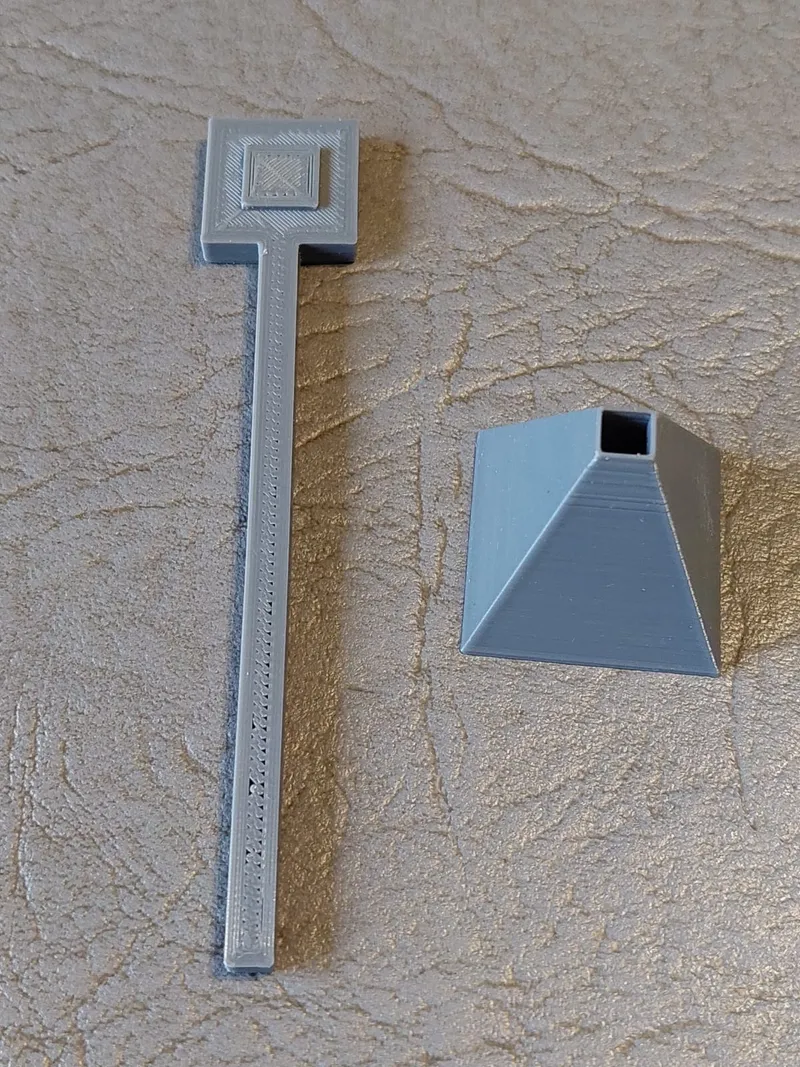
Post and post base
The post and its base fit together without the need for glue, and are printed without supports. Pay attention to the orientation of the post, it must be with the box raised up, that will be the one that fits into the back of the base of the sign. The recommendation is to print them in grey, resembling metal.
Associated designs
- Preventive Signs https://www.printables.com/es/model/549202-traffic-signs-for-scale-models-and-key-ring-set-of
- Regulatory Signs https://www.printables.com/es/model/566423-traffic-signs-for-scale-models-and-key-ring-set-of
- Restrictive Signs https://www.printables.com/es/model/580587-traffic-signs-for-scale-models-and-key-ring-set-of
- Temporary Demarcation Signs https://www.printables.com/es/model/640883-traffic-signs-for-scale-models-and-key-ring-set-of
- Box with 19 slots(for Preventive Signs) (40x192x30mm) https://www.printables.com/es/model/556485-box-with-slots
- Box with 20 slots(for Regulatory, Restrictive and Informative Signs) (50x202x30mm) https://www.printables.com/es/model/573937-box-with-slots-50x202x30mm-20-slots
Tags
Model origin
The author marked this model as their own original creation.


