spiggytech ITX APU/iGP PicoPSU SFFPC Chassis
Description
PDFThis is a simple ITX APU/IGP Small Formfactor PC (SFFPC)
I was trying to make a small server device with a spare ITX motherboard and needed a case quickly. As such, this design is pretty rudimentary.
Edited 9/2/23: Small dimensional updates added. Logos embossed.
Features:
- Simple Low Profile Design
- Quick Assembly motherboard Tray
- Integrated Standoffs
- Integrated Wire Management slots
- Mobo Rear Access Space (for most rear-mount M.2 SSD)
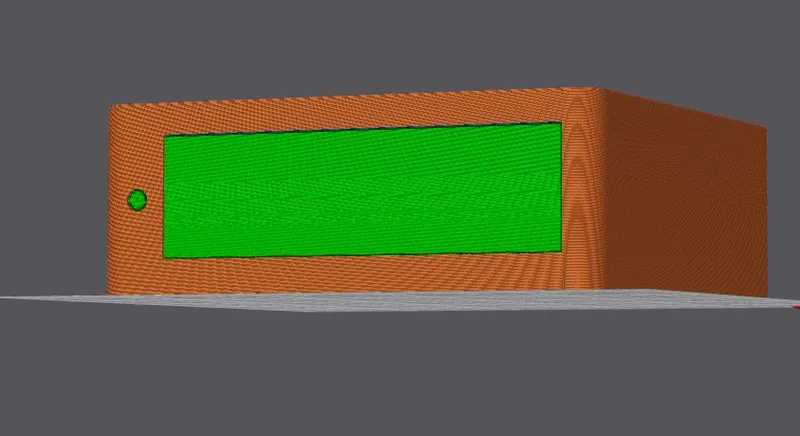
- Front 12mm Tac Button slot
- Rear 8mm Pico PSU plug hole
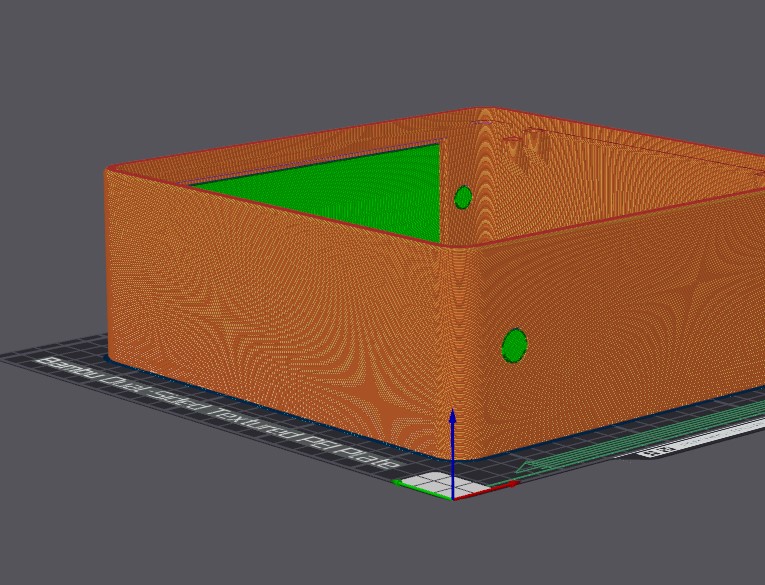
- Magnetic Side Panels
- 49mm tall cooler compatibility
Build requirements
All components to be PETG+ at MINIMUM. ASA recommended for motherboard tray
Additional Materials
- 8x M3x6mm screws for securing the motherboard and the motherboard to the chassis
- 4x M3x6mm Brass Heat Inserts for securing the motherboard tray to the chassis
- 8x 5mm diameter x 2mm thick disk magnets for attaching the side panel covers to the chassis
- A picoPSU for your ITX motherboard
- 12mm Button (LED) or Non LED
- 3M Automative Tape or VHB for 2.5in SSD (optional)
Instructions:
Side Panels: Print with no top layers, setting fill to 30% Honeycomb (not 3D) +4 for wall layers. This will give you a nice hexagon mesh. I recommend a 3mm Brim.
Motherboard Tray: Print to 15% Gyroid, +4 walls. Add supports to the cable tabs. 3mm Brim Recommended
Shell: Like motherboard Tray
Print the shell with supports on the rear IO and all button holes. As well as the bottom shelf. The mounting points don't need any additional supports. (See Images)
Assembly Instructions:
- Install (4) heat inserts into the chassis shell
- Install (8) magnets into the chassis shell
- Install (4) magnets into each side panel cover
- Test fit PicoPSU and 12mm Power Button for fitment
- Install CPU, Ram, Cooler, M.2 SSD into Motherboard**
- Attach Complete Motherboard to chassis shell
- Add the antenna
- Enjoy the Chassis
** 2.5in SATA SSD not supported in this model, sorry - See the NIC model.
If you have any questions or comments, feel free to reach out to me! I'd love to hear from you.
Tags
Model origin
The author marked this model as their own original creation.


