Retro Dad Joke | Home & Office Decor

Description
PDFI turned the punchline into a fun gift for Dad!
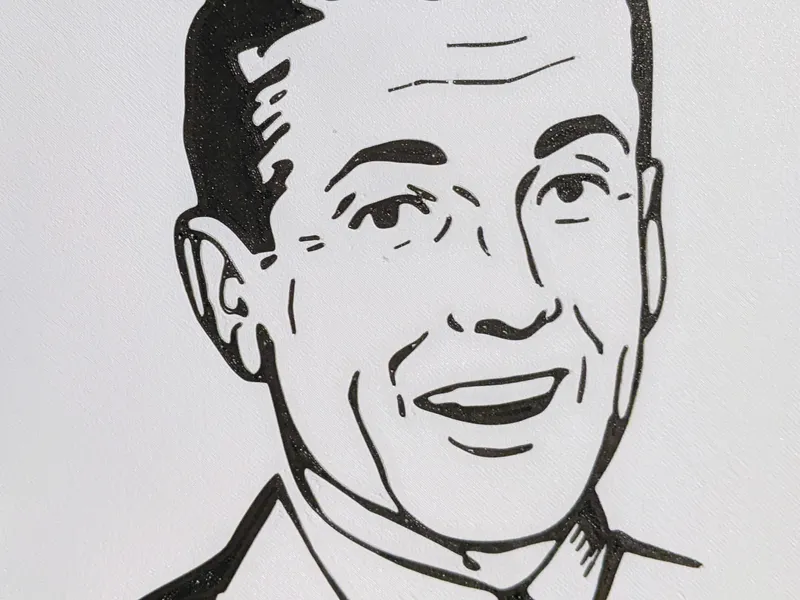
This multi-material/color print was created manually on a printer with a single extruder. Here's how:
- Print the black outlines first
- Leave the first print on the bed when it's finished
- Keep the bed hot and change filament
- Remove the purge line and any skirt if used
- Print the white background second
I scaled my print down to 60%. Make sure to scale both parts equally and center both parts on the print bed to keep them aligned.
XY Size Compensation:
You may need to adjust this setting depending on your printer's tolerances. If you notice that the extrusion lines where the two colors meet are overlapping you can input a negative value to shrink the background (white part) model along the x and y axis. On the other hand, input a positive value if you notice the extrusion lines where the two colors meet have gaps between the two colors. A small increment of + or - 0.1mm should be enough. I ended up not needing the setting for the print in the pictures.
Bed Adhesion:
A clean bed is a must for good first layer adhesion with this print method. Try warm water and dish soap to give your removable bed the best possible adhesion. You can then use isopropyl alcohol in-between prints, as long as you do not touch the bed excessively.
Don't want to mess with all of the above?
I've also included another version that is 2mm thick. You can simply start with your background color and do a color swap for the outlines at 1mm.
Tags
Model origin
The author marked this model as their own original creation.