Raspberry PI 19" 2U rack mount

Description
PDFI had side mounted raspberries using this model. But at some point I've got too many RPis, so I've decided to creaate a proper 19" mount which should be easy made with as least print as possible.
BOM
This model consist of several parts:
- Mounting brackets
- Aluminium extrustion rails
- 10x20 square tube (2pcs), 450mm length
- 12x12 square angle (1pcs), 450mm length
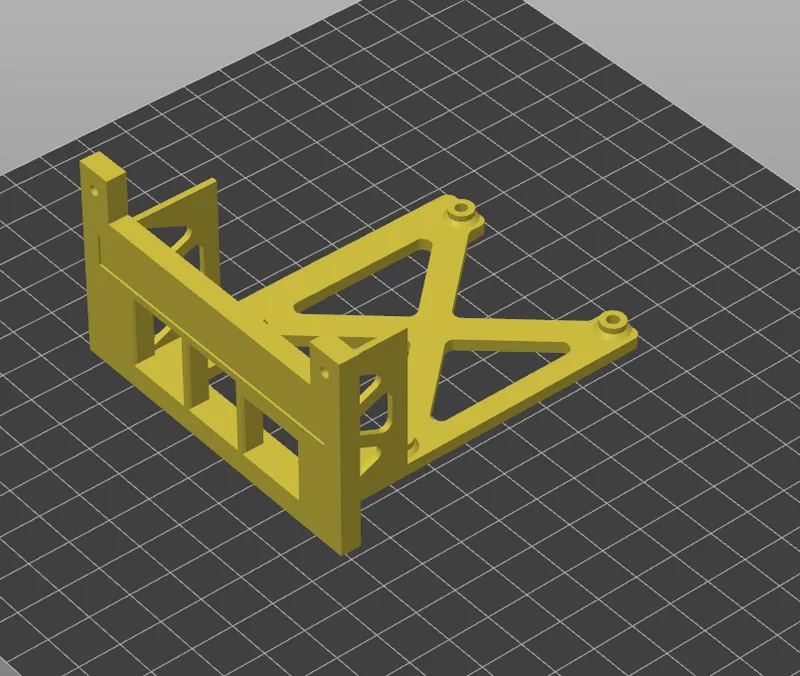
- Module handle with clips
- Module RPi mount plate
- 3x12 screws for clip assembly (2pcs)
- Bolts to mount RPi to mount plate (see note below)
Note
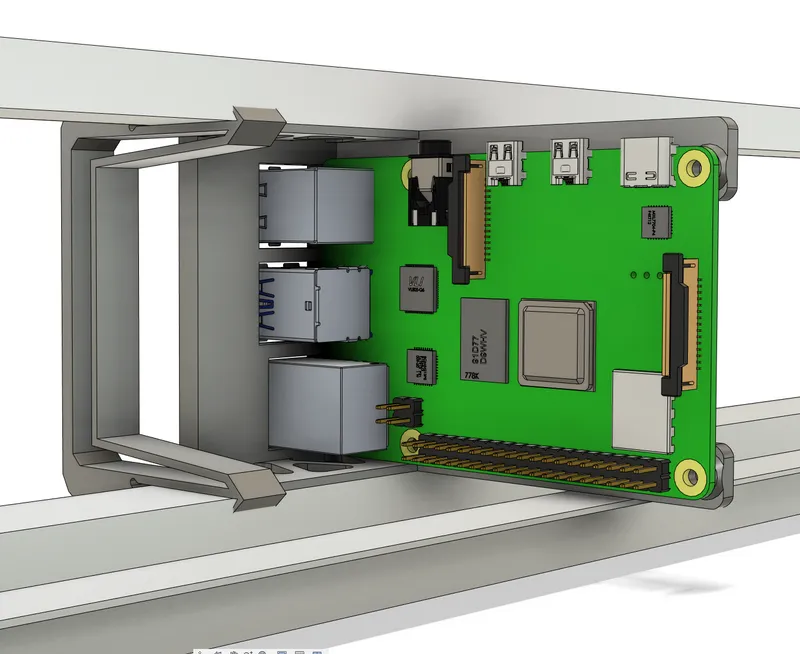
This model is intended to use with PoE HAT. But it's not mandatory (but there is no sense). I'm using waveshare one https://www.aliexpress.com/item/4001298160940.html so dimensions are made to fit it as single module. Other PoE HATs might have other dimensions
RPi'nting & Assembly
Rack
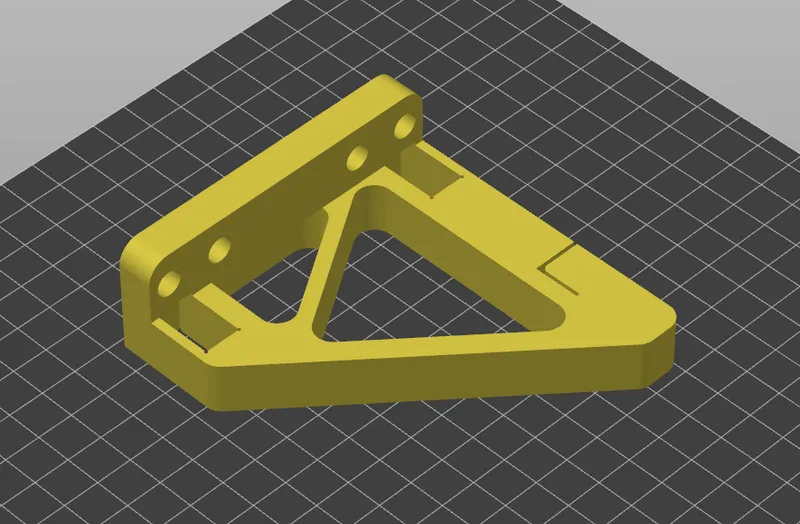
Mounting brackets should be printed on the most flat side (as shown in the picture), two symmetrical parts. This orientation will prevent it from cracking when extrusions will be pressed in while assembling.
Cut aluminium extrusions to the length specified and press them firmly to the corresponding mount holes
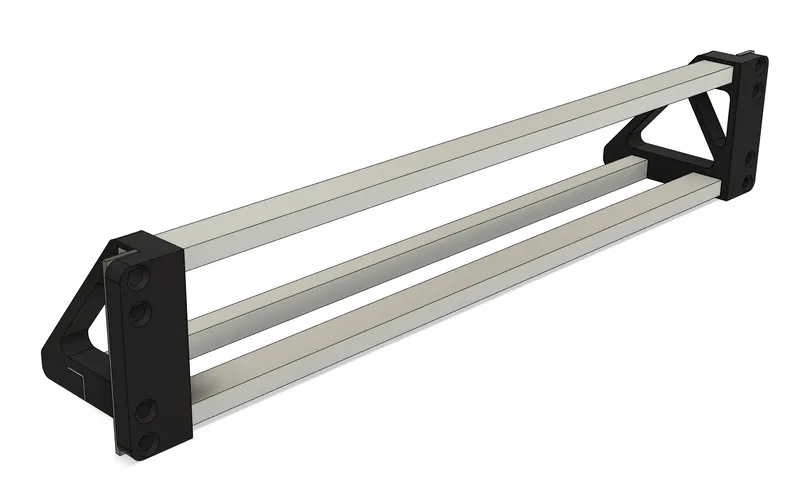
Verify that assembly fits to your rack, remove some extrusion length if needed
Now you have rack itself assembled and installed.
RPi Mount
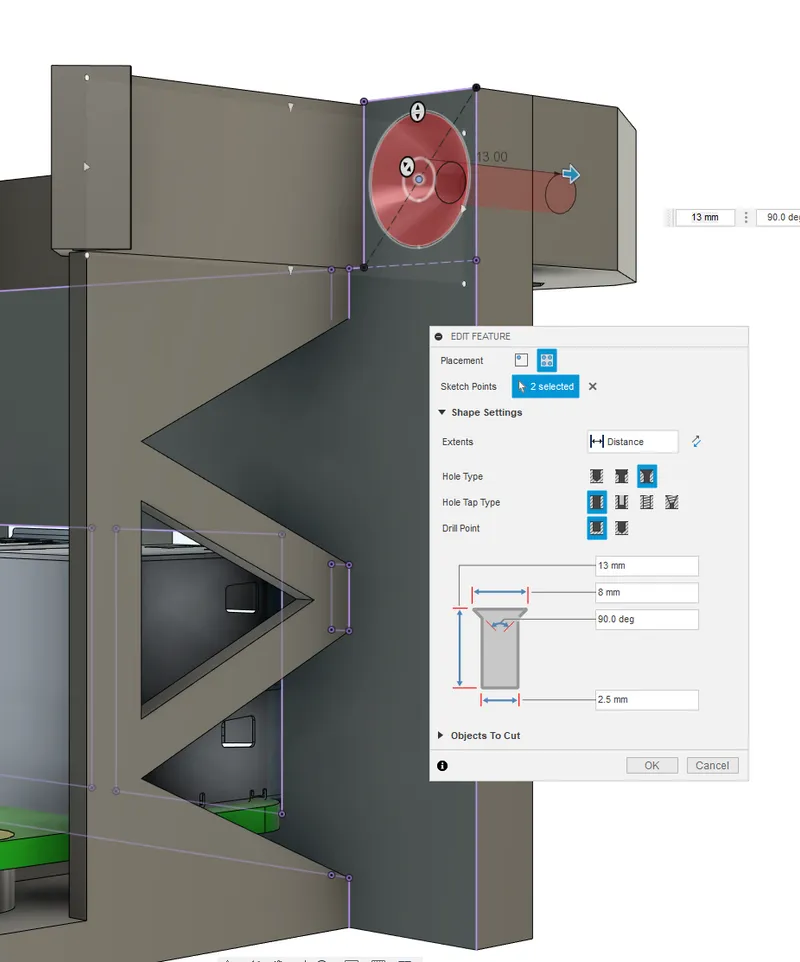
Print the clip. Check it fits well to the rack with satisfying click. I've printed mine with some brim

Print the RPi mount plate using this orientation
Model has some closed holes for mounting hardware, use the drill or the bolts themselves to go through
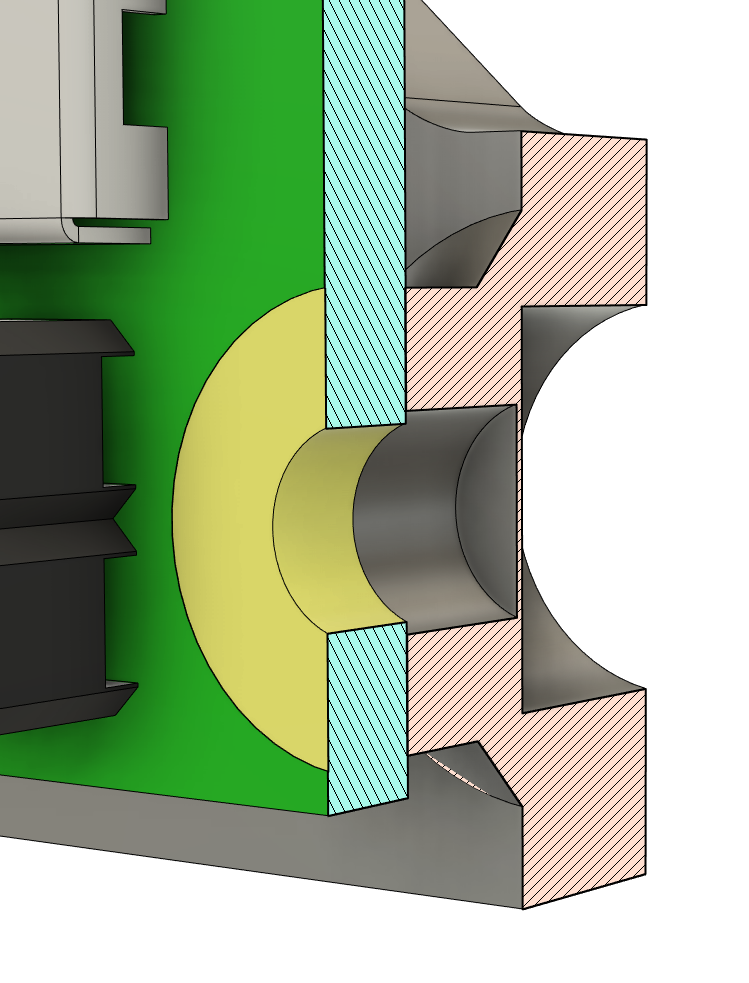
Use the premade hole to attach mount plate to the clip with 3x12 screws
You're done! Now you can clip your raspberry pi in and attach ethernet with PoE to power it
Tags
Model origin
The author marked this model as their own original creation.


