7" touch screen case whit 2020 profile support

Description
PDFAttention: I do not consider myself responsible for the modifications performed on the touchscreen, it is a delicate component, the manufacturers can change the manufacturing layout and the layout of the tracks and the arrangement of the components, the cuts and holes must be made with great care, the same must be made in such a way as to insulate the copper track which has the task of grounding, furthermore the flats of the panel are very delicate as well as the connectors, therefore I do not consider myself responsible for damages that could be created on your touchscreen, I also remind you that this change will invalidate the warranty of the touchscreen which may later have problems even unrelated to the change and you will not be able to use it.
this model is based on a cheap HDMI touchscreen. to be able to use the case you need to make changes on the touchscreen and especially on its control board, if you are not sure what you have to do I advise you against making the changes.
first detach the flat cables from the connectors in a delicate way.
then proceed to detach the panel from the control board with a utility knife or something similar.
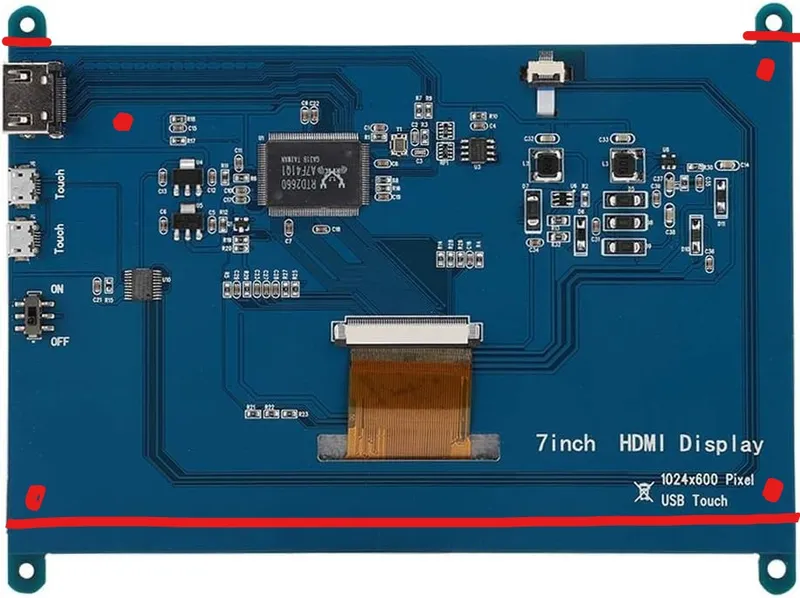
after separating the board from the panel, proceed to cut the upper flaps with a hacksaw or something similar.
now align the upper part of the panel with the upper part of the card and make a signal to cut the lower part of the card, remember that the card must not protrude but must be identical to the panel, if it is too small you will not be able to make the holes to fix it the whole.
after cutting the lower part, insert the card inside the previous touchscreen case printed with your 3D printer and mark where to make the holes on the card with an indelible marker.
at this point you're ready to make the four holes with a 3.2 mm drill make sure you don't drill the copper tracks but only on the thick part that acts as ground.
after making the holes, proceed to remove the residual copper from near the holes and then apply insulating tape.
now put the screws with the spacers and check with a tester that they do not make contact with the ground of the board, if there is continuity proceed to insulate the holes better.
now put two layers of thick double-sided tape on top of each other to glue the panel back onto the card, being careful to pass the flat cables through the holes in the card, to align both well you can help yourself with a printed case, the flats will be perfectly aligned and you will have the space to clip them all the same.
now you can proceed with assembling everything:
Tags
Model origin
The author marked this model as their own original creation.

