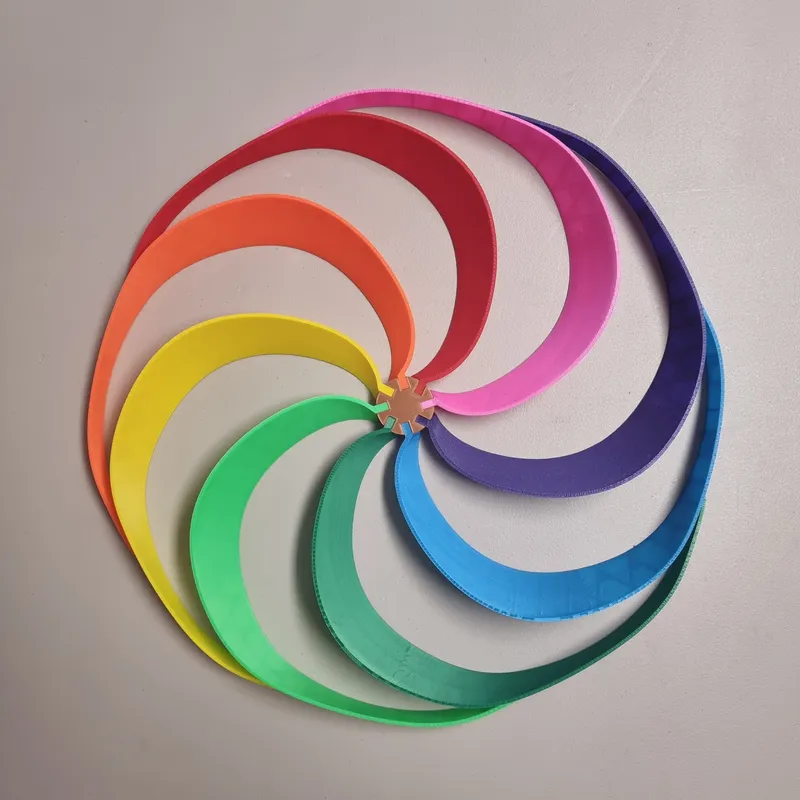
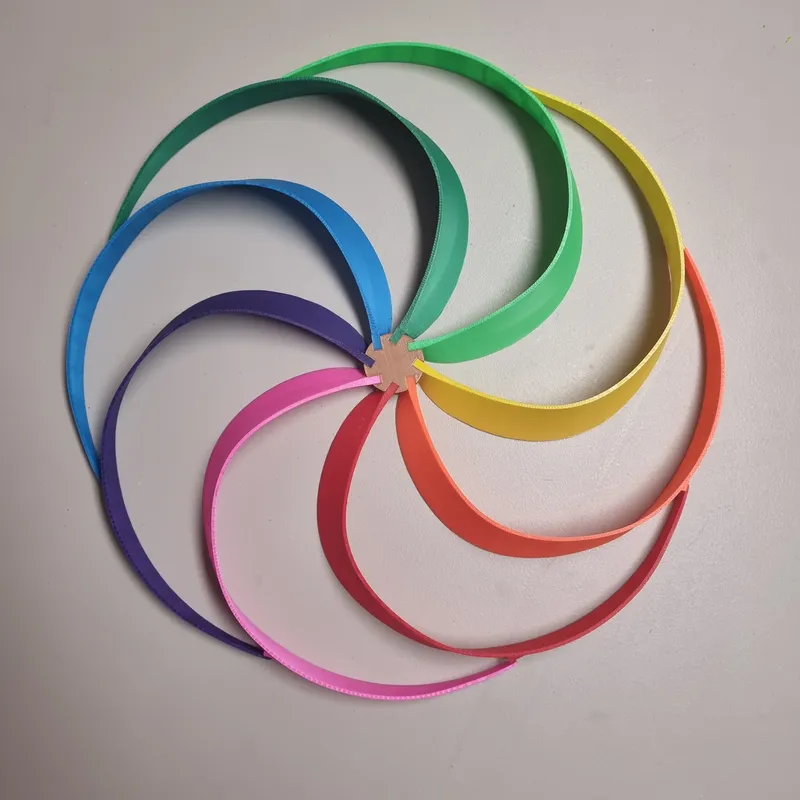
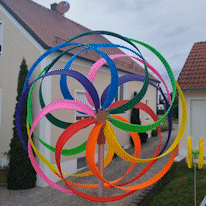
40cm Giant Wind Wheel (approx 15,75" diameter)

Description
PDFUpdate 2023-01-08__02:
I've made a 30cm version of this wind-wheel:
30cm Wind Wheel (approx 11,8") - Remix of Giant Wind Wheel
Update 2023-01-08__01:
There a two possible ways for the rotor:
 “open” rotor - the wings facing away from the ground | 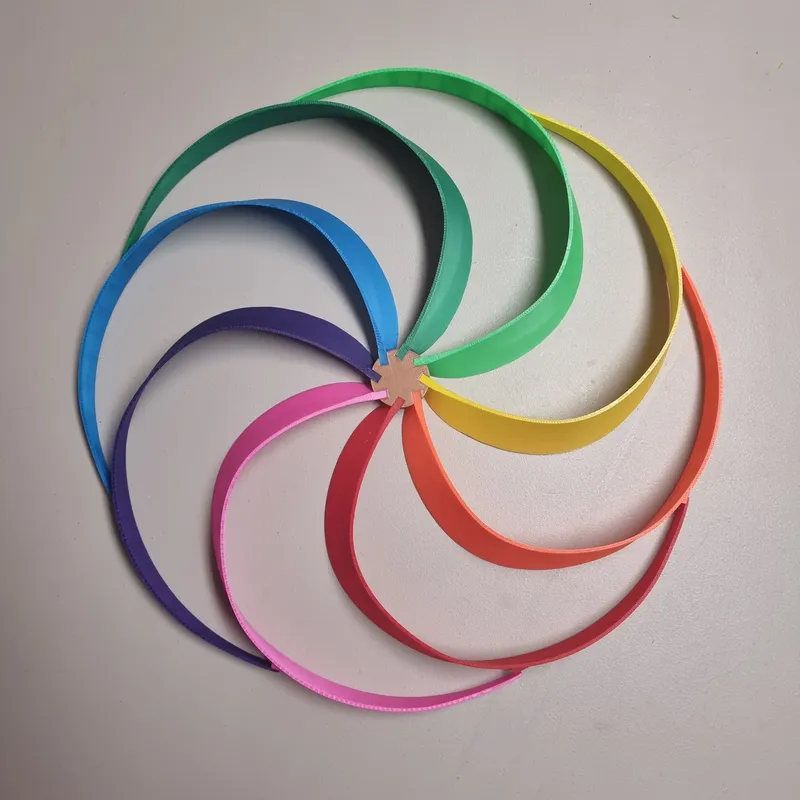 “closed” rotor - the wings facing to the ground |
It seems to me, that the open rotor spins more frequently, than the closed one. I've added now the open rotor so you can decide which of them you want to print.
________________________________________________________________________________________________________________
Let's start
Inspired by my remix Optical Illusion wind wheel (original by Dynamite) I wanted to make a bigger wind wheel - and here it is:
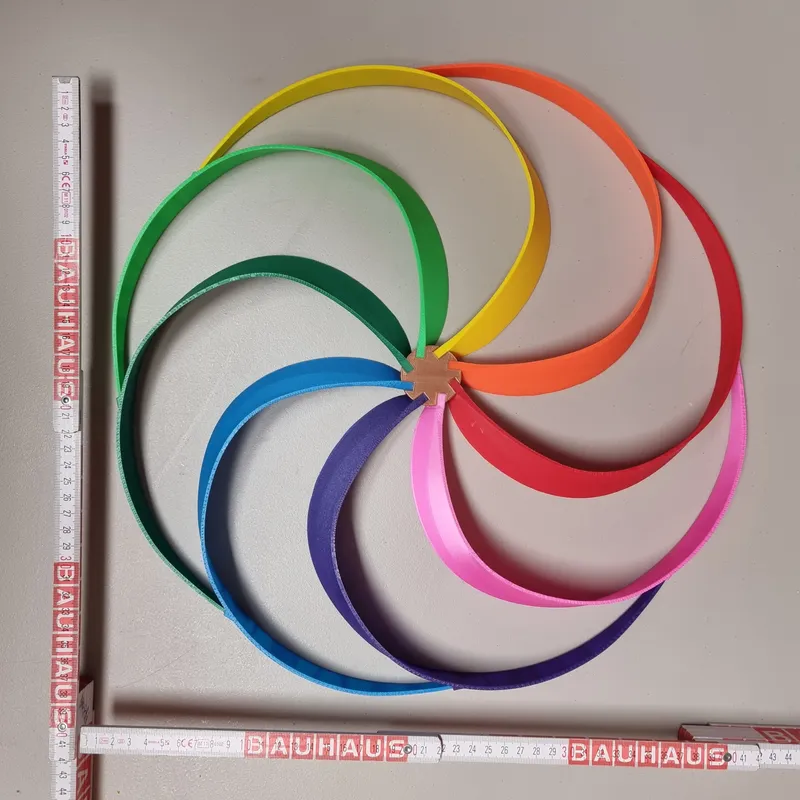
(approx. 40cm/15,75" in diameter, it is a massive built and a hypnotic point of view in your garden or on your balcony)
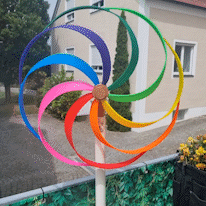
This is a timewise massive, no easy built. Due to the size and overall weight, the wind wheel will not be so wind sensitive than a smaller windmill (e.g. Optical Illusion wind wheel). So don't be dissapointed when the wheel won't move with every small breeze.
Also the type/qualitiy of the used ball bearing does have a massive effect on the aggility - I've used sealed APEC 9 bearing from a good inlineskater OEM. I also noticed that the ball bearings need some time to work proberly.
Overall Structure
The whole windwheel consists of two major groups.
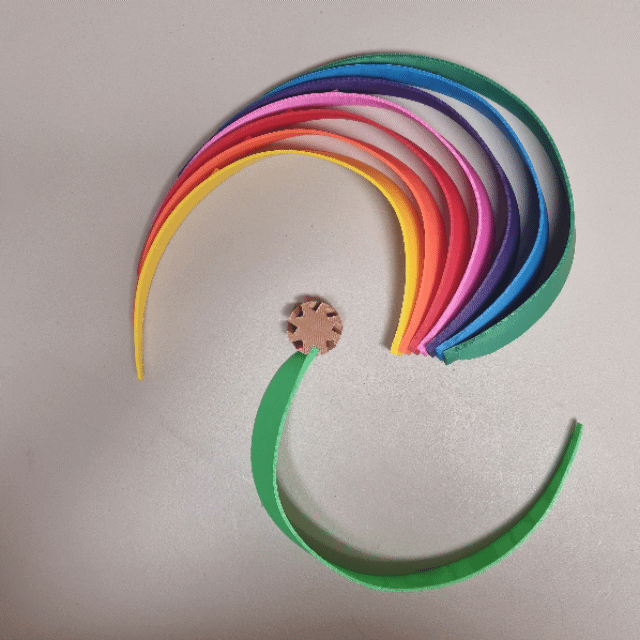
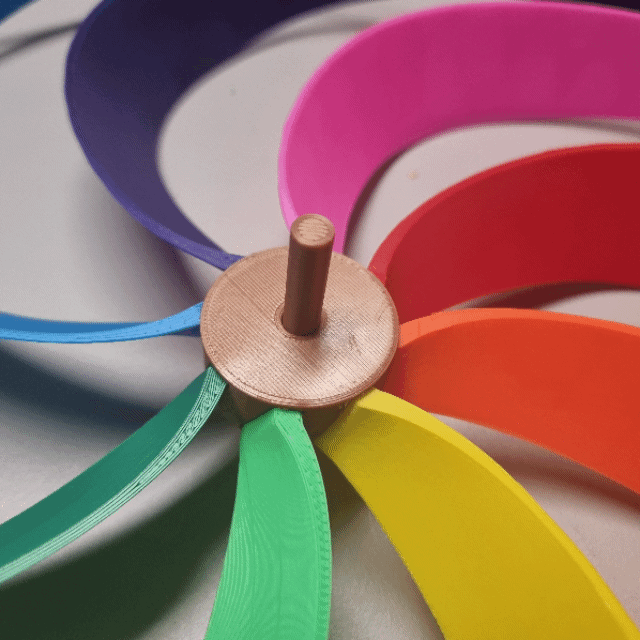
The first group is the rotor with it's 8 wings and the central hub.

The second group is the housing and the bearing.
Building the rotor
First of all you have to print the 8 wings and glue them into the rotor
To get a good qualitiy result I can give following tips:
- to get a light rotor it's important to print light wings. I've printed the wings with 1 perimeter and 5% infill. The rotor was printed with 2 perimeters and 15% infill
- I highly recommend to use brims - I know they are a pain, but otherwise you risk that the wingends detaches from the plate while printing
- let the wing cool down on the print bed before removing
- It's vital, that wings are ALL on one level - do the glueing on a table. I strongly recommend to glue all wings into the hub first before connecting the wings.
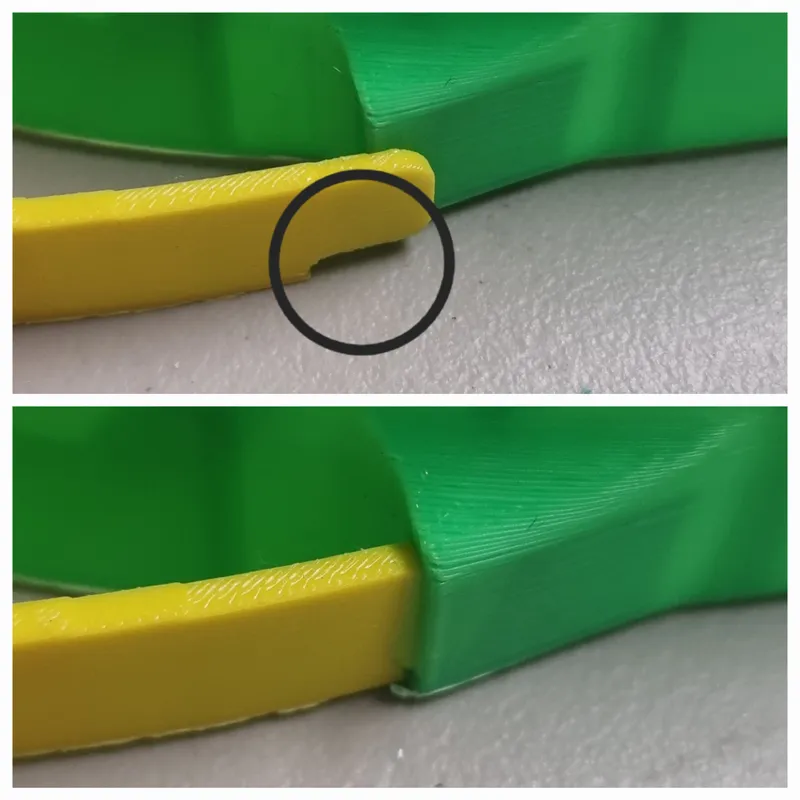
- the wings are connected by sticking the one end of a wing in a pouch of another wing (use glue). The end should easily slip into the pouch without any resistance or putting any twist to the whole rotor structure. If you experience any resistance and work on the part (making the end thinner) inidicated by the black circle.
- it's vital that assembled rotor lies as flat as possible on the surface
The housing (attaching the rotor)
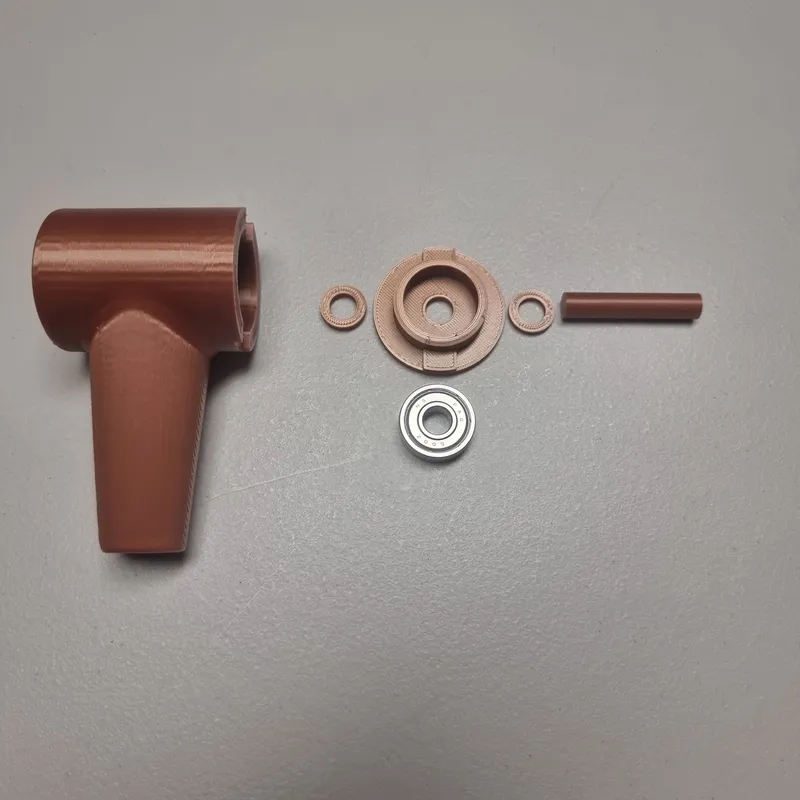
The housing consists if:
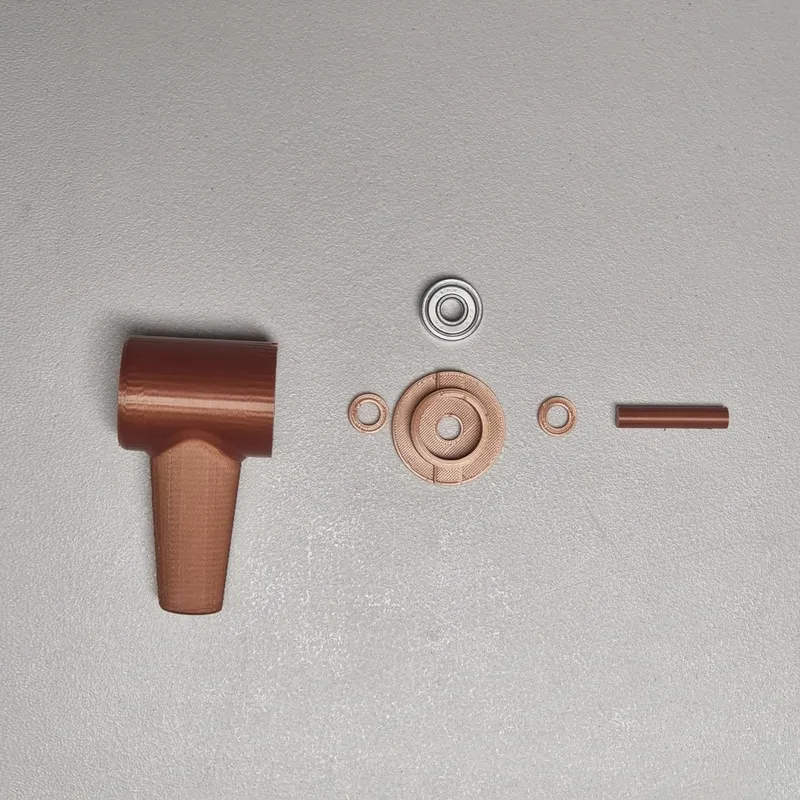
From left to right: single-housing, distance ring, 608 bearing and shell, distance ring, axis
I've printed the single housing, the distance rings and the 608 ball bearing shell with 3 perimeters and 30% infill, the axis with 3 perimeters and 70% infill.
How to assemble those:
- Insert the axis into the rotor (ensure a tight fit)
- put on a distance ring onto the axis
- but the ball bearing into it's shell (ensure a tight fit) and put this assembly onto the axis (ensure a tight fit) - facing the open ball bearing side away from the rotor
- put on a distance ring and to the axle (I recommend it to glue this ring to the axis but be carefull - never apply glue to the ball bearing itself or into location, where the glue can get into the ball bearing… that sucks)
- connect the rotor and bearing assembly to the single-housing (use some glue)
- DONE
Final comments:
- I've experimented with many tolerances and finally came to the conclusion, that I print the parts a little smaller and achieve the thight fit by putting on a textile glue tape before putting the parts together. This proofed to me more easily and keeps me more calm
- The mounting hole of the housing is 16mm
I hope you can use this design and would be very thankfull if you give me a like, a comment or even better post a make of your built.
Stay curious and enjoy life!
If you are interested in a two rotor wind wheel version of this size, go to Giant Optical Illusion Wind Wheel (approx 40cm/15,75" diameter).
Tags
Model origin
The author marked this model as their own original creation.


