3D-Printer Enclosure (e.g. MK3 or MK4)

Description
PDFI did not like the Prusa offered enclosure for MK4, so I built my own. Unfortunately, I cannot export the model to a step nor F3d-file, so I just added a 1:2 scale of a stl-file.
Main enclosure size outer dimensions are 550mm wide, 540mm high, 650mm deep. This is when the profiles are correctly assembled.
Explore my other Printables: https://www.printables.com/de/@Tritschi
Materials:
Aluminum Profile 2020: 4slots 6.4mm wide, center hole dia Ø4.8 for M5 threads.
Slot shall be wider than 6+ mm. This is important for later side glasses of 3mm thickness as sliding doors. Hole diameter important for M5 BHC screws (Linsenschraube, Button Head Screw).
- Item #1: 4x 540mm: upright profiles. Note: they make outer corners, which means that all other profiles come inside of them!
- Item #2: 4x 510mm: front and rear bottom and top
- Item #3: 1x 510mm: middle cross profile on top
- Item #4: 4x 610mm: lateral profiles right and left, bottom and top
Price: approx 60EUR incl. VAT and S&H. Note I chose black anodized, but color and finish was not very good. Pay attention that the cuts are rectangular, maybe not milled but smooth cut!
Vendor e.g. Profilzuschnitt24
Acrylic Glass Panels (e.g. Plexiglas or Makrolon): Check the necessary size i.a.w. your profile. They may differ from mine, so the glass panels also differ from my sizes. Allow the glass panels a 1-2mm gap to “breathe”.
- 4x 325x509x3mm (for sliding doors lateral)
- 2x 273x538x4mm (front doors)
- 1x 519x509x3mm (6mm max) for rear panel
- 1x 519x300x4mm (6mm max) for upper panel
Price: approx. 86EUR for “Plexiglas” incl. VAT and S&H
Vendor e.g. Nordic Panel GmbH
Assembly:
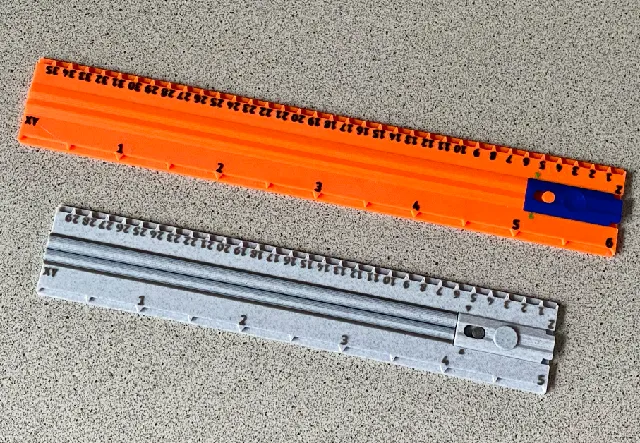
- Profiles #1will have holes at each end = 16 holes. The holes are for penetrating a 4mm Allen Key. Screws may vary from this, better check it out before you drill. Torx is a good alternative.
The principle is that the BHC M5mm screw is screwed into the front ends of #2 and #4 profiles, such that the BHC-head can slide in the slot. After final positioning you can apply the AllenKey through the prior mentioned holes. See screenshots.
For drilling the holes I added two drill gauges. For nice rectangular holes use “DrillGauge 2020_for M3HeatInserts.stl” Two M3 inserts may guide your drill correctly. Predrill with Ø2.5mm, then after that the diameter for the AllenKey or Torx.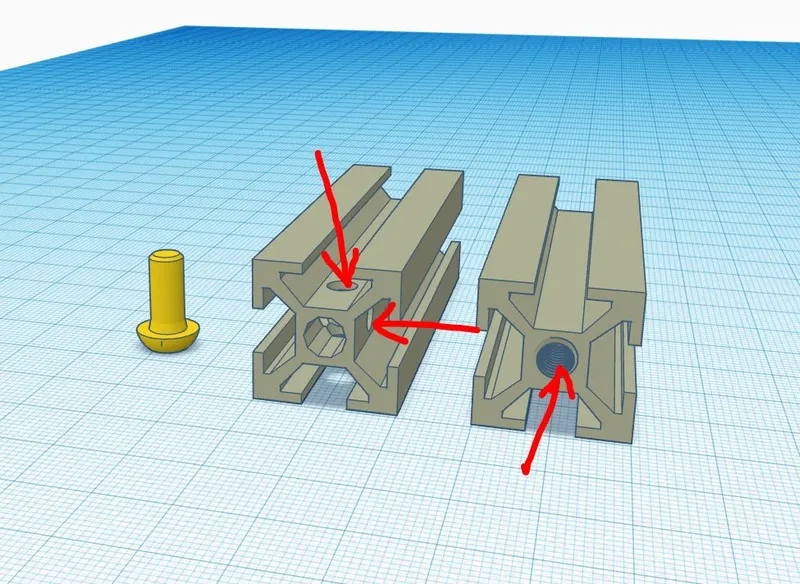
Profiles #2 and #4 will have a M5mm thread on each front (20x20cut) = 16 threads
Photograph: shows left BHC screw.
middle: two holes for AllenKey access on item #1 (upright profiles), centre bore 10mm from the end. right: end of items #2, #3, #4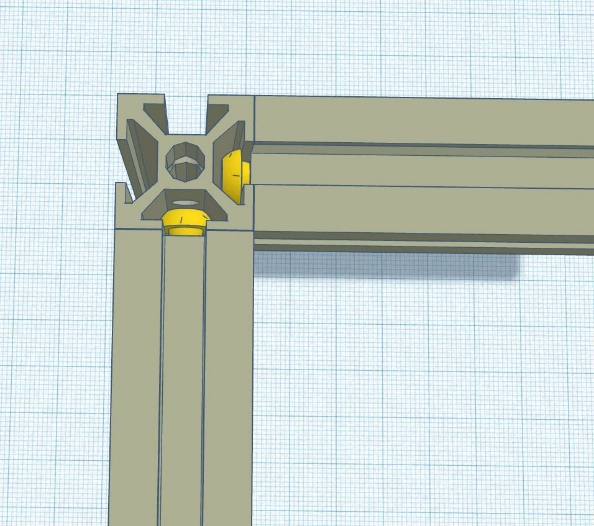
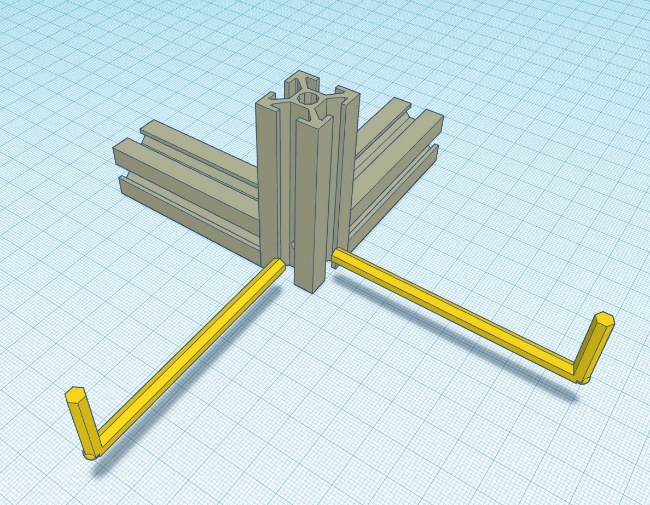
- Assemble the enclosure so that the item #1 (upright) profiles are set to the workbench, all other (lateral and front/rear) profiles are inside the upright profiles.
Photograph: view from top and/or bottom. Mind the BHC screws clamping the system together.
Only slightly tighten the screws by AllenKeys until you are confident for a correct assembly.
- Now check the size:
Front overall = 550mm (20+510+20)
Lateral overall = 650mm (20+610+20)
Height = 540mm (540 only!)
Check if everything is rectangular, if so, then slightly tighten the 16 screws. - For the middle cross-profile on top, you need two corner brackets (see stl files).
- Everything you want to attach now I recommend you have couples of 2020-T-nuts available, in M3, M4 and M5. Or use appropriate nuts same size. Advantage of T-nuts is that you can easily add or remove them.
 Attach two magnetic latches as door holders (include two Ø10x5mm Neodyms, each = total 4). Align to the middle of the front profiles.
Printing: as I designed the holes for the magnets bottom round, top rectangular you can insert magnets in upright position.
- Attach four hinges on the front upright profiles (270 degrees possible). One stl-file of hinge only, I printed four and mounted left, and right 180°. If you like it symmetrical, print 2 mirrored hinges.
- Take the front doors and align to your best convenience, I chose 1mm space to the bottom. Mark the holes and drill a hole for fitting M4 thread for countersunk screws. Be extremely careful drilling in Acrylic glass. Pre-drill and cool (I took IPA). Then carefully make the M4 thread. Makrolon is much better, but also more than 2 times the price! Maybe for the front doors worthwhile buying Makrolon instead of Acrylic glass.
- Drill another four holes to take the countersunk screws that hole the doors shut with the aid of the magnets. Stainless screws is no good idea! After the thread you need to countersink the front door from rear side. Be careful! I messed one thread up by using exaggerated force to fasten the countersunk screws, Acrylic glass breaks very, very easy.
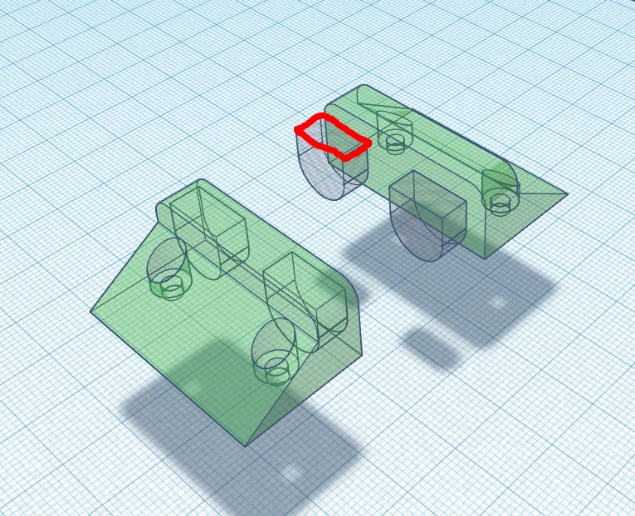
- Apply some double sided VHB tape on the handles and attach them symmetrically to the front doors.
- Mount the front doors, not overtighten into the Acrylic!
- If not already done, insert the rear panel. Hereby you need to open the upper rear profiles one more time.
Also insert the top panel, this may be difficult to bend, so as long as the rear upper profile is out slide this panel in. The upper middle profile with two 90° brackets can be applied. You can do this also later, no disassembly necessary (provided you use T-nuts!).
- Insert the 3mm sliding doors into the lateral slots and bend them a bit to fit into the upper slot. Two doors each side.
- Glass retainers (stl) I printed in PETG for better elasticity performance. Mine are that they click in and don’t fall out, when mounted upside down. Print a handfull of those.
- With that done the general assembly is done.
- TPU profiles can be printed in max length, then cut to size. I did it on my Voron with 340mm length. When printing TPU I recommend to print sequentially, otherwise you may be lost in stringing. Apply profiles as the very last action
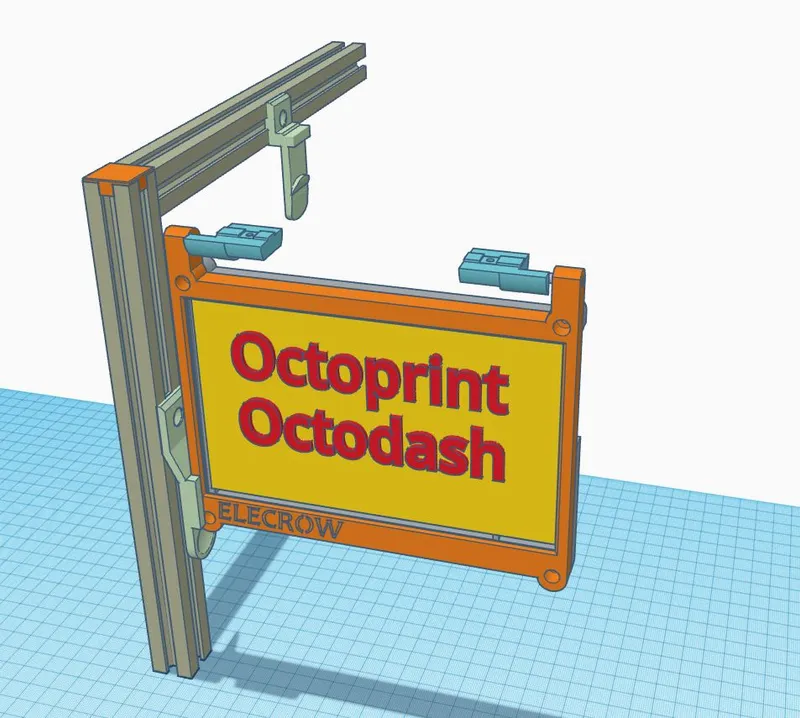
In case you have a 7” touch display (here: from Elecrow)
- complete case for display with interfaces for mounting to 2020 profile
- two versions:
i. mounted on top of the profiles, outside the enclosure (“North”)
ii. mounted on top of the profiles, outside the enclosure (“South”)
- for “South” you need the snap-In bottom and snap-in-top parts
They hold the display in upper resp. in front position
- the Case Hinge parts fit all versions, only need a generic hinge and a mirrored- Cables are zip-tied to attachable cable-tie-holders (see stl-files)
- Print 4 or 8 endcaps and put them on top of the upright profiles. Maybe also on the bottom?
Most parts printed in PETG for flexibility, you can also use PLA or ABS. Your choice. Profile filler is done in 90°Sh(A) TPU. Fastener according your magazine or skills. Some screws need to be cut off (BHC) for front door hinges and magnetic holders.
For illumination I used a 24V LED strip and glued it on the upper panel. Still experimenting if this is my lucky one?
Hope I did not forget any important step.
Good luck with your enclosure and Happy printing!
Back plate Joes face is here: https://www.printables.com/de/model/589118-chief-joe-is-now-watching-my-mk4
Explore my other Printables: https://www.printables.com/de/@Tritschi
Tags
Model origin
The author marked this model as their own original creation.