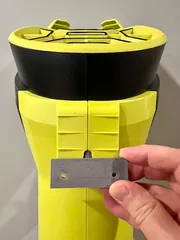
Description
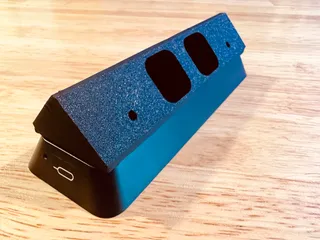
PDFThis is a remix from Thingaverse of PSomeone's "free standing tripod" with changes to the center column to allow a 4th 2x4. I also adapted to allow for "fresh from the lumber yard and still wet" treated lumber, providing approx 1-2mm of play, so the boards could more easily be docked into the chassis. I wanted to build a freestanding mount for a weather station that I could deploy to a flat section of my roof that was sturdy enough to not be blown around in a storm. Final dimensions are 6ft tall by 42 inches triangle footprint and approximate weight (with new treated lumber) is 48lbs.
3D printing recommendations:
If this part is destined for outside, you'll want to use ABS or ASA filament, which better withstands the elements and print at the manufacturer's recommended settings. I needed to use my larger CR-10's 300x300x400 build volume for this and at 80 mm/s, this took 37 hours with 613g of filament. I printed with ABS inside an enclosure and layer adhesion was pretty good. I spray painted with a white, plastic friendly spray paint, as ABS doesn't have the best UV resistance and didn't want this to yellow over time. For strength, I printed with 5 lines for walls, tops and bottom. The 10% infill felt plenty strong with those beefy walls in the final deployment.
Here are the materials I used:
(1) 10ft treated 2x4
(1) 8ft treated 2x4
(4) 1 5/8 inch deck screws
(4) washers
(pint) white latex exterior paint
Cut the 2x4s as follows:
- 10ft, cut at 6 feet to yield (1) 6ft and (1) 4ft section
- 8ft, cut in half to yield (2) 4ft sections
- You should have (3) 4ft sections for the legs, cut 30 degrees at the end of each to make feet
- On 1 leg, add an addtional 30 degree cut so it can mate inside the 3D printed chassis, as that board will be adjacent to the center column 2x4 (see pics)
Finishing and Assembly:
- Paint if you'd like, but note treated lumber should dry/season or the paint won't adhere well
- Rough fit the boards together into the chassis in your final location. Note there is some intentional play in the chassis that allows you level the tripod, but wait until you get to your final location to do this, unless you're building and deploying onto a perfectly level surface.
- With the boards rough-fit into the chassis, place a 9in torpedo level atop the flat top of the chasis and adjust the boards until level.
- When the boards are adjusted and level, insert the 1 5/8in deck screws and washers to lock everythign into place
Model origin
The author remixed this model.


