Garmin Varia / Magene L508 Saddle Mount for Saddle Bag Clearance
Description
PDFUpdate: After using this in the 40C weather and putting in a few thousand km this summer, I made a few changes, to increase the strength of the main piece. Mine never broke, but I like this update a bit more. 7/10/2023
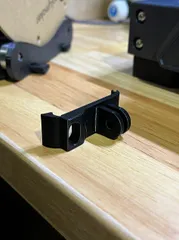
This model/remix allows your Garmin Varia or Magene L508 (or even a head unit) to be mounted above your saddle bag. On smaller frames or unique-frame bikes, the rear tire is in the way of the radar, making it less accurate, and/or hiding the light from the view of those behind you. The original mount from Thingiverse cannot be used with a saddle bag. I angled the rail mounts and extended them so they will fit up higher on the back of the saddle. I have tested it only on 155mm saddles, but it should work with any standard saddle rail, it may just sit higher or slightly lower (you can always shorter the gap).
The remix of the Garmin quarter-turn mount is very small. I added slightly more density to the spring and housing compared to the original. All credit of course goes to the original owner as this was a small change to add some structural integrity (I found the original had some play in it and didn't want to lose my light because of it). Please view and support his model as it is a great design for 3D printing a Garmin mount.
You will need
- 2 x zip ties -- Any should work. This is what connects the mount to the saddle rails
- Super glue, epoxy, etc – This is to glue the Garmin mount to the plate
Printing
- Filament
- I recommend using PETG
- Resolution
- I recommend around 0.15mm. More or less is OK but I like .15 for the strength, look, and timing balance
- etc
- Infill: >50%. I used 100% and it didn't make this significantly longer
- Walls: I used 5 perimeter walls at .15mm. If you pay attention to the orientation, it won't matter too much (IMO), but I suggest a decent amount of walls – and even possibly more than 5 - so you don't lose your light :). You could also thicken the wall if you are worried or not riding on generally smooth roads
- Supports
- For the saddle-mount-plate: Yes – While tempting to print with the circle-plate orientated flat against the build plate, this causes structural issues because the lines are joined in the same direction where the force is applied if a bump is hit while riding. I recommend keeping it in the same orientation as the STL and using auto-painted supports or everywhere supports. I like tree/organic but any should be fine. As long as the zip-tie holes fit a zip-tie, the final aesthetics should not matter much.
- For the Garmin quarter-turn pieces: No – See original design or user's Youtube Video or original model
- Putting it together
- After printing each piece, I would recommend slightly roughing up the surface of the mount-place. This allows better adhesion of glue or epoxy.
- Put together the Garmin piece (you can use your fingernails, a flathead screwdriver, or use the tool provided from the original design), and then glue the base of the Garmin piece to the flat mount plate. Note the orientation, as Garmin, Wahoo, or Magene have different orientations.
- Align the saddle rail with the indents, insert zip-ties, secure, and trim excess.
Let me know if you have any questions or suggestions. This was a fairly simple remix and I made changes primarily to allow better security so the piece doesn't break while riding or hitting bumps.
Tags
Model origin
The author remixed this model.
Differences of the remix compared to the original
Fixed the interface lockring


