Windowsill Mini NFT Hydoponic System
Description
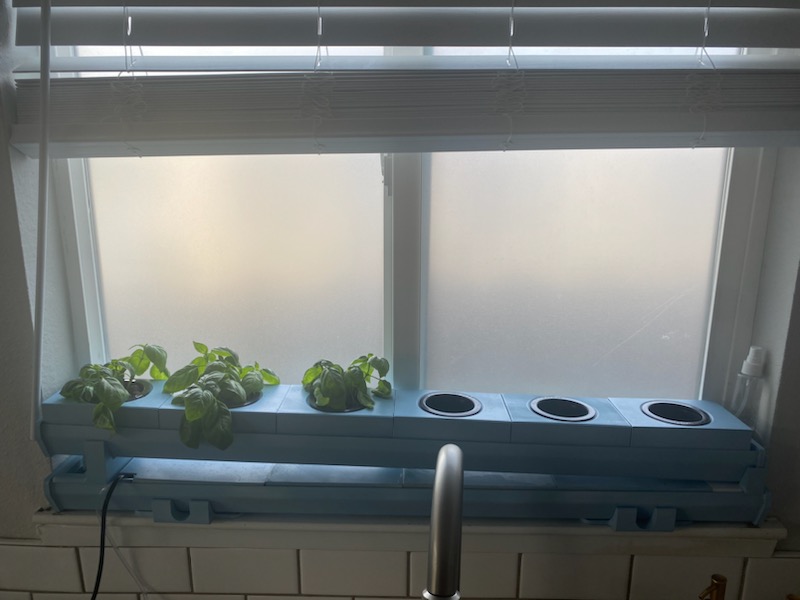
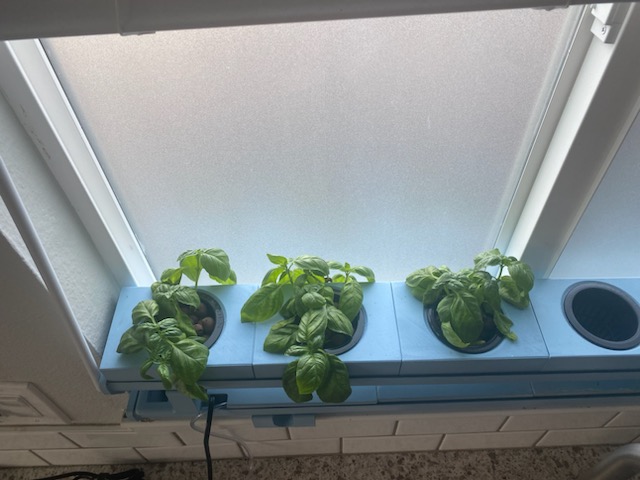
PDFHello this is my windowsill NFT hydroponics system V2….V1 was a contrived leaky mess, let’s forget about it. I have been using this successfully for over a year (minus the cold winter months)
The goal of this project is:
- Cut main “rail” and “tank” to any length required
- Simple assembly (I made this in my tiny apartment with basically zero tools)
- Cheap
- Not be an eyesore (wife’s requirement
Only need a few things for this project.
- Piece of U gutter
- Pipe glue
- Mini water pump
- Air stone and air pump
- Net cup (or print because 3d printing)
- Growing media (whatever you decide)
I chose the main gutter to be a piece of U rain gutter I found at the local lowest store:
https://www.lowes.com/pd/Amerimax-Contemporary-4-in-x-120-in-White-Half-Round-Gutter/1000246365
It has a nice flat bottom which I read was the best for NFT systems, it was cheap and easy to work with (I cut it with some very sharp scissors, not recommended). Everything else besides the motor and air stone was 3D printed. I painted everything blue because it looks better than my hodgepodge of colors.
The pump I used was the following, turned down to its minimum setting.
And I just got an air stone from Walmart.
Print stuff:
I used PLA on everything except the bottom tank ends, I used PETG with a couple extra top and bottom layers to make it watertight. I used pipe cement to attach it to the gutter. Everything else was just printed at whatever setting I think default in CURA on my Ender 3 (235mmx235mm). Since this is kind of a custom cut to length project you will need a tiny tiny tiny bit of CAD to change the length of the covers or change the support height if you go really long or really short (mine is at 2 degrees at 36 inches long). Parts are listed with quantities at the beginning of the file name and material. Opt for optional, Ea for each and XX will be based on your final length. Picture below shows all my parts you can also look in the assembly.
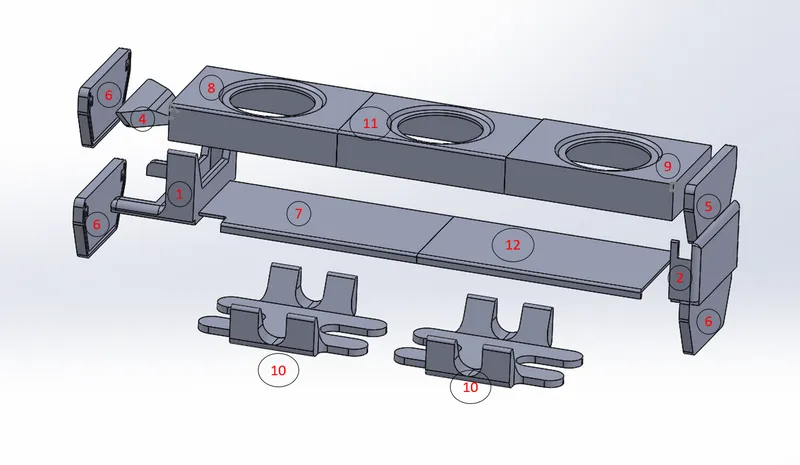
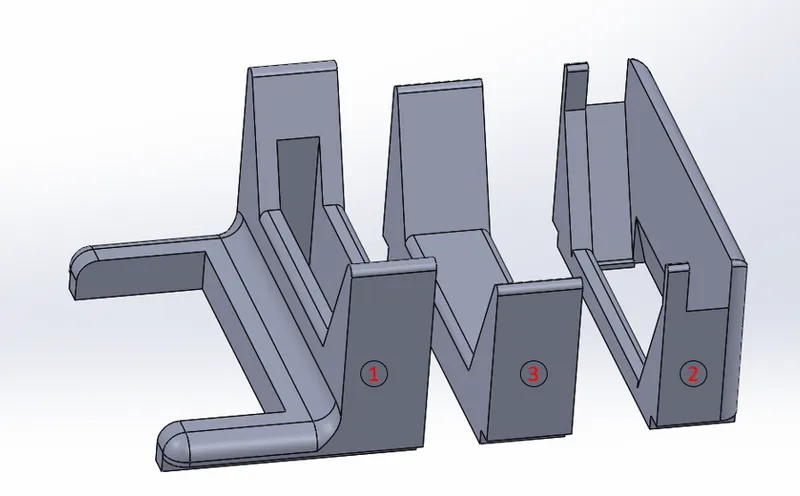
- 1 upper support
- 1 lower support
- 1 (optional) middle support
- 1 (optional) internal baffle (only to slow the flow of water if you have a high output pump)
- 1 PETG end Cap with slot
- 3 PETG end caps without slot – should be pipe glued to gutter rail.
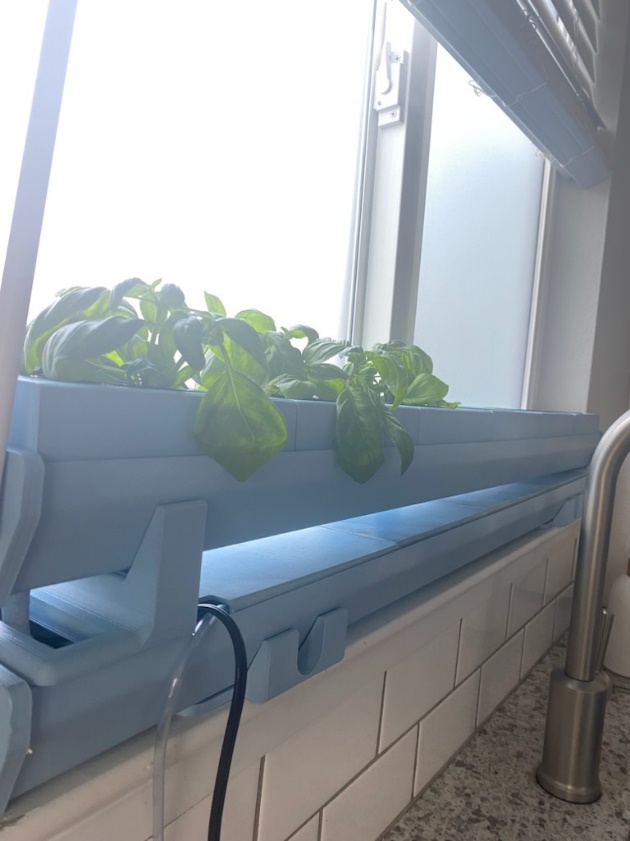
- 1 bottom cover with slot – for cords and tubing to run out of the tank.
- 1 top cover end1
- 1 top cover end2
- 2 (minimum) tank support – more may be necessary if you have a long design
- XX top cover – for the length of rail you have I have 4 on mine
- XX bottom cover – for length of rail you have I have 4 plus a little piece on mine)
- Optional – cover for 3 in plant decorative, I don’t use it.
The Build:
- Print all the parts.
- Measure your area and cut your upper and lower sections of gutter to fit.
- Use pipe glue to attach PETG ends and let dry.
- Put everything together like the assembly and picture and mark out where the tube for the pump goes.
- Drill a hole in the floor for the pump tubing of the upper gutter above where the pump will be situated.
- Glue the end of the tube in and cut it to the length which allows the pump to sit on the floor of the bottom tank.
- Blue the internal baffle in (optional)
- Reassemble and fill it up to check for leaks.
That’s about it… I hope the hydroponics community will enjoy this.

I wanted to make this as open as possible so all the files I have are attached. Hopefully someone who likes this could help make it better or give me some insights on how I can make this better 😊
Future upgrades?
- Tank bottom cover
- Different size options for net cups
- Cover for upper support (that can hide the tube)
- Shallow bottom reservoir (mine is 36” in length, and fits about 1 gallon) maybe change it out for some 4” pipe with capped ends or something IDK.
- Better fitment overall – I used the same geometry for every piece, and it works pretty good but could be better.
Tags
Model origin
The author marked this model as their own original creation.


