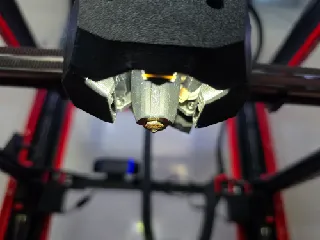
Large Gear Clockwork2 ERCF Filament Sensor + ECAS Bowden Fitting
Description
PDFUPDATE for the 2023-07-10 version: The upstream model by @nhchiu was updated with some fixes. I uploaded an updated main body STL for LGX gears and with the ECAS coupling because that's what I personally use in my extruder. The other STLs can be similarly re-generated using the OpenSCAD script files, but might need some tweaking because the position (relative to the origin) has changed in the 2023-07-10 update of the upstream model, and I couldn't be bothered to re-align the parts for the other versions of the model for now. For this new version you shouldn't need any extra tension guidlers!
A mod of the Large Gear Clockwork2 extruder that adds a filament sensor. There's a microswitch that triggers when the filament drive gears are pushed apart by filament entering the extruder, which should be ultra reliable since it doesn't rely on any extra sensors. There's also a version that adds an ECAS reverse bowden fitting.
I made this remix in a hacky way using OpenSCAD but would love to incorporate it into the original model using the original CAD files!
Extra BOM items needed:
- An Omron D2F style “endstop” switch without a lever.
- A M2 8-10mm self-tapping screw to attach the switch.
- A M3 8mm SHCS/BHCS bolt for sensitivity adjustment.
If you pick the ECAS version:
- A push-fit ECAS fitting with 4mm inner diameter.
- A 4mm diameter, 2-3mm inner diameter, ~36mm long PTFE tube to guide the filament. It's fine to use less than 36mm; this just decides how long of a tube will stay in the extruder permanently vs where your detachable bowden tube “takes over” so to speak.
Print the two new STLs (guidler-b and main-body variants) from this mod and the remaining parts from the original model.
The default guidler works well for semi-hard filaments (PLA, PC, usually ABS, ASA, …) but softer filaments (PETG, nylon, …) might require more travel for the filament sensor to register when the filament enters the nozzle. For this case, print the large-gear-clockwork2-filament-sensor-extra-tension-guidlers.stl file instead of the normal guidler. This one brings the extruder gears slightly closer together which means that the filament pushes the gears out more, leading to more travel for the microswitch. Yes, for this you will need to print both guidler sides from this mod (they are in the same STL, just split by object in your slicer). There's no real downside to printing this version so you might as well do it.
You should be able to screw in the microswitch using the self tapping screw; there's a hidden hole behind the bridging of the main body part. I added some sacrificial bridging before the hole to make the part print more easily. Then, insert the M3 bolt in the “guidler-b” part (threading into the plastic) and adjust tension until the switch clicks exactly when filament is inserted into the extruder.
If you picked the ECAS version, first push in the PTFE tube from the top of the extruder, and then press fit the ECAS fitting.
Tags
Model origin
The author remixed this model.


