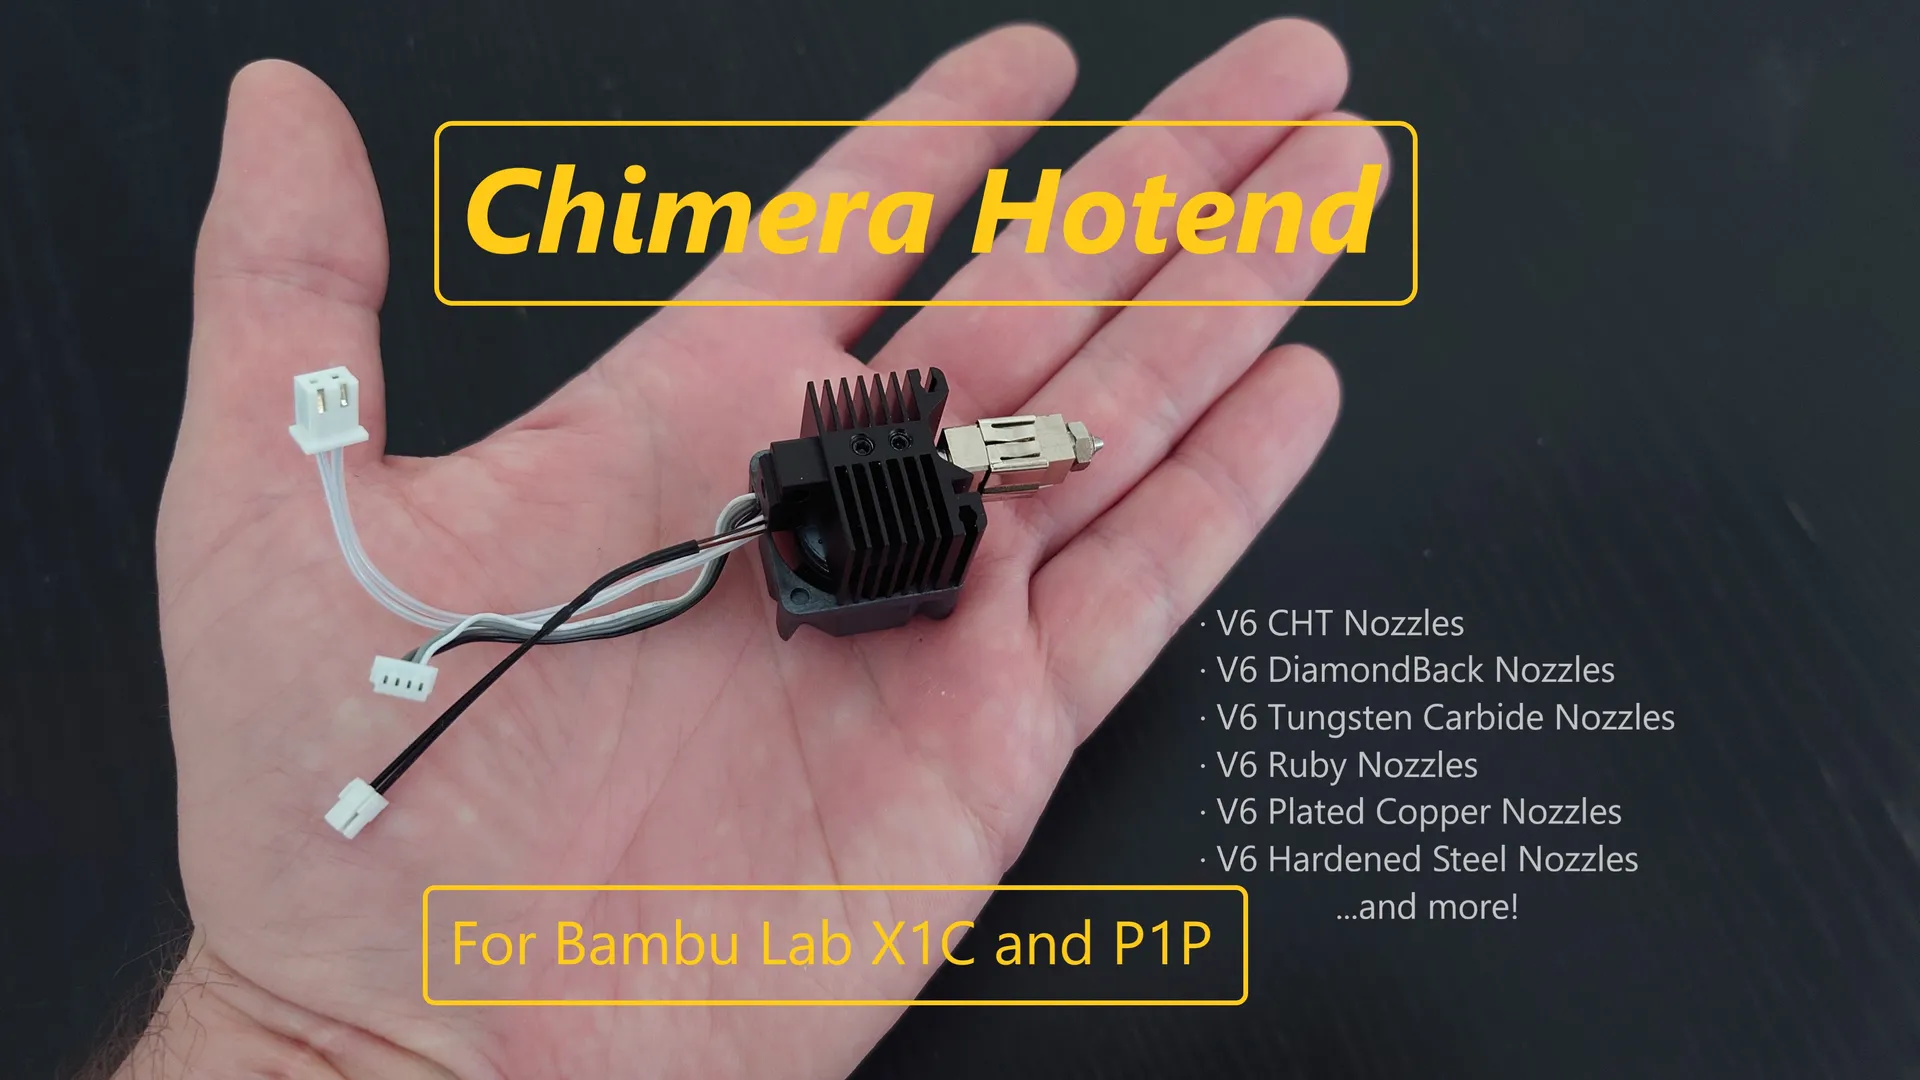
Chimera - Bambu Lab X1C / P1P / P1S Aftermarket Hotend (For V6 nozzles!)

Description
PDFUpdate August 29, 2023
A DIY Silicone Sock for the Chimera Hotend has been added.
The silicone sock greatly improves the thermal stability of both the heatblock and the nozzle, without a silicone sock you can experience a temp drop as the parts cooling fan cools it too much and you get “nozzle temperature malfunction” and the print is paused and you need to manually resume it. With the sock the temp is stable. Read more below:
Update June 10, 2023
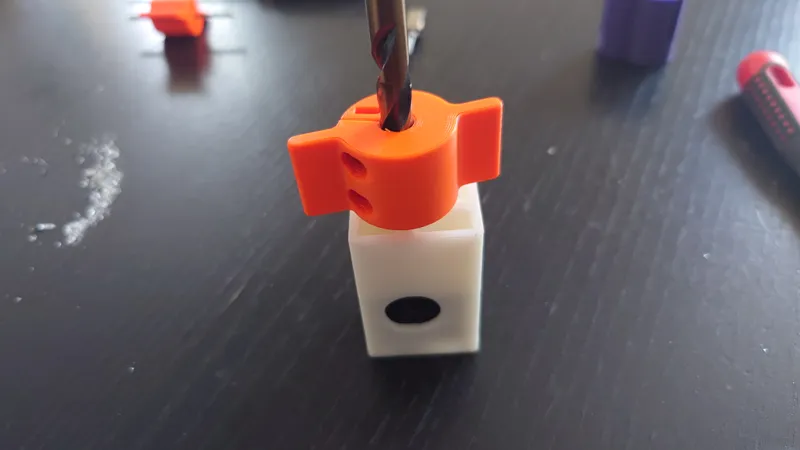
The drill depth tool has been updated to version 1.1, it adds 1.5 mm of drill depth of the 7 mm drill to increase the clearance between the heatsink and heatblock.
You will now see the 7 mm drill partially cutting through the lower heatsink fins as pictured below but don't worry, it makes no difference to the heatsink functionality:
About
Chimera is a hotend based on the popular Aftermarket Hotend for Bambu Lab X1C and P1P you can find on AliExpress. It's not a new hotend but instead a modification of one that is available but I had to give it a fancy name to stick with my theme of Greek mythology. :)
I designed these DIY tools so anyone can modify the hotend at home without having access to expensive tools or ask a friendly machinist. With these DIY tools, you can modify the aftermarket hotend so that you can use any V6 nozzle with it and the hotend length will be the same as the stock Bambu Lab hotend. The modification only takes a few minutes, excluding the time to print the tools, of course.
The standard Bambu Lab hotends are pretty good, they're fairly high flow, cheap and somewhat quick to replace. However, the Bambu Lab nozzle outlet machining is hit and miss and there have been reports of the heatbreak coming off. I also don't find it sustainable having to replace the whole hotend just because the nozzle is worn out.
Personally, I like using V6 nozzles for my printers, these you can find just about anywhere and you also have the possibility to increase the maximum flow using V6 CHT nozzles.
So if you're like me and have a mountain of V6 nozzles for your other printers, some cheap and some very high-end ones, you might want to give this little mod a try. Or if you just want to swap nozzles quickly and at the same time use a hotend made of better materials (titanium heatbreak and plated copper heatblock in mind, mainly).

Support
All my designs and mods on Printables are free to use and remix. They have a non-commercial license. If you enjoy this or any of my other designs you can send me a small donation using the link below. Thanks :)
https://www.paypal.me/humebeamengineering
Why modifying it?
The aftermarket hotend is very nice, the machining is excellent, the heatblock is plated copper, the heatbreak is titanium and the nozzle uses an M6 thread, just like the Open Source E3D V6 nozzle. I've used these hotends for a while. The problem with the Aftermarket Hotend out of the box is that it uses a nozzle that is also proprietary. But it's easy to fix, we'll get to that soon.
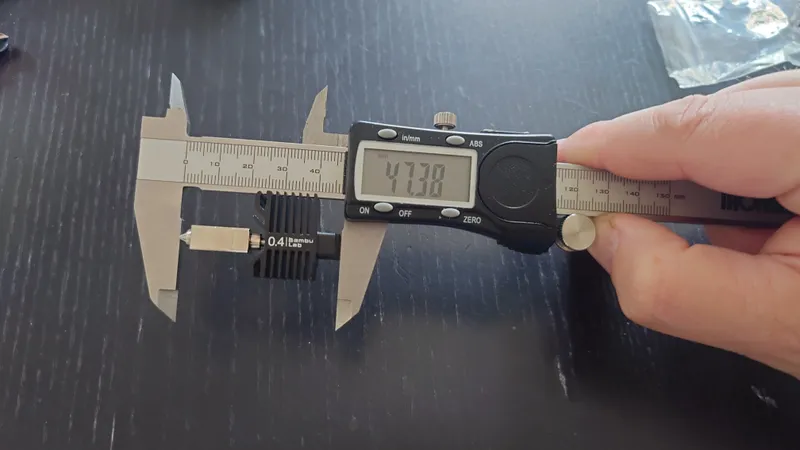
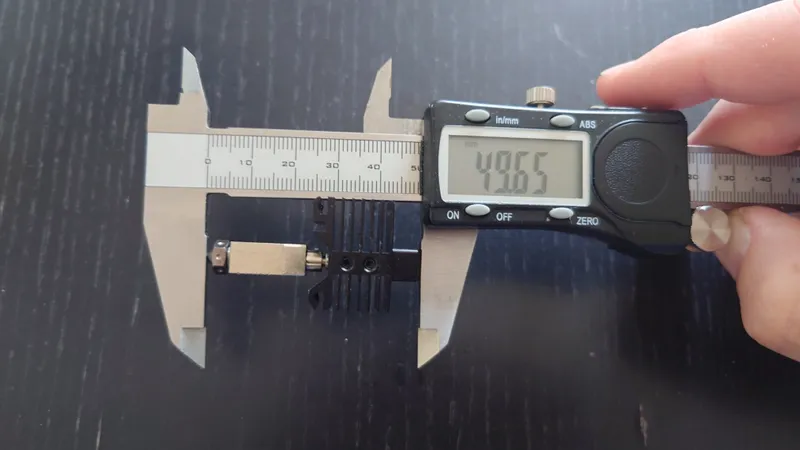
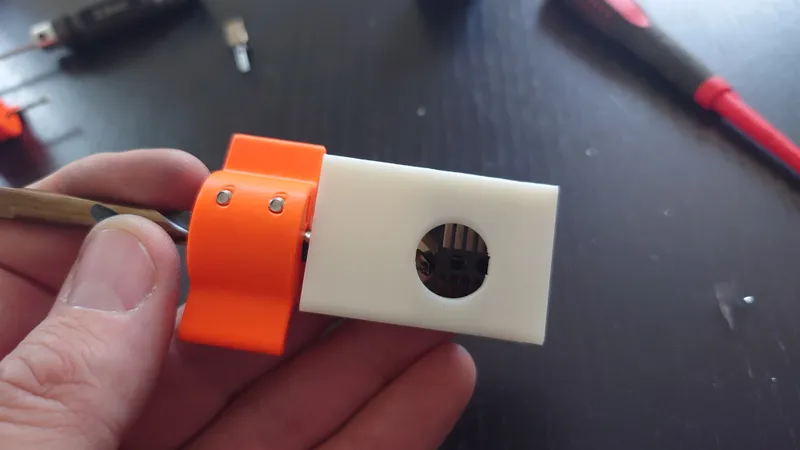
If you would mount a V6 nozzle directly to the aftermarket hotend, the assembled hotend would end up being around 2.3 mm taller/longer than a new standard Bambu hotend:
There are a few issues with this, mainly:
- The increased length means the parts cooling is way off and parts cooling would be very poor. I have tested this, with very poor cooling as a result.
- The increased length would mean it would hit the nozzle wiper too low and hard, wearing out the wiper prematurely and you will likely end up with a bent heatbreak sooner or later.
- The printer would nag you about nozzle being too long, thinking there is filament stuck to it.
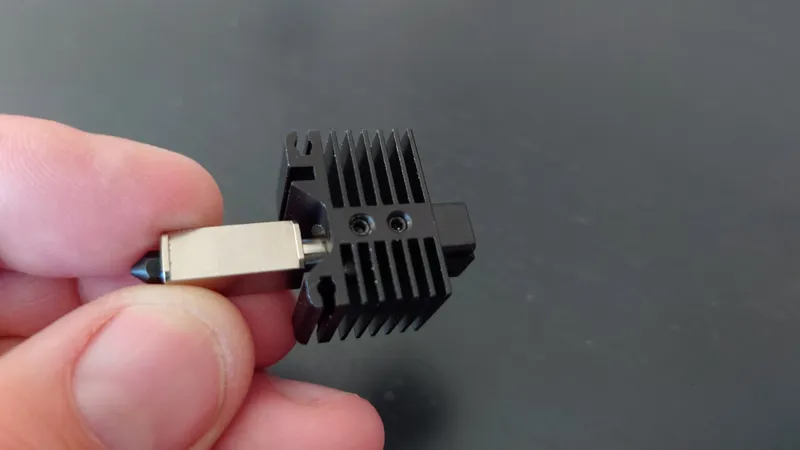
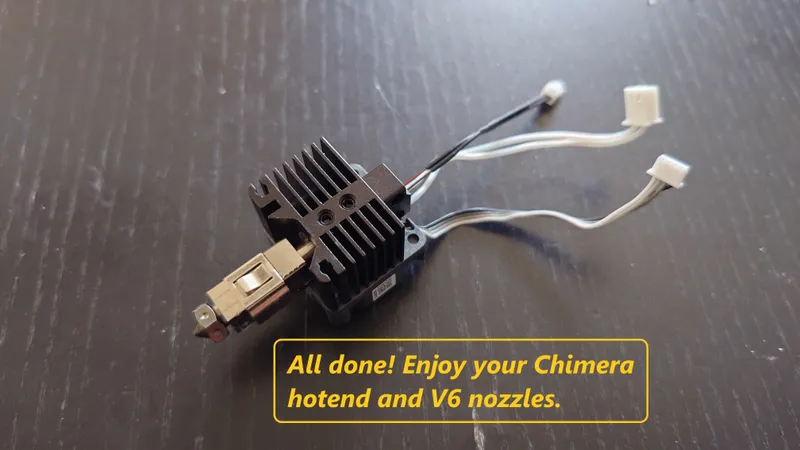
But after this modification, here is the aftermarket “Chimera” hotend:
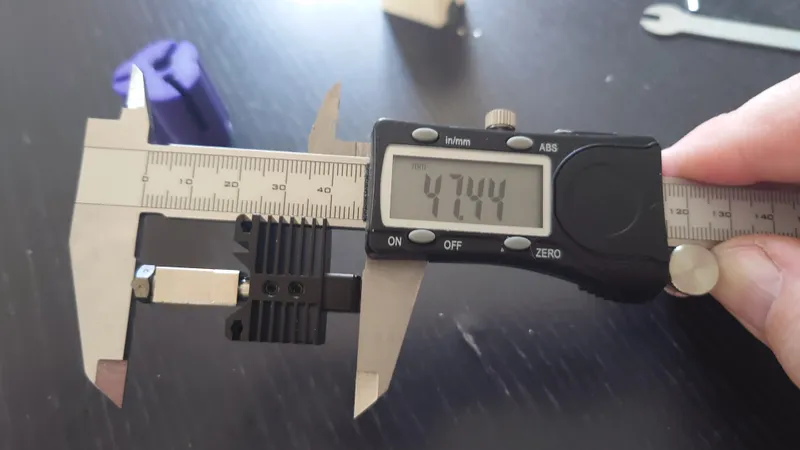
All good!
How to fix it?
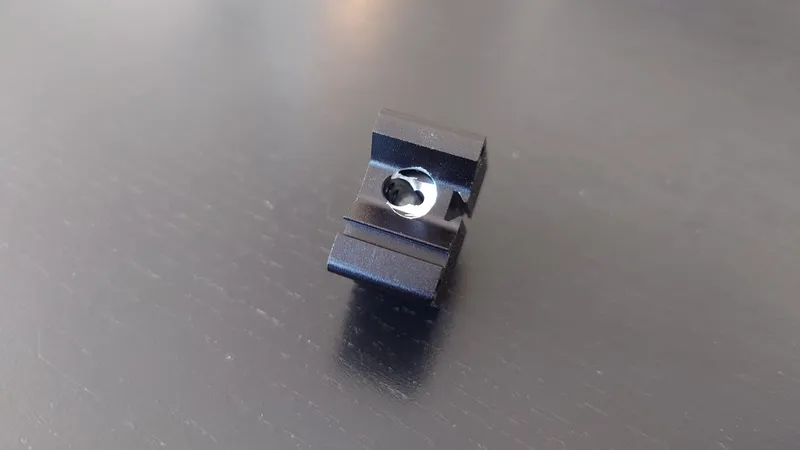
It's not so difficult, really. All you need to do is remove some material from the heatsink so the heatbreak sits deeper inside the heatsink. You could shorten the heatbreak instead but it's more work. The good thing is the heatsink is aluminum which is an excellent material for this job due to its thermal properties. It's also very soft and easy to hand drill. So what we do is drill the hole for the heatbreak a little deeper and also drill the hole for the locking piece a bit deeper. Finally, we remove some material from the bottom of the heatsink to separate the heatblock from the heatsink because cooling the heatblock would be a bad idea.
BOM - Bill of Materials
You obviously need the Aftermarket Hotend. Don't mind the 500 C advertising, this is not why we modify it. The printer is not capable or setup for those temps, it's just what the parts in the actual aftermarket hotend can withstand.
You also need some metal drills (2.5, 4.0 and 7.0 mm) and 6 x M3 screws and nuts, you probably have some at home already. I've recommended the M3 hex socket kit below before for my other designs, I use it for pretty much all my builds and DIY tools, you don't need all the screws and nuts of course but it will come handy later.
- Aftermarket Hotend for Bambu Lab X1/P1P Carbon
- 2.5 mm, 4.0 mm and 7.0 mm HSS drills
- 1100 pcs M3 Hex Socket Head Cap Kit
Be sure to grab the full hotend kit and not just the spare nozzle. I added a couple of more sources, different shops offer the same hotend.
To modify it, you can use a power drill if you like but if you do, drill very slowly and carefully and make sure you don't drill deeper than what the hand drill / drill stop allows so use very moderate pressure while drilling. Aluminum is very soft and you can easily hand drill it instead with the hand drills included here which is what I recommend.
BOM - Optional Parts
I highly recommend these Nano Coated Helical Extruder Gears from FYSETC, I use them for all my Bambu printers, they're inexpensive and offer a number of improvements of the stock gears:
- Extruder Gear for Bambu X1/P1P/P1S CNC Nano Coating
- Extruder Gear for Bambu X1/P1P/P1S CNC Nano Coating (Alternative Source)
I've also heard great things of the new BigTreeTech Panda Extruder but I've not tried it personally yet, you can get it including the Revo hotend as well:
Although not required these double sided textured PEI sheets are great. The Hex Tools are superb for any 3D printer, I've had mine for years.
- ENERGETIC Double Side Textured/Smooth
- Double Sided Textured PEI Build Plate
- Hex Tools (1.5 mm - 3.0 mm)
BOM - Nozzles
If you don't have any V6 nozzles already and looking for some good ones, I can highly recommend Trianglelab's range of V6 nozzles, the machining is excellent and the pricing is good, the brass nozzles are super cheap. I like the Plated Copper and Hardened Steel nozzles personally but you can also go for some high-end diamond coated ones that are extremely wear resistant. Some also like using Ruby V6 nozzles but I've not used them personally.
If you're looking for increasing the flow of the hotend, you can go with some Bondtech CHT nozzles, CHT clones are also available on AliExpress. These will increase the max flow, meaning you can print even faster with larger (+0.6 mm) nozzles.
But a good starting point for high quality V6 nozzles are made by Trianglelab on AliExpress:
- Trianglelab V6 Brass Nozzle
- Trianglelab V6 Plated Copper Nozzle
- Trianglelab V6 Hardened Steel Nozzle
- Trianglelab V6 ZS Hardened Steel Copper Alloy Nozzle
CHT Max Flow with Chimera?
I've personally tested both genuine Bondtech V6 CHT nozzles and clone V6 CHT nozzles from AliExpress and they both have a reliable, continous max flow of around 32 mm³/s using a 0.6 mm nozzle printing Prusament PLA at 220 C, very impressive and around 50% higher than a stock Bambu hotend.
That equals 0.6 mm line width, 0.3 mm layer height at 200 mm/s print speed. Using even higher flow than this and you begin to see underextrusion. So stay below 32 mm³/s to avoid headaches, it's still a huge bump over normal nozzles.
Using a 0.8 mm CHT nozzle you can expect +40 mm³/s!
What to print
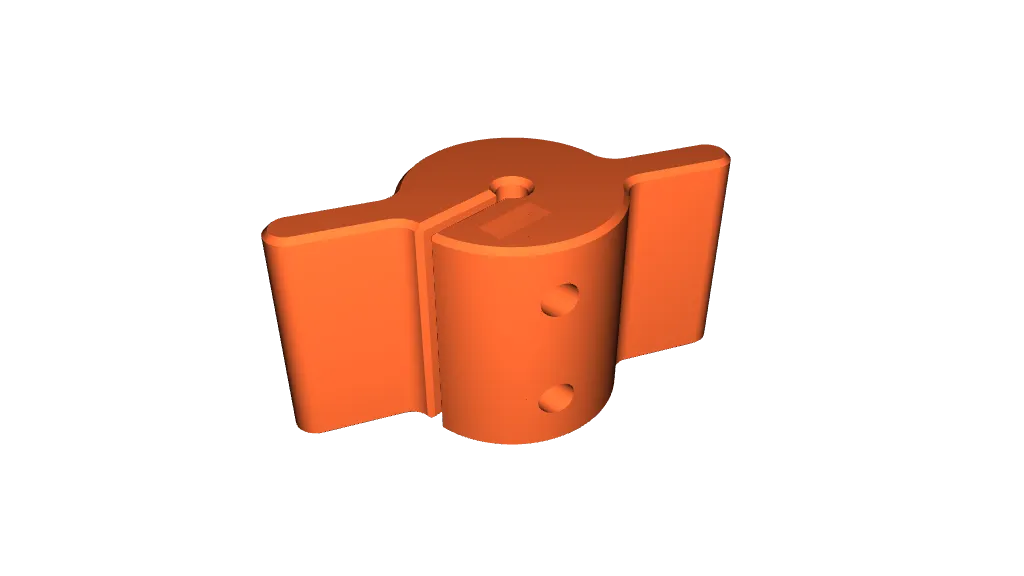
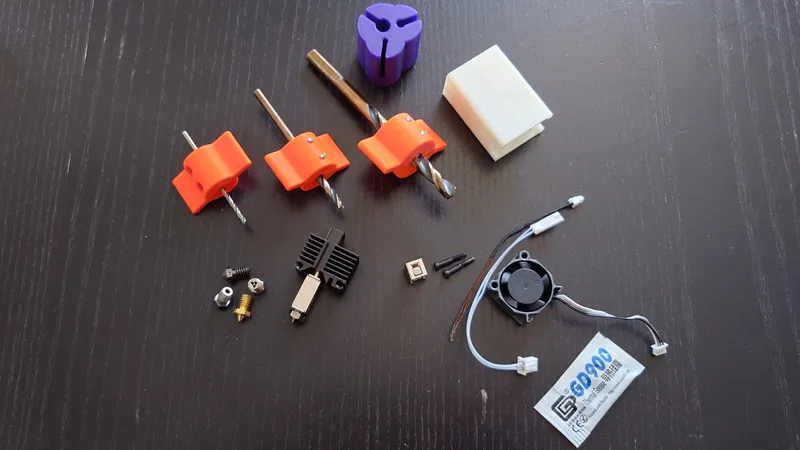
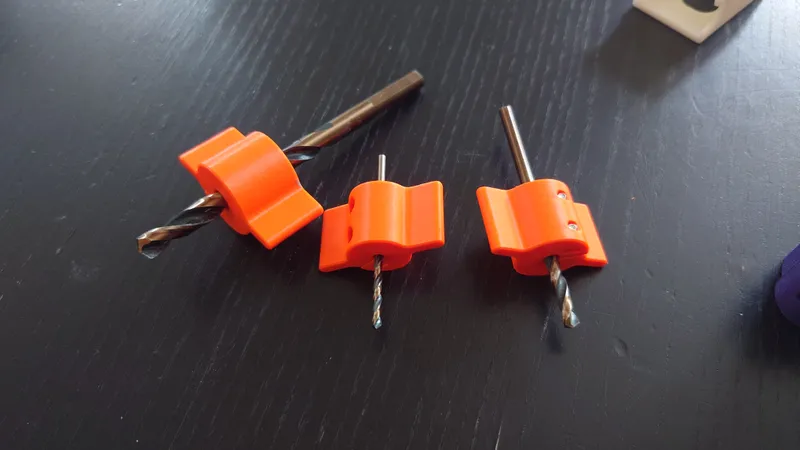
Print one of each of the following included models:
- 2.5mm-hand-drill.3mf
- 4.0mm-hand-drill.3mf
- 7.0mm-hand-drill.3mf
- drill-depth-tool.3mf
- hotend-holder.3mf
Print the parts in the direction I have set them, no supports are required. You can print the tools in just about any filament, I've used Prusament ASA Orange for the hand drills, Prusament PLA Galaxy Purple for the drill depth tool and eSUN ABS+ for the hotend holder.
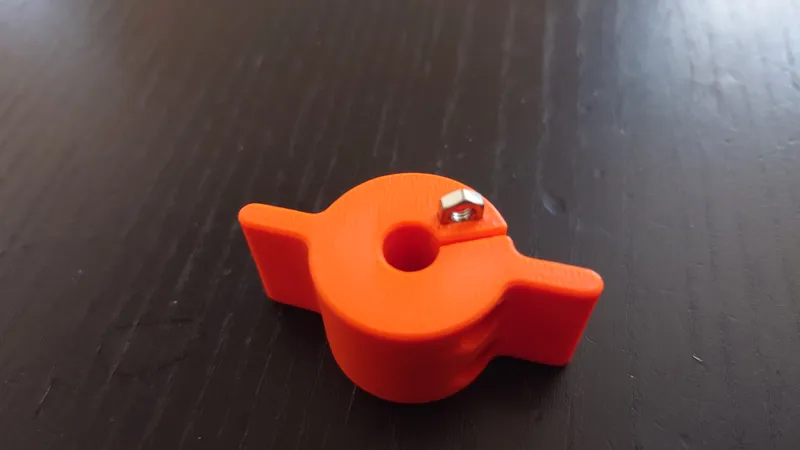
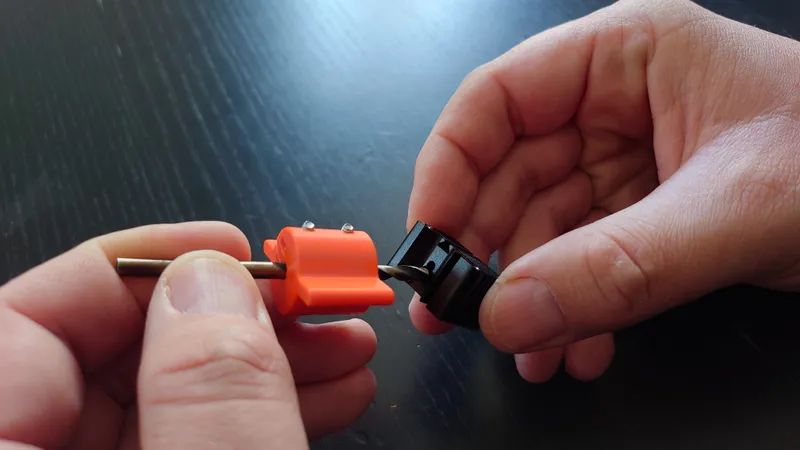
How to use
Start with the hand drills. These are actually combined hand drills and drill depth stops. Each one requires two M3 nuts inserted and two M3 screws to tighten the hand drill against the drill. When you insert the nut, have a “corner” of the hex nut pointing up so the flat sides are against the sides of the cutout, then press fully down with the 2.0 mm hex tool. Ensure the nut is fully pressed to the bottom, you can just peek a look from the “front” to see that the nut lines up with the hole.
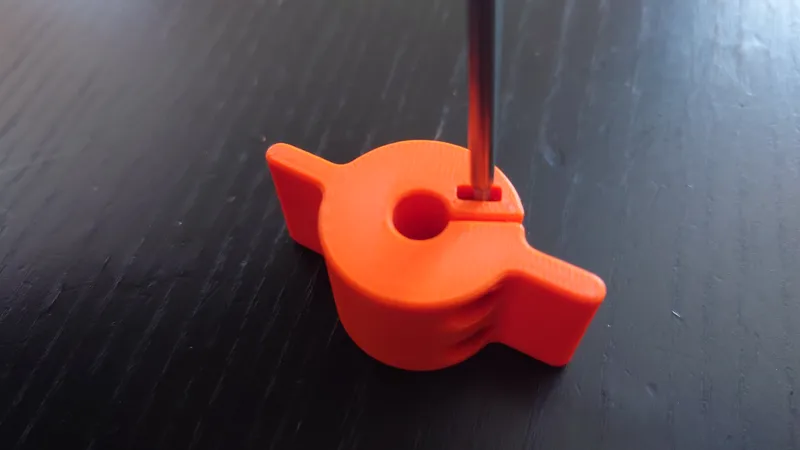
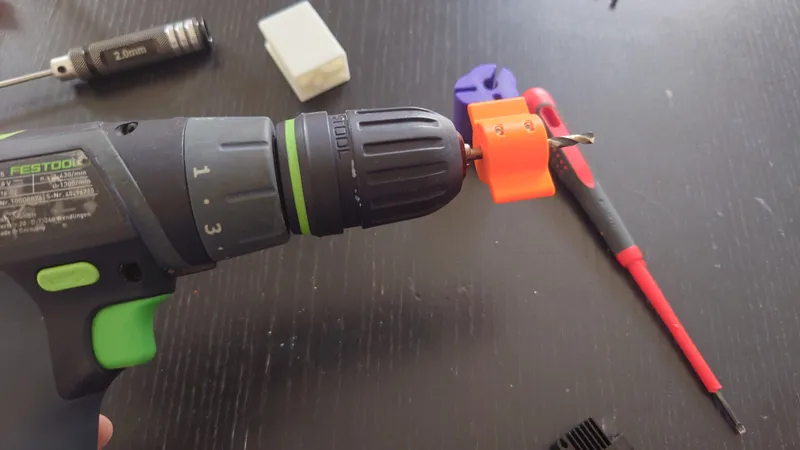
Next, insert the M3 screw (length is not important but 10-12 mm length is fine) but do not tighten them yet. Place the hand drill and the drill in the drill depth tool and press down the hand drill and drill fully to the bottom then tighten the M3 screws properly. There are three holes in the tool, one for each drill size.
After tightening, ensure it doesn't move at all if you press it. It's very important that the hand drill is secured against the drill.
This way we ensure that we drill the correct depth of the heatsink.
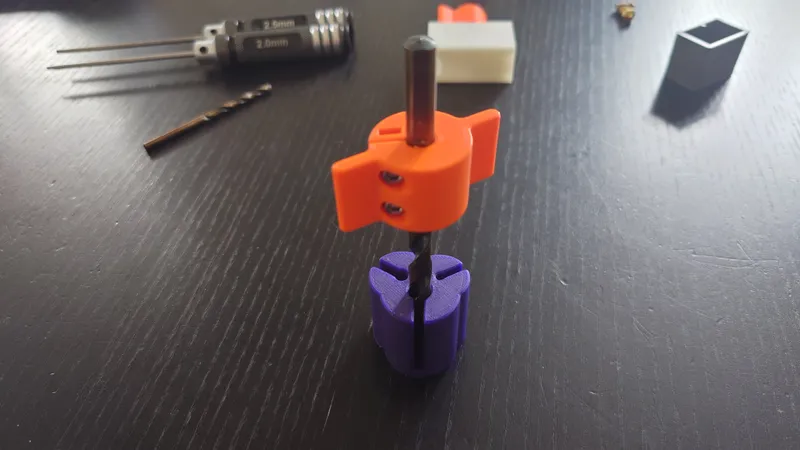
After tightening, double check that the depth is correct, just compare it with the printed drill depth tool.
Repeat for all drills (2.5, 4.0 and 7.0 mm).
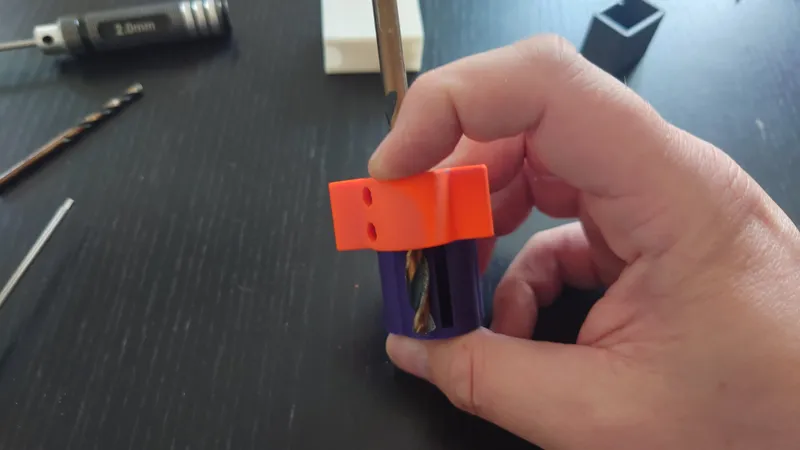
When you're done, you should have a set of three hand drills with an accurate drill depth.
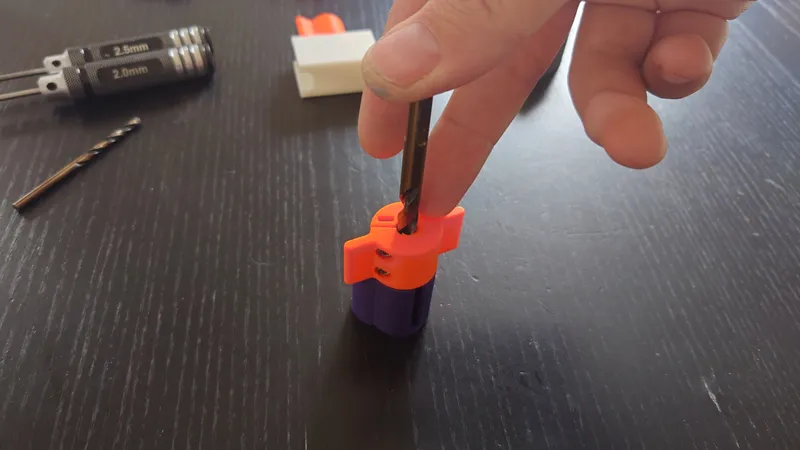
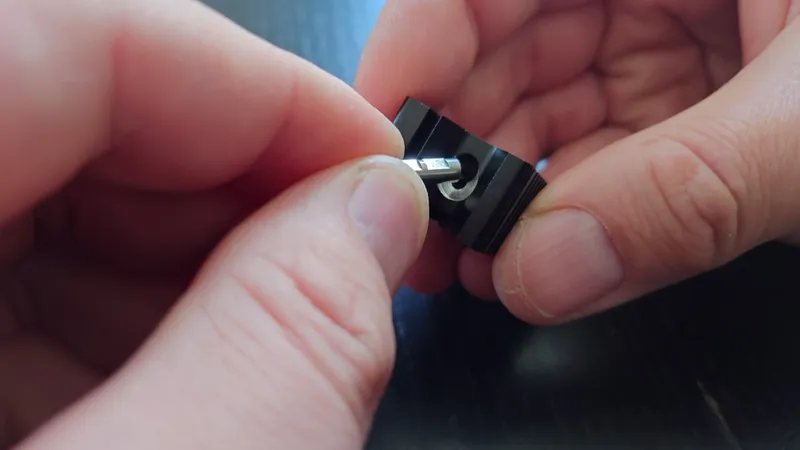
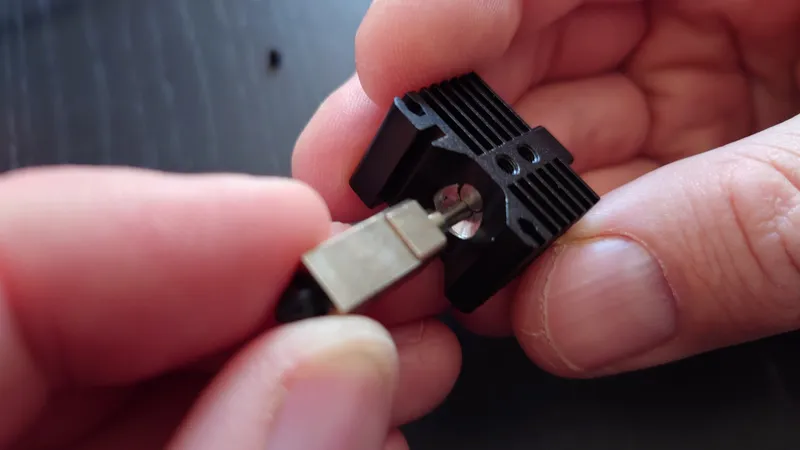
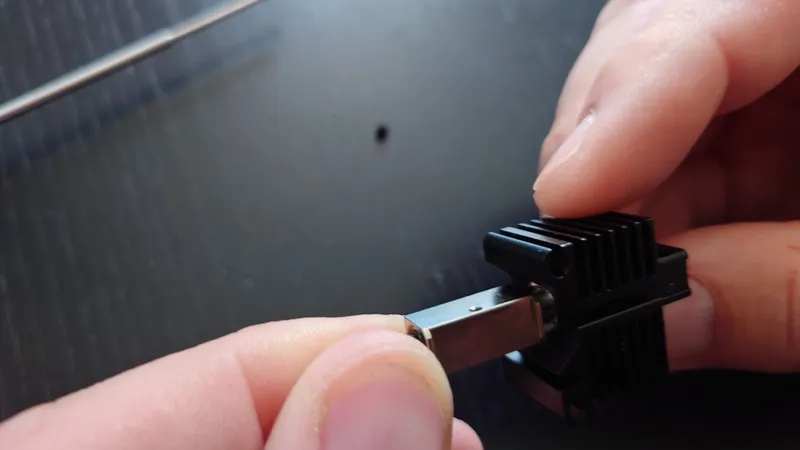
Before you begin drilling, if the hotend is already assembled, make sure to remove the two small black grub screws holding the heatbreak/heatblock locking piece and of course also the actual locking piece.
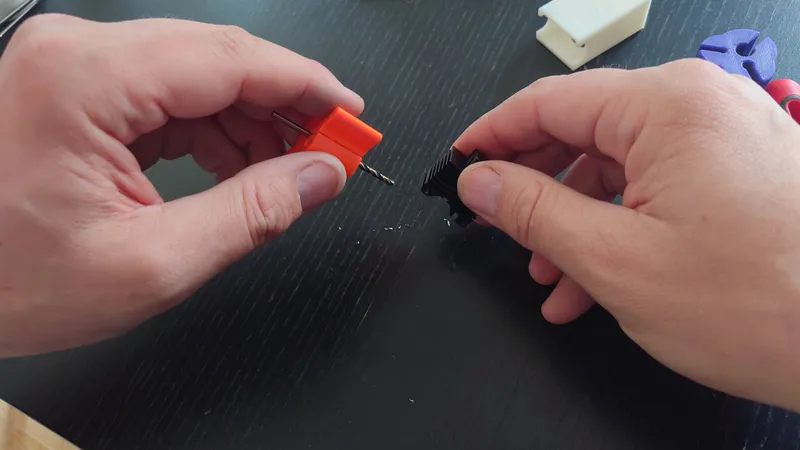
Now, it's time to drill the heatsink. First we drill the heatbreak hole (the smallest hole) deeper with the small 2.5 mm drill. When drilling, hold the middle of the heatsink and not the cooling fins as they are quite thin and can break off, unlikely but be cautious. Insert the drill into the hotend and drill carefully, rotate a bit then pull out the drill and remove some cut off aluminum then repeat until the drill stop hits the end of the hotend.

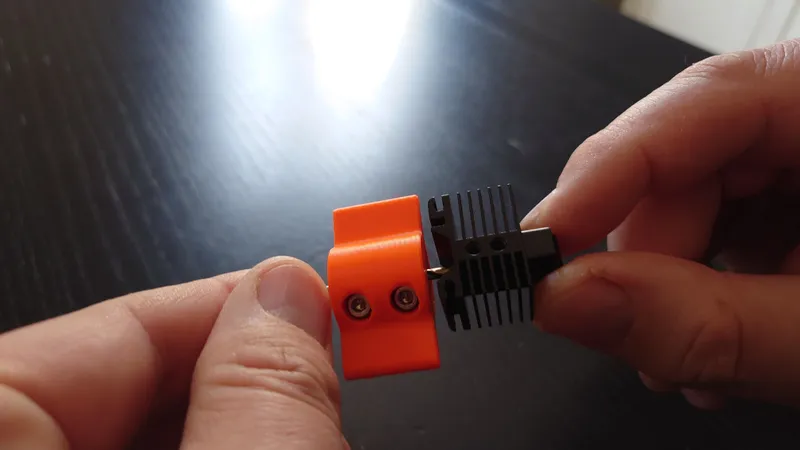
Drill a little bit then empty the cut off aluminum.
Repeat until the hand drill reaches the bottom of the heatsink (when the hand drill touches it).
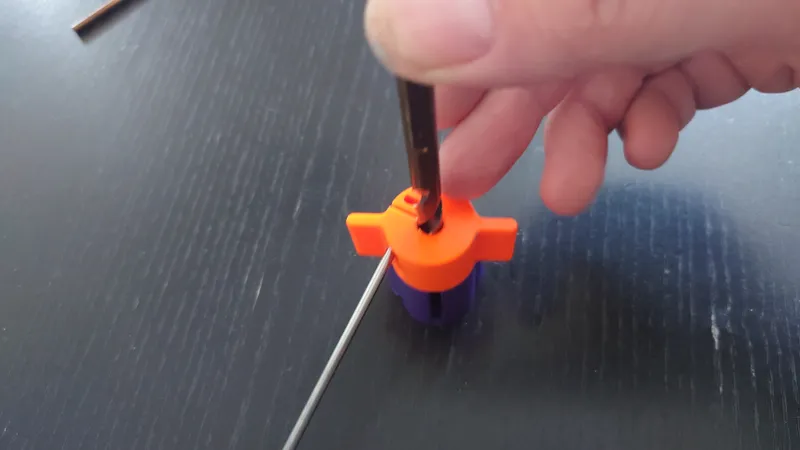
Next, do the same thing but for the larger hole in the heatsink. It's a little larger than the 4 mm drill but don't worry, it will work just fine. Stop when you reach the bottom of the heatsink (when the hand drill touches the heatsink).

To speed up the process, you can of course use a powerdrill but if you do, drill slow and carefully with only a little pressure. The heatsink can rather easily be hand drilled though.
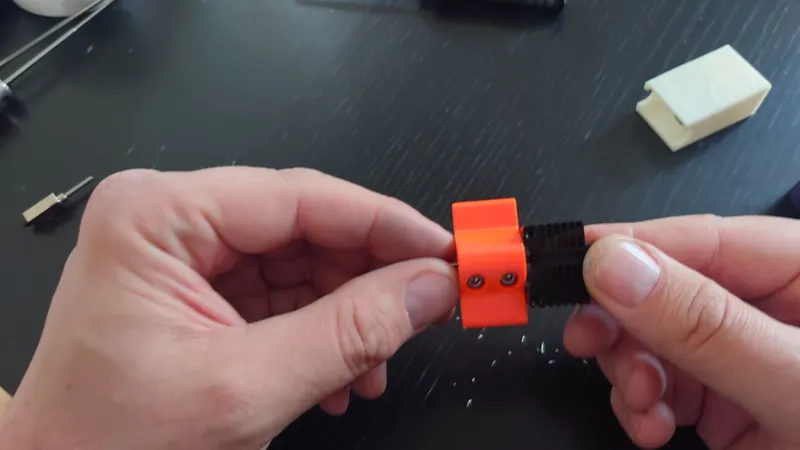
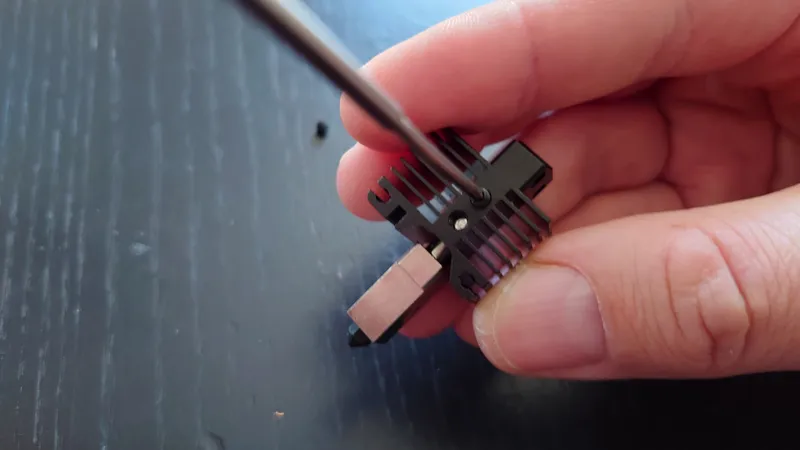
Now we're done with the main parts. Next we just need to drill a little cutout to seperate the heatsink from the heatblock.
Grab the hotend holder and you'll see a notch on one of the sides, this is where the corresponding cutout on the hotend goes. Don't worry, you can only insert it one way so there's no chance of messing up. The hotend holder is used so that the large 7 mm drill is drilling at the correct spot.

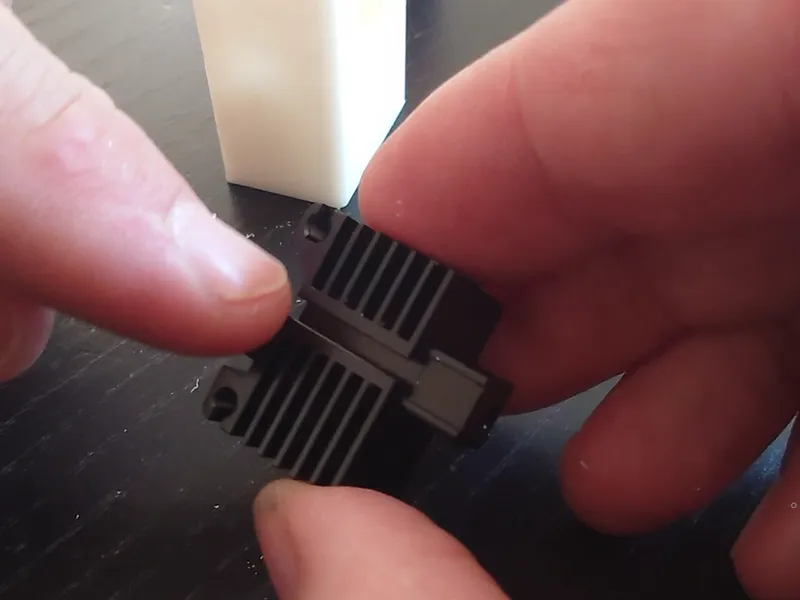
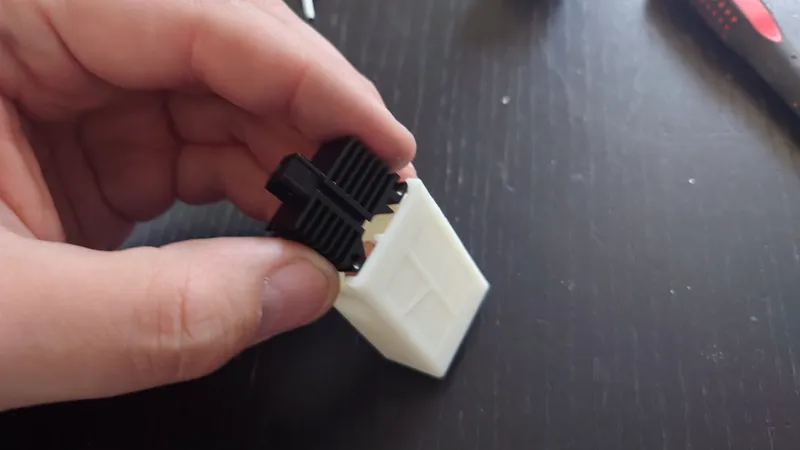
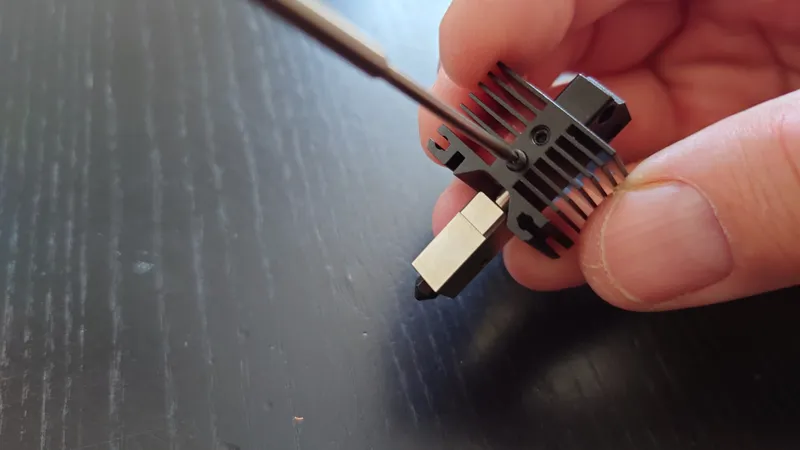
Turn it upside down and insert the 7 mm drill and fully drill it out. You can place the tool on a table when drilling, the top of the hotend sits flush with it.
Now the modification is complete! Make sure to blow off any aluminum scraps inside the drilled holes.
Time to install the heatbreak/heatblock and fasten it.
The hole for the thermistor should be facing the left hand side on the side of the heatsink that has the slots for the cables. Push down the heatblock/heatbreak fully into the heatsink.
If you have the small original aftermarket hardened steel nozzle installed, you can keep it installed for now and remove it once the new hotend is installed in the printer and preheated. Do not attempt to remove it cold! If you don't have a nozzle installed you can install one now but don't tighten it.
I usually preheat to at least 250 C when removing or installing nozzles and use a Bahco torque wrench when tightening. I recommend using a torque wrench, there are some printable ones that are accurate enough. I tighten at 2.5 Nm with the nozzle at a minimum of 250 C. But some nozzles like Bondtech Bi Metal CHT (in the top picture of this page) must be tightened with a low torque, use at most 1.0 Nm for these. Check with the nozzle manufacturer if you are unsure. It's very important to always install or remove nozzles hot, both to not damage the hotend/heatbreak and to avoid leaks.
If you're having issues with the heatblock spinning when you tighten the nozzle it's possible you use too much torque when tightening, use at most 2.5 Nm. Also ensure the heatbreak locking pin is aligned properly so the grub screws sit flat against the pin. Tighten it fully. Then reinstall the hotend in the printer.
If it's still spinning when you tighten the nozzle you may need to hold the heatblock with pliers when tightening. Be careful, make sure to not damage the ceramic heater or thermistor or wires.
Once this is done, install the thermistor and ceramic heater. You can use the ones from your original Bambu hotend, it uses the same parts. In the pictures below I have already removed the original aftermarket nozzle but it's the same principle.
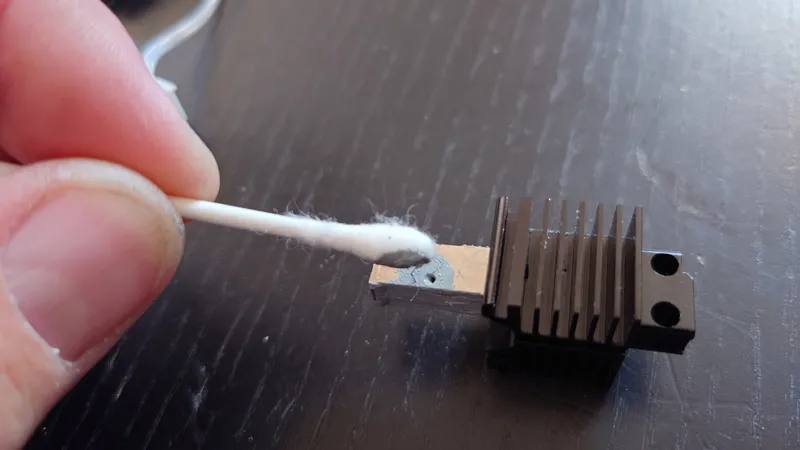
Start by applying some thermal grease to the heatblock where the ceramic heater is placed. I use a Q-Tip / cotton swab to apply it. You only need a thin layer.
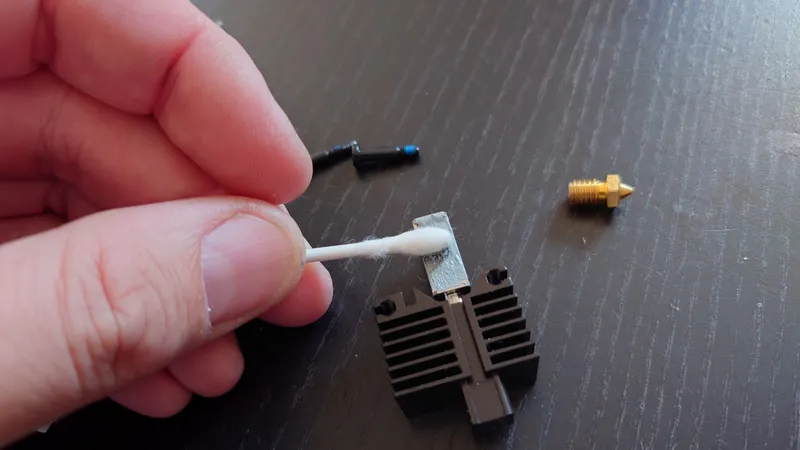
Do the same for the hole for the thermistor.
Insert the thermistor.
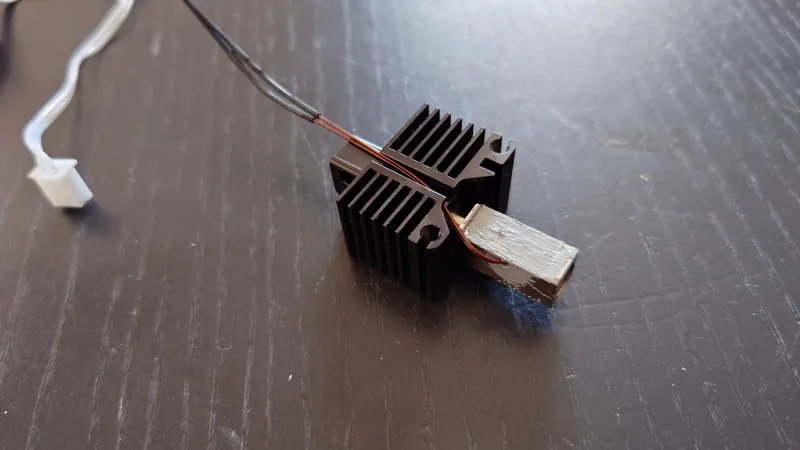
Place the ceramic heater as well.
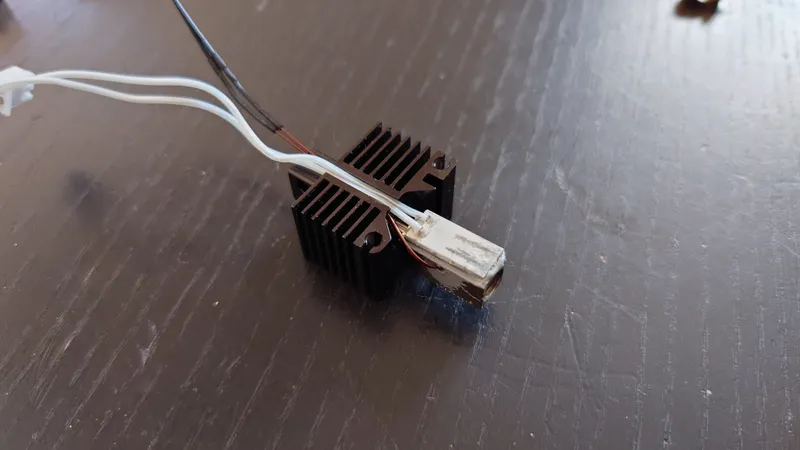
Slide over the clip to secure the ceramic heater.
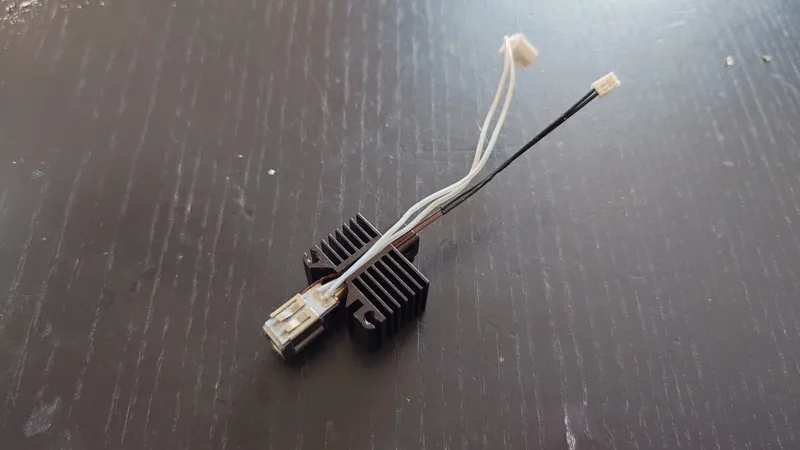
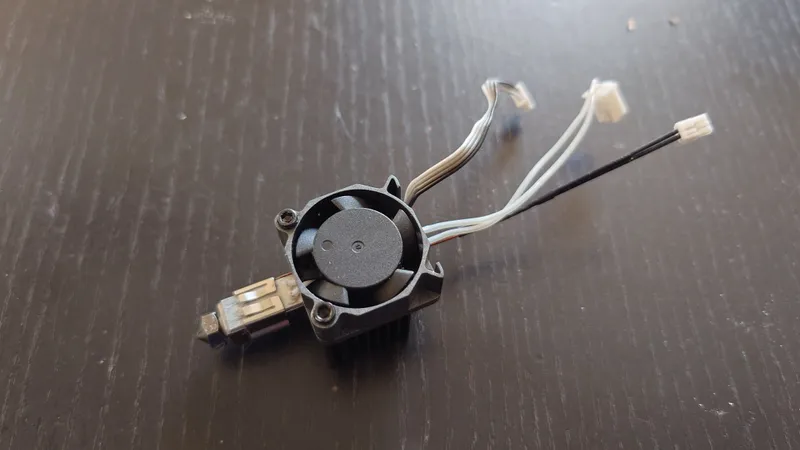
Finally install the hotend fan with the two screws from your original hotend. You can also install a nozzle now if it's not already in place (do not tighten!).
Not pictured here but make sure you use a silicone sock for thermal stability else you can get nozzle temperature malfunction and the printer halts until you hit resume:
You could also use a modified stock silicone sock.
The hotend fan sticker should face the hotend as pictured:
Tags
Model origin
The author marked this model as their own original creation.


