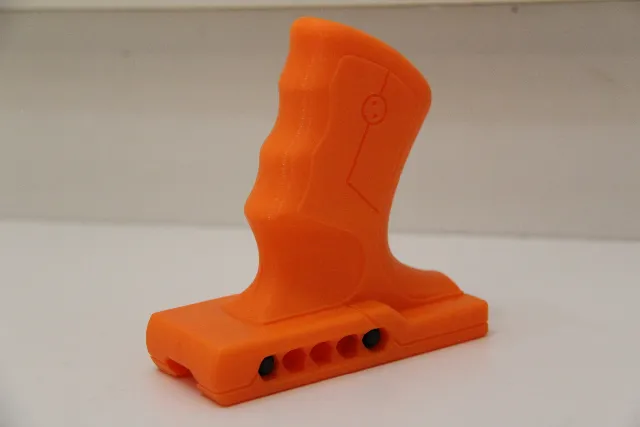
The Cryptid: a Pump Action Conversion for the Nerf Sledgefire .

Description
PDFWhat would be the Achilles Heel of a Sledgefire? The long reload cycle perhaps. And to remedy this, in designing this monstrosity I have sacrificed everything: simplicity, optimal print orientations, even common sense. Still in terms of nerf “shotguns” this cross between a magstrike and a folding chair has much to offer. This front-end replacement completely reconfigures the sledgefire into a pump action shotgun, capable of using clips of varying capacity and ammo type: classic triple shot, mega, and rival. Despite it’s freakish looks the folding lever pump mechanism can - with reinforced internals - still prime heavy spring loads; with the max load I’ve tested (read: max I was able to fit inside the sledgefire) being 17 coils of pro-26. This mod isn’t for everyone, but I’m sure at least some of you will find a use for it.
Firing Demonstration: https://www.youtube.com/watch?v=-yjHaoFNQUo&ab_channel=GunnerLeo
All Clip Variants Avalable: https://www.printables.com/model/479911-clip-variants-for-the-cryptid-a-pump-action-clip-f
Hardware Parts List:
- ONE (1): 16cm of 50mm coloured PCV
- ONE (1): 20.5cm of 20mm coloured PVC
- ONE (1): ~30cm of 3mm bungee cord
- ONE (1): 3mm thick one side adhesive foam pad cut into a 42mm diameter circle with a 20mm hole cut into it.
- ONE (1): 2mm x 20mm Metal Pin (I used a cut down nail if it’s in the ballpark it should work)
- ONE (1): Spring small and short enough to fit into the 6.8mm diameter hole of the clip retainer notch. I used a piece of 7/32 Inch diameter spring cut to about 1.5 CM
- TWO (2): 10-32x1 Inch Flat Socket Head Machine Screws
- FOUR (4): 8-32x3/4 Inch Flat Socket Head Machine Screws
- ONE (1): M6 x 20mm Grub Screw
- TEN (10): M2.6 x 16mm Pan Head Screws
- TWO (2): M2.6 x 10mm Pan Head Screws (Can be self tapping or not)
- SIX (6): M2.6 x 8mm Pan Head Screws (Can be self tapping or not)
- [OPTIONAL for reinforcing the sledgefire with a spring upgrade]
- One (1) X 2.5 x 32mm Metal Pin (Used to reinforce the sledgefire’s plunger rod hinge. Again, I used a cut down nail)
- One (1) Upgrade spring of your choice, I used 17 coils of pro 26 spring but that was pushing it to it’s maximum. So, I would recommend less.
- Glue: preferably plastic welder but any sufficiently strong glue will suffice. This will only be used to glue in the 2.5mm x 32mm pin to reinforce the sledgefire.
Preparatory Sledgefire Work:
- Remove air restrictors.
- Sand the front of the plunger tube so that the three raised circles are flat.
- Cut or drill out the centre of the plunger tube face to join the 3 smaller air holes into one large “Y” shaped hole.
- Remove latch arm from the thumb switch by pulling the thumb switches two pieces apart and return the thumb switch without the latch or latch arm.
- Take apart the front barrel of the sledgefire freeing it from the priming rod that attaches to it’s hinge.
- Cut the two protruding dark grey/navy tabs on the shell at the bottom of the sledgefire’s hinge so that the hinge’s track is extended to be flush with the light grey protrusion at the bottom of the sledgefire that has the serial number on it. This allows the wishbone to be pulled back all the way.
- [OPTIONAL reinforcement for spring upgrade]
- Glue in 2.5mm x 32mm pin (or nail) into the hole of the sledgefire’s plunger tube hinge to reinforce it.
- You can also complete any other sledgefire performance upgrades: padding the plunger head or adding Teflon under the o ring.
For Printing the parts I went with 3 walls 20% infill for most of them, all with support. Notable exceptions were: the Wishbone as it should be a bit stronger I printed it at 3 walls 30% infill, and the Retainer Notch parts I printed them at 2 walls 20% infill.
Assembly [Once the Sledgefire Preparatory Work is Done]
1) With the sledgefire open, place the latch replacement part into its socket above the front of the plunger tube.
2) With the plunger assembly removed use the Clipwell as a guide use a nail or a pin to mark the 4 points on the sledgefire where you will be screwing it in just below the plunger tube. Then drill out 4 holes snug enough for the 4 M2.6 x 16mm Pan Head Screws to fit into.
3) Using the M6 x 20mm Grub screw attach the wishbone to the sledgefire’s priming bar by screwing it in. The wishbone should be curving away from the direction of the plunger and should fit comfortably over the sledgefire’s hinge pin, taking the place of the original sledgefire’s barrel.
4) With the Latch Replacement and Wishbone attached you can now close the sledgefire.
5) Take the two Long Hinge nuts and screw in each of the 10-32x1 Inch Flat Socket Head Machine Screws so that the tapered end of the nut covers part of the screw head.
6) Connect the Connector Arm to the Wishbone using the two 10-32x1 screws with the Long Hinge nuts attached. Make sure that the connector arm is oriented correctly you should be screwing into the end without the rounded cut-out in the middle and with the rounded cut-out facing where the PVC will eventually connect.
7) Attach the Right and Left Pump Hinge’s to the Pump Body using four (4) of the M2.6 x 16mm Pan Head Screws.
8) Screw two (2) of the 8-32x3/4 Inch Flat Socket Head Machine Screws into the two Short Hinge nuts so that the tapered ends of the nuts partially cover the screw heads.
9) Attach the Pump to the Connector Arm using the two 8-32x3/4 screw nut combos.
10) Take the Clipwell and slide it onto the front of your sledgefire, use five (5) M2.6 x 16mm Pan Head Screws to attach it. 4 screws at the base and 1 at the top where the latch was.
11) You can use the now installed Clipwell as a guide to attach the 3mm foam pad to the front of your plunger tube and stick it in place.
12) Fit the two Clip Retention pieces together and fit the spring in the bottom of the tab itself. Slide it in and use one (1) M2.6 x 16mm Pan Head Screw to attach i.
13) Slide the Cam arm in its place in the Clipwell.
14) Take the bungee cord and tie a not in one end. Feed it through the diamond shaped hole in the pump grip so that the knot is inside the diamond shape and leave it there for now.
15) Take the Manacles, the 50mm PVC pipe, and the 20mm PVC pipe and dry fit them into place on the blaster. Make sure to place the 20mm PVC pipe inside of the Pump Grip. Make sure that you have enough space for the pump grip to move all the way forward. Then mark where the screw holes on all the PVC will go and take it apart again and drill out the screw holes. (you can skip this part if you’re using self tapping screws to hold the PVC in place)
16) First Screw in the Manacles to the 20mm PVC using the two (2) M2.6 x 8mm Pan Head Screws.
17) Then place the roller into its slot in the middle of the two PVC holes and use the 2mm x 20mm Pin to hold it in place.
18) Then insert and screw in the 50mm PVC using the six (6) M2.6 x 8mm Pan Head Screws.
19) Use the last two (2) 8-32x3/4 Inch Flat Socket Head Machine Screws to attach the Pump handle to the inside grove of the Cam Arm.
20) Thread the bungee cord around the Roller and into the hole on the Clipwell so that it pokes out the diamond shaped hole. You can then prime the blaster and adjust the amount of tension you want to have on the bungee cord. Just make sure to leave enough slack for the pump handle to prime back fully.
Tags
Model origin
The author marked this model as their own original creation.