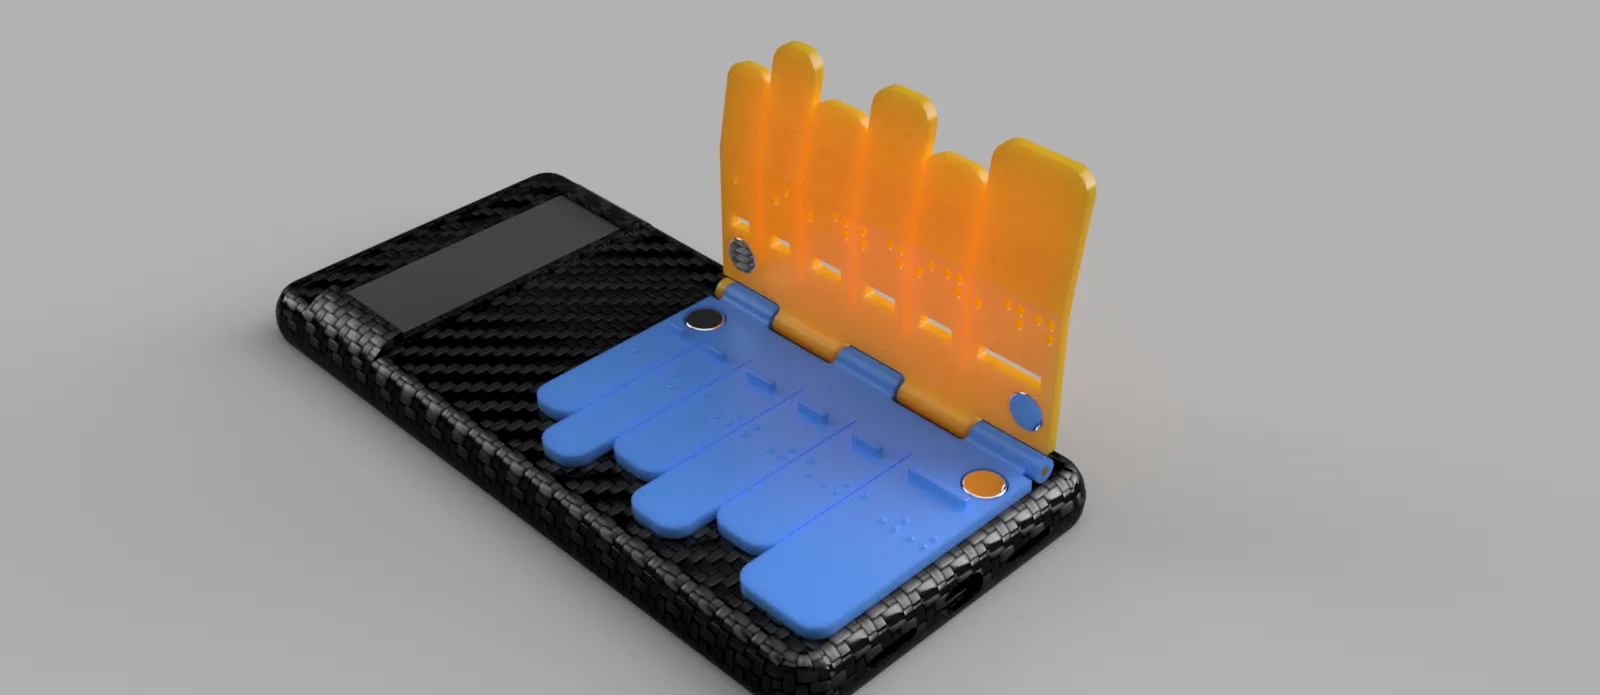
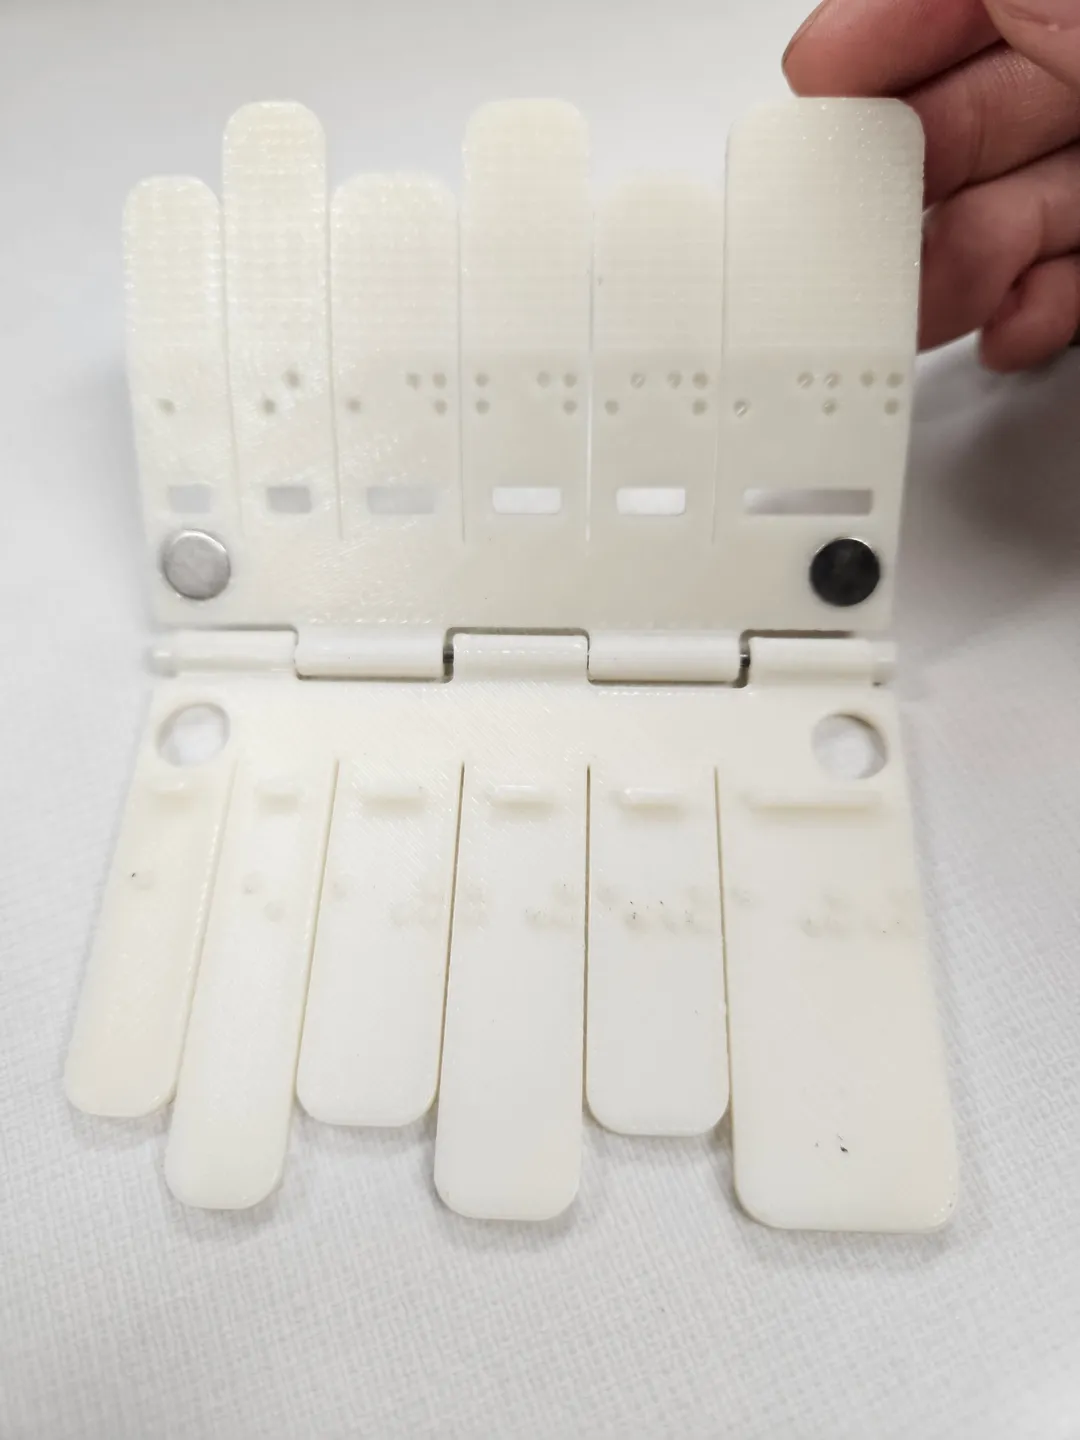
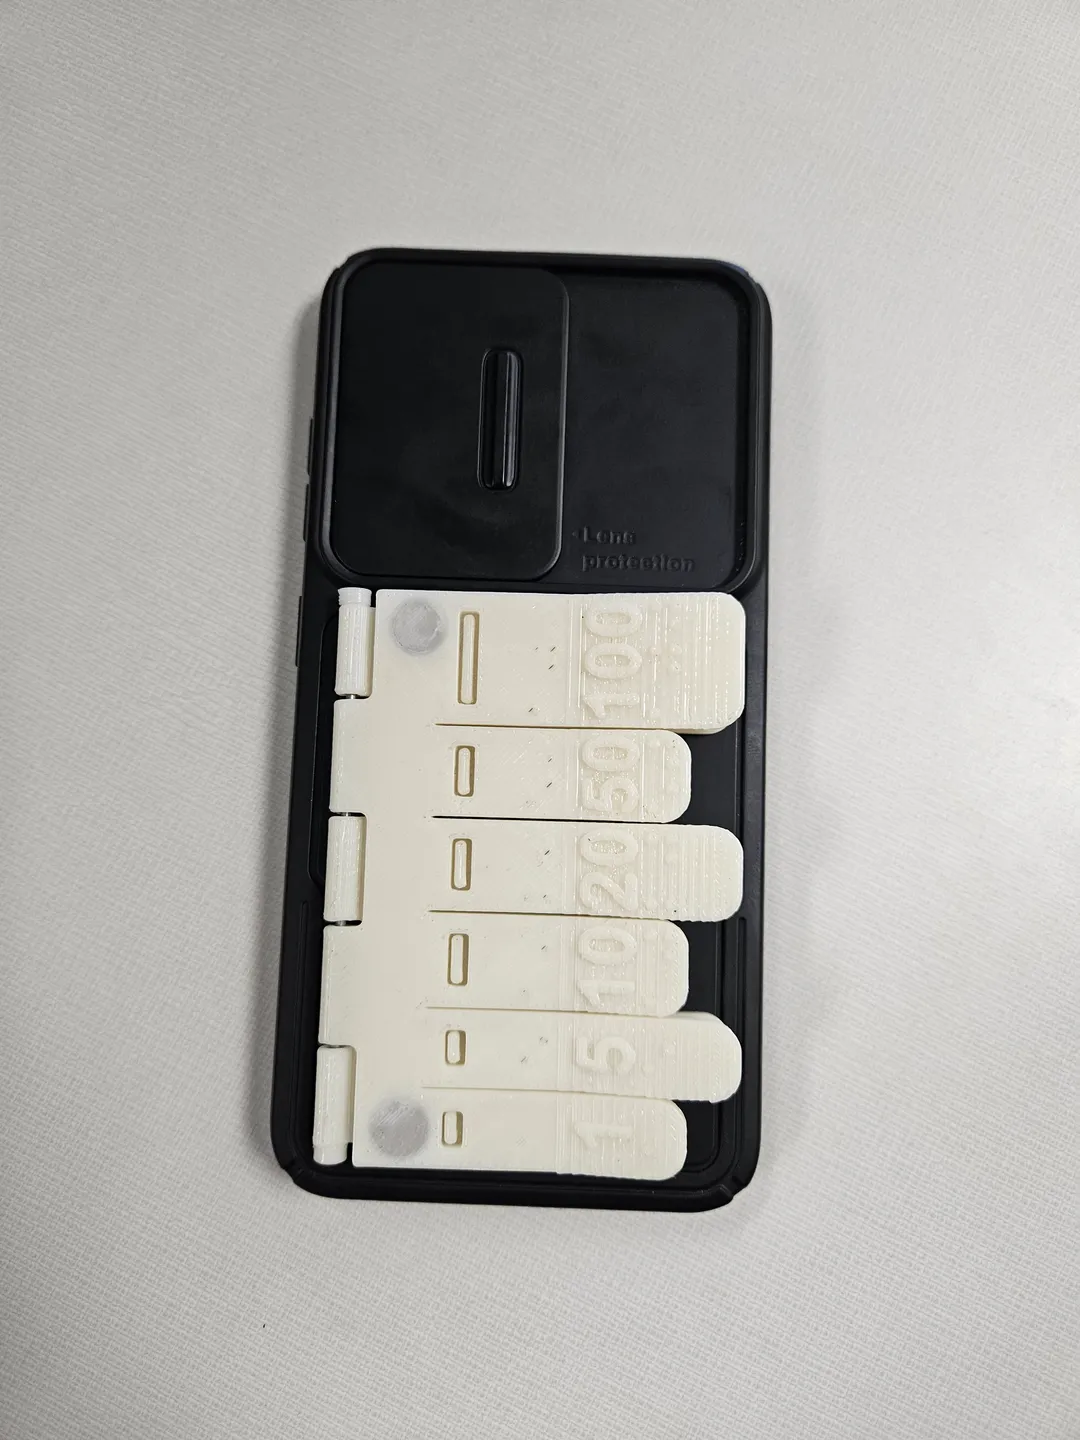
Money brailler V3


Description
PDFNote this is a school project and contains the resource we made for this project with minimal editing.
Needed materials dock https://docs.google.com/spreadsheets/d/1aUoGosyegKyjCyjHgwkh5Hdrwk6x9QWeYOaFe_cyLmw/edit?usp=sharing
Build Procedure
https://sites.google.com/shakopeeschools.org/braille/element-g-construction-of-a-testable-prototype
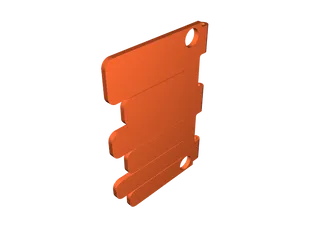
This is using a 1.5mm mettle rod and two end caps not the plastic one.
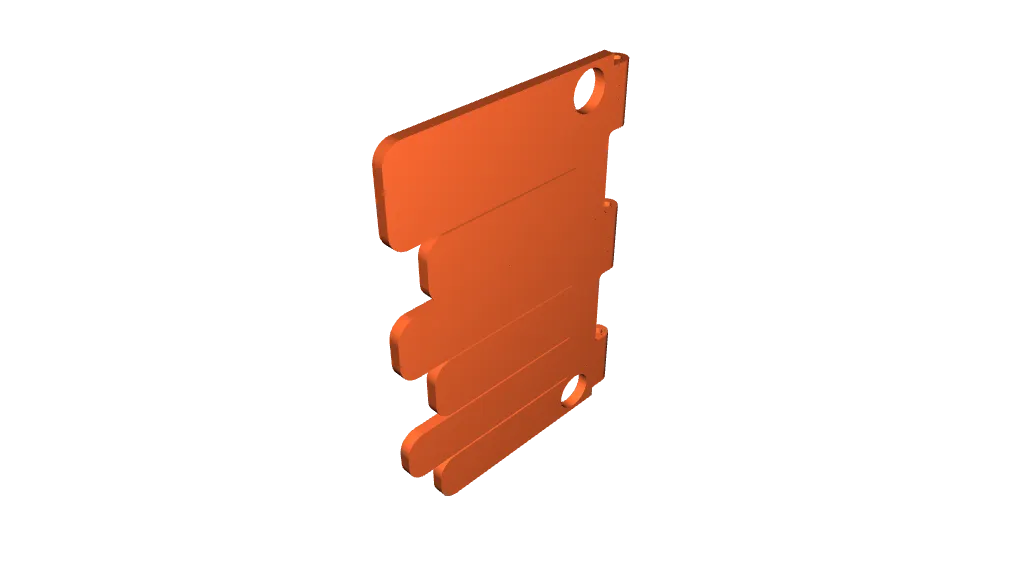
Take 3D-printed parts out of the printer and place them in the tub until supports are broken off (takes a lengthy amount of time)
use pliers to cut a stainless steel rod (1.5 mm x 300mm) to size so it is the same length as the hinge ends of the base plate (83mm in length)
Heat up the rod and press on the end cap onto the end (or superglue it).
slide both the base and top plate of the brailler onto the rod so it is touching the stopper on one of the ends of the bar.
Cut the rod to so the end is flush with the far end of the device..
Heat up the bar and press on the other end cap (or superglue it).
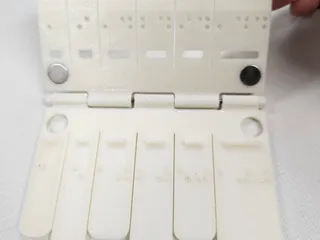
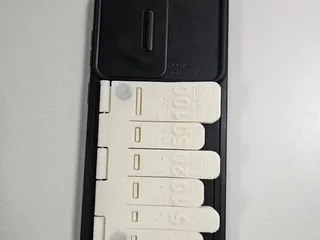
use liquid superglue to glue circular magnets (2mm x 8mm) into fitted holes of the top plate and wait for it to dry
Put 3mm magnets on 2mm and put super glue on the bottom of the 3mm magnets before putting it onto the back of the phone case.
Put a weight on top of the device and phone case before leaving it to dry for a few minutes.
Bad simulation (but still cool)
Other resources
project web documentation thing.
https://sites.google.com/shakopeeschools.org/braille/home
Google slides presentation.
https://docs.google.com/presentation/d/1TRsS9O29Pc2-6rt6cFVSa5RE5Li6yVXMAn06JraYAdk/edit?usp=sharing
Tags
Model origin
The author marked this model as their own original creation.


