Parametric gasket ring (or washer) with a "blob trap"

Description
PDFThe problem
So, now that you have got your 3D printer, you thought that you would never again have to buy things like gaskets but could rather print them yourself, right?
Well, there's hardly anything that's as easy to draw as a gasket, but when it comes to printing it using TPU, there's always the same problem: After the print is finished, the nozzle lifts up from the gasket leaving a blob at the point where it last touched its surface. This blob prevents the gasket from being as tight as required and, due to the material's flexibility, is nearly impossible to remove.
The solution
I found an easy solution to this problem: If it's not possible to avoid the blob, just offset the blob to a place where it doesn't bother us. So I added a small appendage to the gasket that features a very small peak point at its end.
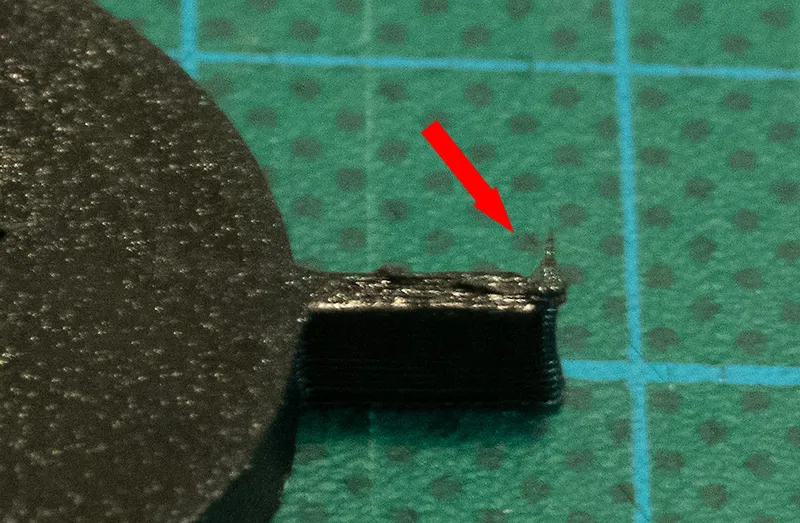
Due to this point being the model's maximum Z extent, the nozzle will always go to this point after printing and lift up from there. The appendage can then be cut off the gasket easily and without the risk of causing leakage.
Generating a gasket model (Fusion360 or OpenSCAD)
The two STL files I uploaded are just examples of how the gaskets generated look like. Arbitrary dimensions can be created using the F3D and SCAD files that you will find attached as well.
Fusion360:
Open the .f3d file in Fusion360, then open the “Change parameters” dialog. Here you will find three user parameters:
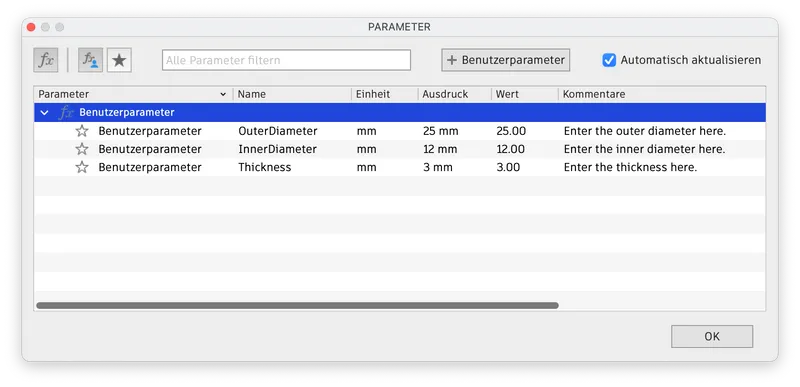
Enter the desired values for outer and inner diameter and thickness, then press “OK”. The gasket's dimensions and appendage offset will change according to your input.
Save the resulting gasket model as an STL or STEP to import it into your slicer.
OpenSCAD:
Quite the same here, but by far quicker (the model file is just 0.5 KB!). 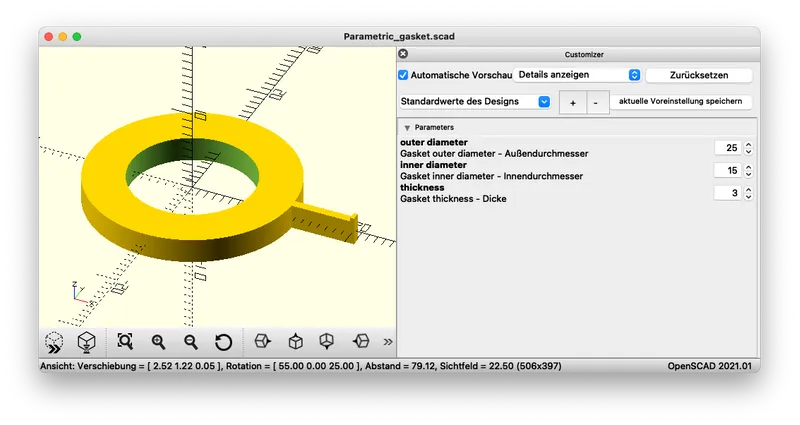
Open the attached .scad file in OpenSCAD, enter the three parameters, click the “Render” button and export the model as an STL.
The output quality of both applications is the same. If you have both, I suggest you use OpenSCAD due to its higher speed (You don't have to wait minutes for the application to start, and you don't have to upload the file to use it).
Printing
Printing parameters may vary according to the type of TPU you use. In most cases you will want to use an infill rate of 100%, but it is also possible to use a lower infill rate to make the gasket softer. Just avoid using an infill pattern that will cause an uneven deformation of the gasket when pressed. A few more printing tips:
- The file attached is meant to be printed using a 0.4 to 0.6 mm nozzle.
- Obviously: Never use a structured print plate surface to print gaskets.
- Use either a concentric top fill pattern or the slicer's ironing function.
- Underextrusion is critical with gaskets. In case of doubt it's better to use a little overextrusion.
Obviously, as I have no control nor idea what you do with these files, use them at your own risk and responsibility. Please be especially careful when using home-made gaskets on pressure pipes and the like. In case of doubt, rather use some certified gaskets than risk to have your claim refused by your insurance company. ;)
Tags
Model origin
The author marked this model as their own original creation.